Loading ...
Loading ...
Loading ...
43
31-1000600 Rev. 0
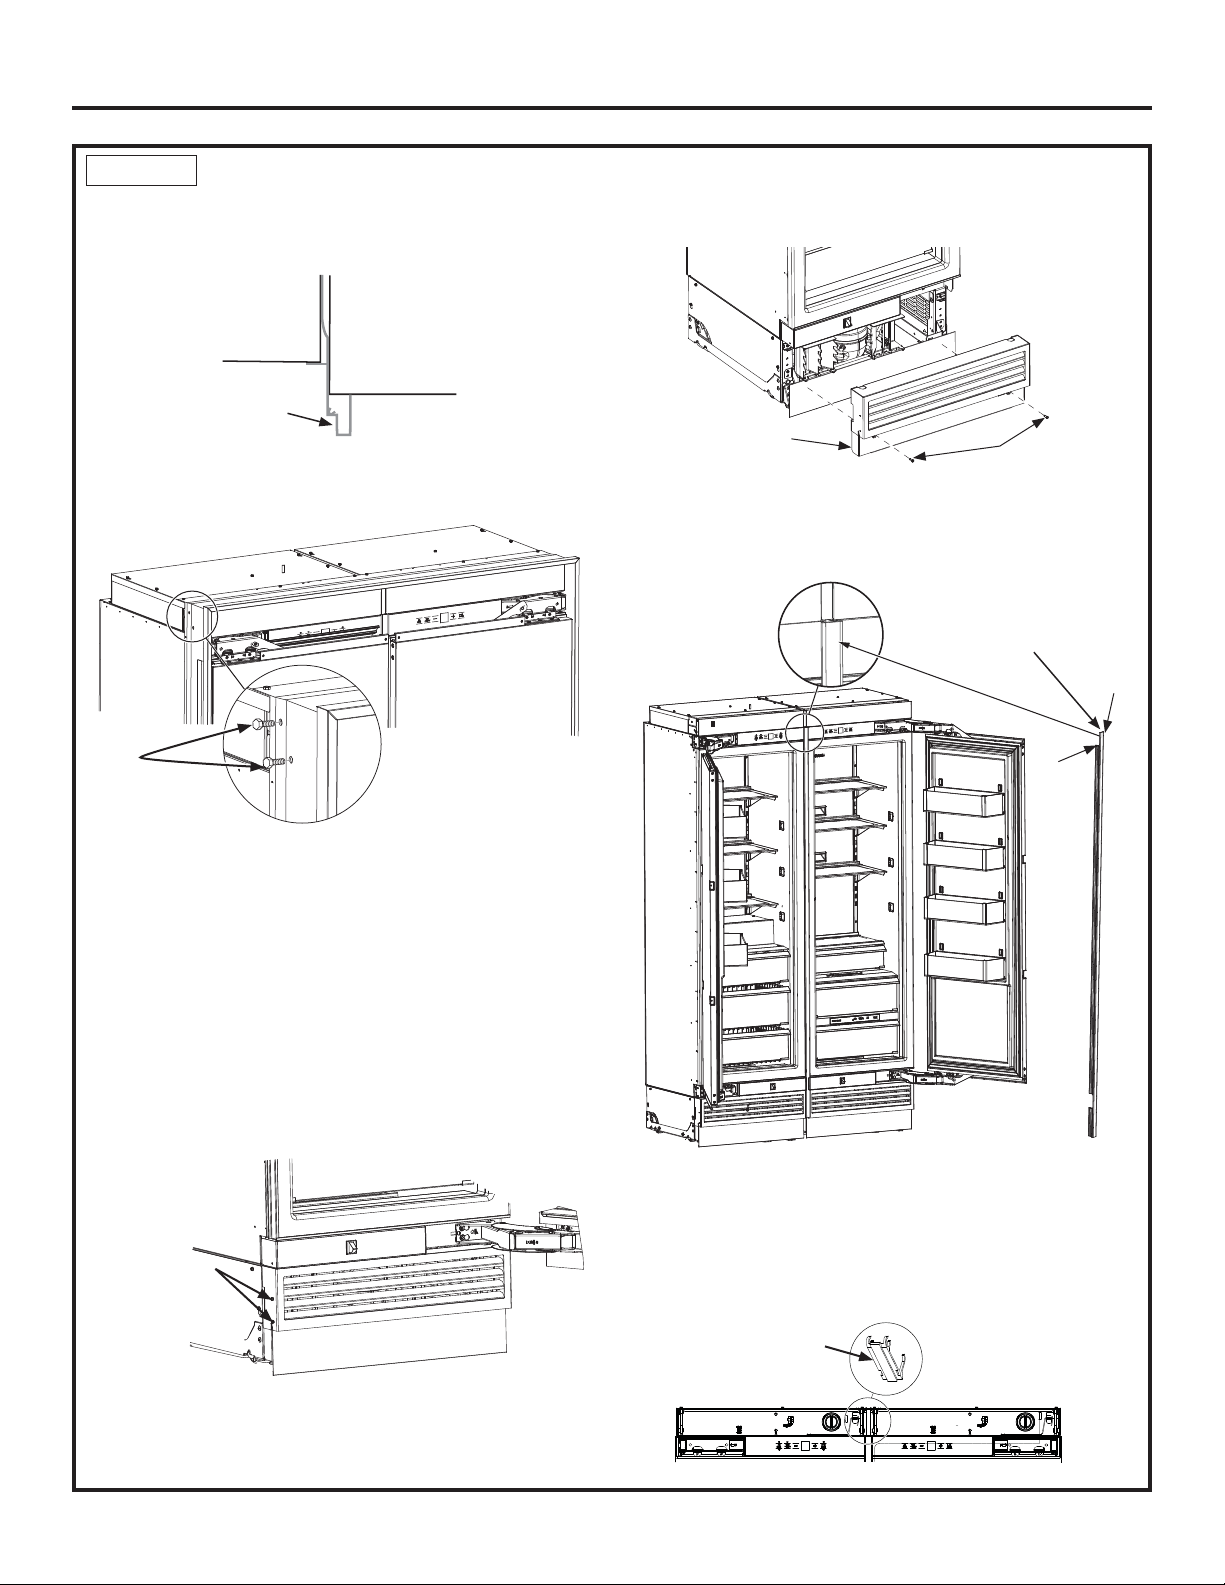
STEP 9
FINAL EXTERNAL UNIT PREPARATION (Cont.)
Ŷ For proper case placement after leveling, the back side
of the top and side retro trims should be flush with the
cabinet surround on all sides.
Ŷ Secure the trims to the surrounding cabinets to reduce
excess movement to the top of the case during normal
operation.
1. Drill 1/16” pilot holes in the trim 1/2” deep(2 per side,
see figure for approximate locations).
2. Drive #6 Phillips head wood screws into the pilot
holes.
NOTE: This step does NOT replace the anti-tip safety
hardware. Refer to Step 4 Installing Anti-Tip Bracket
and Step 7 Inserting/Securing into Cabinet Surround for
details on installing the anti-tip hardware. Repeat for the
second unit.
Ŷ Verify the two 1/4” hex head screws are assembled to
handle side of the products for both freezer and fresh
food columns.
Ŷ Put the access cover back onto the unit and secure with
two 1/4” hex head screws.
Ŷ Install front mullion trim between the two units. Open
Doors and push the flexible dart in the area between
units.
Ŷ Top dart of the mullion must align with bottom edge of
the case trim.
Ŷ Open both water filter access doors to 90°.
Ŷ Snap the trim bracket between the water filter access
enclosures above displays.
Refrigerator
or Freezer
Retro Trim
Cabinet
Surround
Installation Instructions - Dual Retro-Fit Installation
2 on
each
side
1/4” Hex Screws
1/4” Hex
Screws
Access
Cover
Trim
Upper Mullion
Trim
“Dart”
Top Dart
Loading ...
Loading ...
Loading ...