Loading ...
Loading ...
Loading ...
38
31-1000600 Rev. 0
Installation Instructions - Dual Retro-Fit Installation
STEP 5 JOINING DUAL INSTALLED UNITS (Cont.)
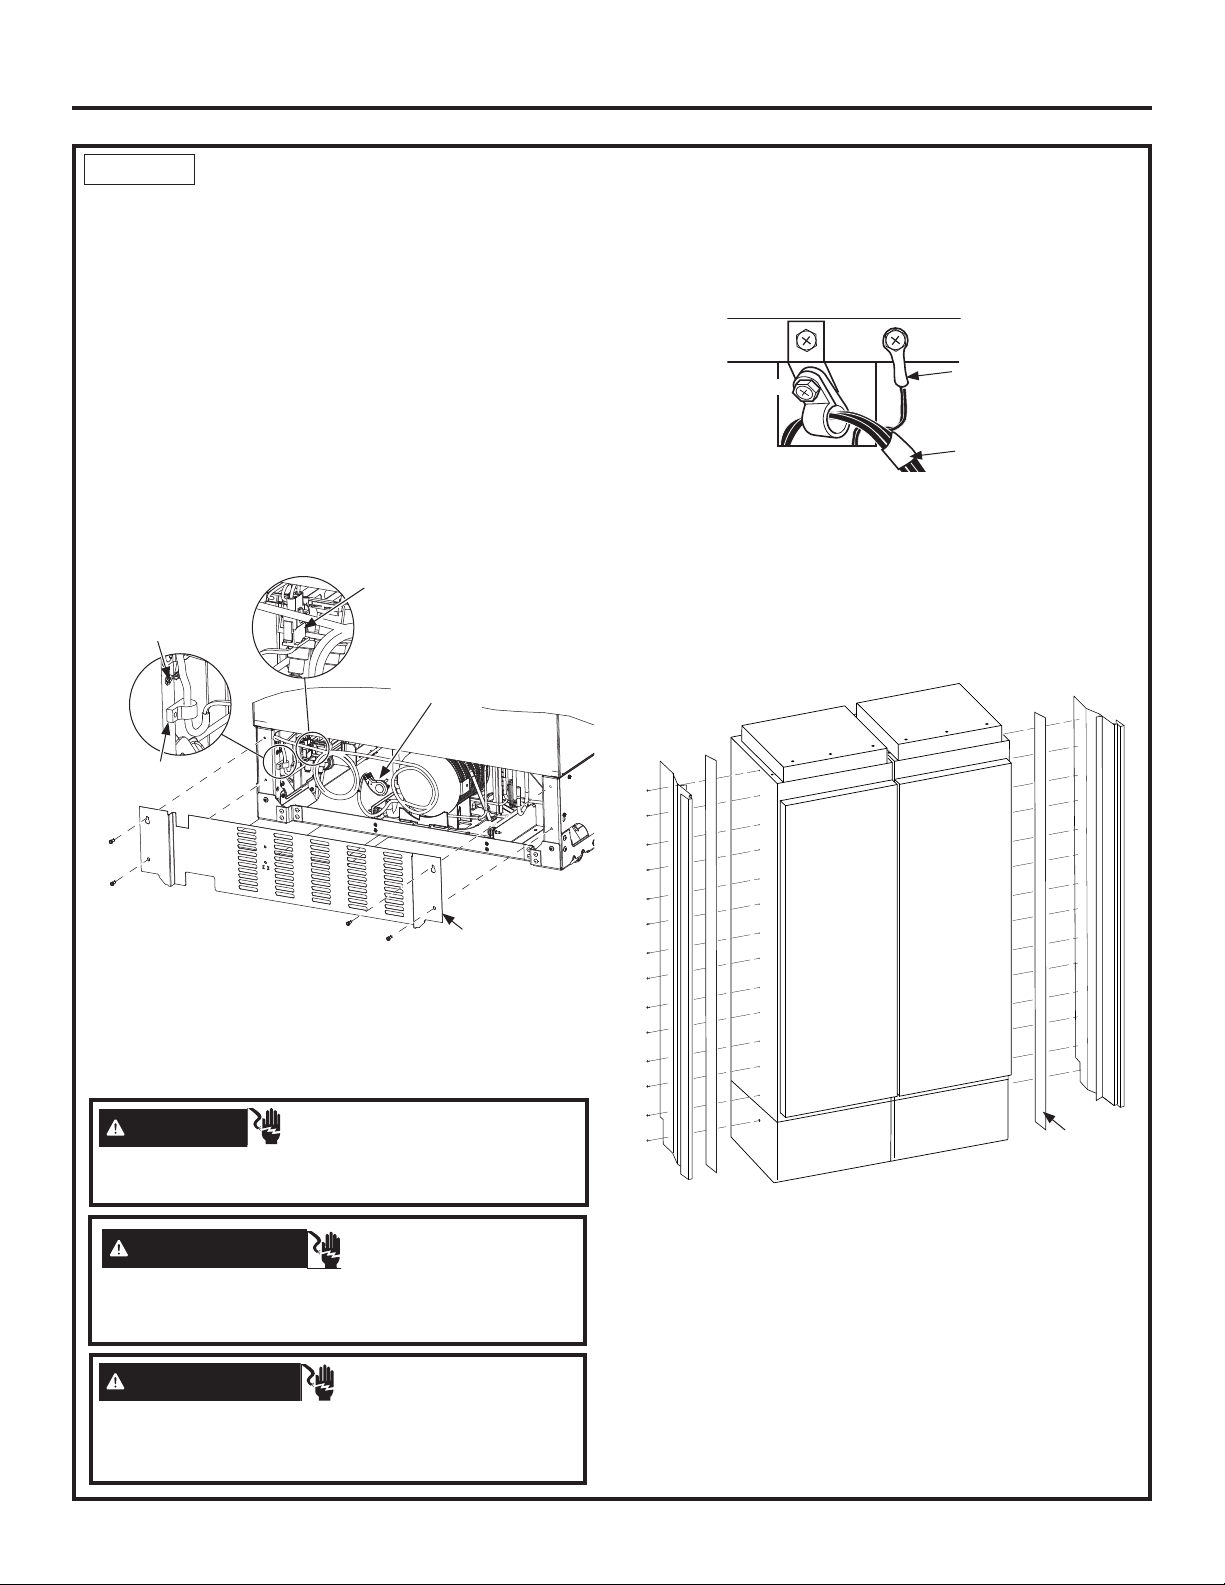
CHANGE POWER CORD
Longer power cords are required for retro fit installation.
Power cords are included in 42” ZKR42N and 48” ZKR48N.
Replace power cords on both units. Both units can be
plugged into the same electrical supply receptacle.
Remove existing short power cord with string
assembly:
Ŷ Remove 1/4” hex screws attaching rear access cover.
1. Unplug 3-pin power cord connector inside the
machine compartment (press on sides to release
locking tabs).
2. Remove power cord green ground 1/4” hex screw.
3. Remove strain relief 1/4” hex screw.
Install new longer power cord:
1. Plug in the 3-pin connector (make sure locking tabs
are engaged).
2. Install the power cord green ground screw.
3. Install the power cord strain relief.
Ŷ Replace rear access cover. Make sure the power
cord and ground wire are properly routed through the
access cover cut-out.
Repeat all steps for second unit.
CASE TRIM INSTALLATION
Ŷ Install the trim kit side rails to the exposed right and
left case walls using the provided #8 Phillips head
screws - 14 screws per side. Install spacer on each
side of the 72” dual installation.
WARNING
Electrical Shock Hazard.
To avoid the risk of electric shock, make sure to re-install
the ground screw after changing the power cord.
Ground
Wire
Power
Cord
Step 3
Step 2
Rear
Access
Cover
3-Pin
Power Cord
Connector
3-Pin
Power Cord
Connector
Green Ground
Screw
Strain Relief
Screw
Step 1
Step 2
Step 3
AVERTISSEMENT
Risque
d’électrocution.
Pour prévenir le risque
d’électrocution, assurez-vous que le cordon électrique
n’est pas branché dans la prise murale.
ADVERTENCIA
Riesgo de Descarga
Eléctrica
A fin de evitar riesgos de descarga eléctrica,
asegúrese de volver a instalar el tornillo de conexión a tierra
luego de cambiar el cable de corriente.
Spacers
(72”only)
Loading ...
Loading ...
Loading ...