Loading ...
Loading ...
Loading ...
Care and cleaning of the range.
Painted Surfaces
Painmd surfaces include the dooI; top of
file control panel and the drawer front.
Clean these with soap and wamr or a
vinegar and wamr solution.
Do IIOt tlse comnlercial oveil cleaners,
cleaning powders, steel wool or hmMl
abrasives on any painted surface.
Control Panel
Clean up splattex_ with a damp clodl.
You may also use a glass cleaneL
Remove heavier soil with waml
soap), wateL
Do not use abrasives of any kind.
Donot rub or cleanthe door gasket--
it hasan extremelylow resistance to
abrasion.
If younotice thegasketbecomingworn,
frayedor damagedin any wayor if it has
becomedisplacedonthe door, youshould
haveit replaced,
Cleaning the Oven Door
Tocleantheinsideof thedoor:
Because die area inside die g_tsket is
cleaned during die self-clean cycle, you
do not need m clean this by hand.
The area outside die gasket and
die door liner can be cleaned with a
seal>filled smel wool or pl_tsdc pad,
hot wamr and dem_gent. Rinse well
with a vinegar and wamr solution.
Toclean theoutsideofthe door:
Use soap and water to ttloroughly
clean file rap, sides and front of die
oven dooL Rinse well. You m W also
use a glass cleaner to clean file glass
on die outside of die dooi. Do not let
wamr drip into file vent openings.
If any stain on the door vent uim is
peisismnt, use a soft abrasive cleaner
aim a sponge-scrubber for best results.
Spillage of marinades, fluitj uices,
mmam sauces and basting mamlials
containing acids may cause
discoloration aim should be wiped
up immediately. When surface is cool,
clean and rinse.
Do not use oven cleanets, cleaning
powders or hmMl abr_tsives on die
outside of die dooL
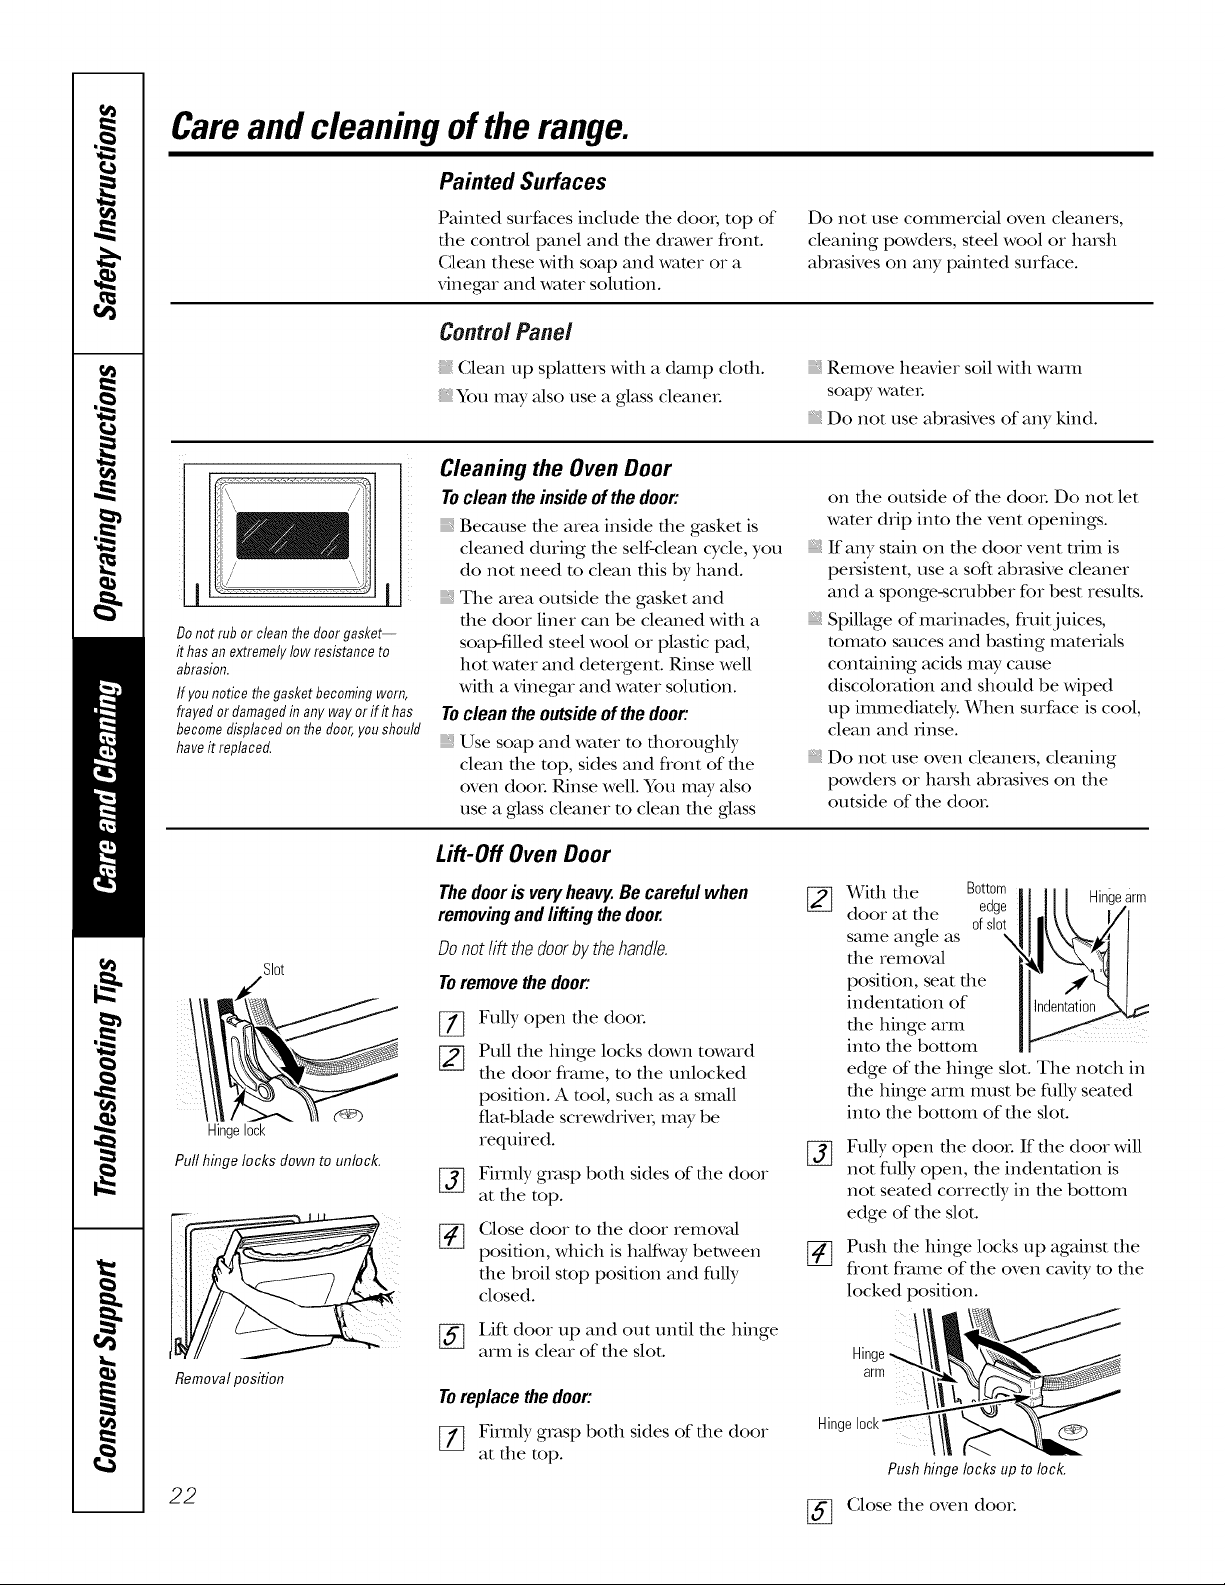
Slot
Hingelock
Pull hinge locks clown to unlock,
Removal position
22
Lift-Off Oven Door
Thedooris veryheavy.Be carefulwhen
removingandliftingthedoor.
Donot lift thedoorby thehandle.
Toremovethe door:
%
%
Fully open die dooL
Pull die hinge locks down toward
die door flame, to die unlocked
position. A tool, such as a small
fiat-blade screwdriver; may be
required.
Firmly grasp bodl sides of die door
at die top.
(;lose door to die door removal
position, which is hMg,vay between
die broil stop position and fiflly
closed.
[_ I,iff door up and out until die hinge
arm is clear of die slot.
Toreplace the door:
[77 Firmly grasp bodl sides of die door
at die top.
_(A/idldie Bottom Hingearm
door at die edge
ofslot
same angle as \
die removal
position, seat die
indentation of
die hinge arm
into die bottom
edge of the binge slot. The notch in
die hinge arm must be dilly seated
into die bottom of die dot.
%
Fully open die dooL If die door will
not dilly open, die indentation is
not seated correcdy in die bottom
edge of die slot.
[_ Push die hinge locks up against die
flont flame of die oven cavib, to die
locked position.
Hinge
arm
Hinge10ck_
Pushhingelocksup to lock.
[_ (;lose die oven dooI:
Loading ...
Loading ...
Loading ...