Loading ...
Loading ...
Loading ...
www.kolpak.com 800-225-9916 29
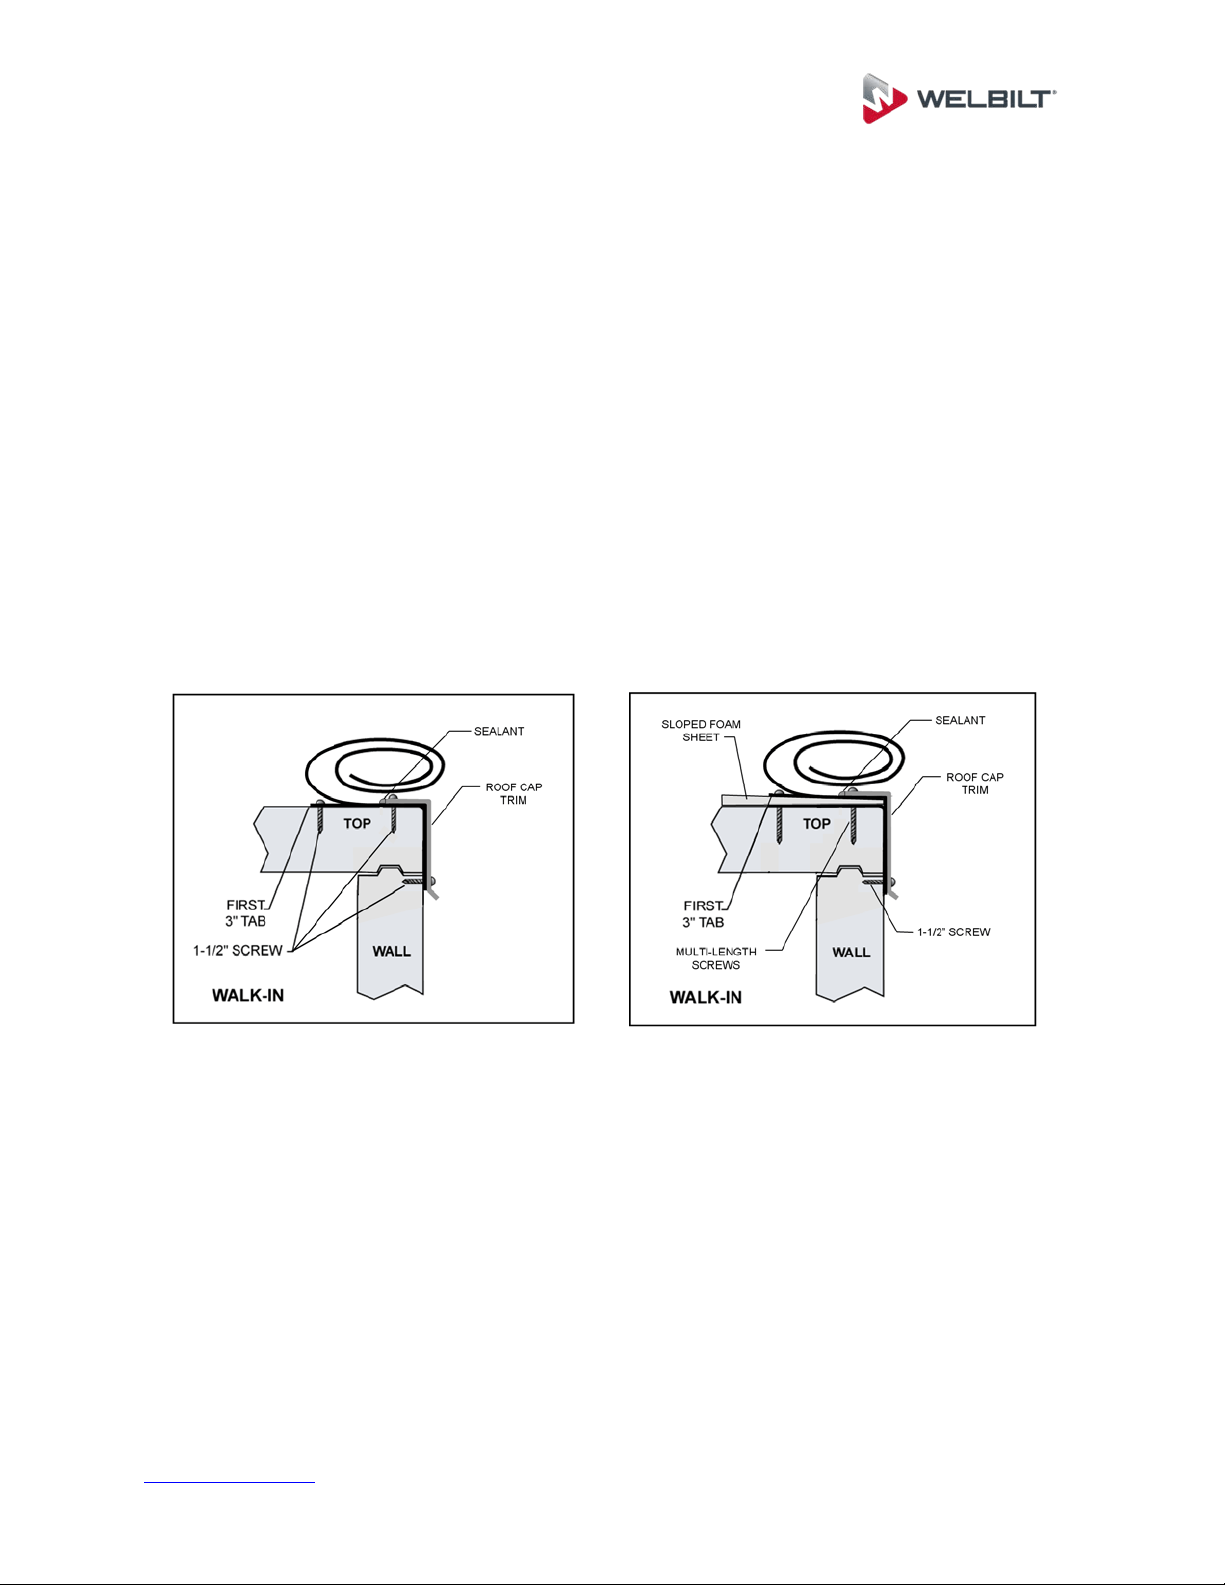
Install the sloped foam sheeting (if required) first. Consult the “As Built” drawing
for proper placement. Locate the thickest tapered sheets and install them flush
to the building wall, working toward the furthest edge with progressively thinner
sheets.
If the unit is free standing, align the thickest panel along the side of the ceiling
panel.
Verify the overall width and length of the membrane by measuring the sloped (of
flat) dimension on top of the unit, and compare to the printed size on the rolled
membrane. The membrane should overhang the top edge of the wall panel by 5”
on all exposed sides of the walk-in unit, and extend at least 8” up on adjacent
building walls.
The smooth (shiny) finish surface of the membrane is the exposed (up) side.
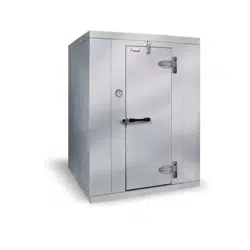
The 3” fastening tabs are on the bottom side of the membrane.
Unroll roof membrane and align first 3” tab with a square chalk line across the
unit. Use a GRiPull roof puller racket vice grip tool to pull membrane taut.
Fasten 3” tab by using 1 ½” black #14 screw and fastening plate. Align
membrane so that the tabs are perpendicular to the adjacent building.
Start in the middle of the tab and work toward the edges placing the screws and
plates 6” on center. Pull membrane toward edges to remove slack. The 1-1/2”
screws should penetrate the top metal skin of the walk-in top panel.
Loading ...
Loading ...
Loading ...