Loading ...
Loading ...
Loading ...
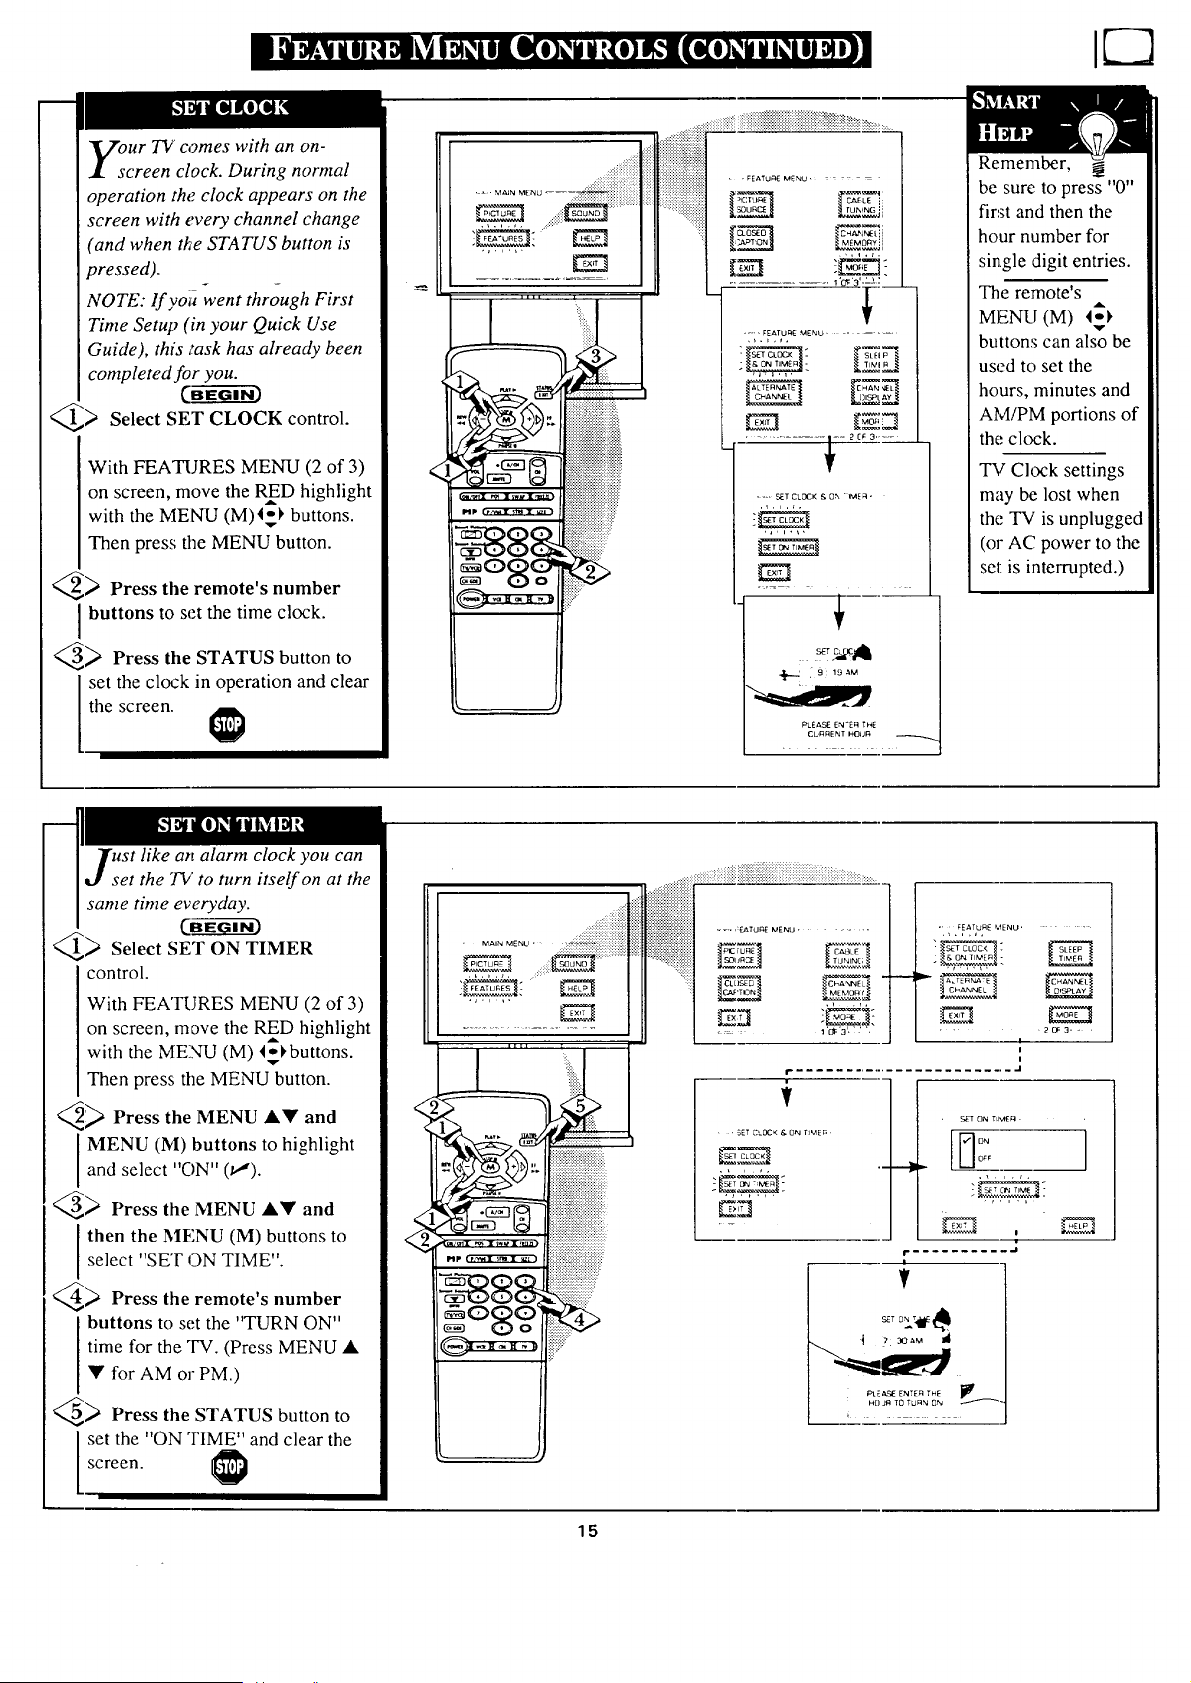
our 7!/comes with an on-
creen clock. During normal
operation the clock appears on the
screen with every channel change
(and when the STATUS button is
pressed).
NOTE: If voi_went through First
Time Setup (in your Quick Use
Guide), this i'ask has already been
completed for you.
CBE-- 3
_) Select SET CLOCK control.
With FEATURES MENU (2 of 3)
on screen, move the RED highlight
A
with the MENU (M)4_1, buttons.
Then press the MENU button.
_ Press the remote's number
buttons to set the time clock.
_..._ Press the STATUS button to
set the clock in operation and clear
the screen.
_IC:IUF_E CAELE i:
.............. i "cy:'3'=L_2
.....FEATU F_[MENU .......
SLEIP _.
E8
El E_
7:=2_,9.....-.....
+
PLEASE EN'EFI THE
CLFIRENT HOUF_
Remember,
be sure to press "0"
first and then the
hour number for
single digit entries.
The remote's
MENU (M) I_
buttons can also be
used to set the
hours, minutes and
AM/PM portions of
the clock.
TV Clock settings
may be lost when
the TV is unplugged
(or AC power to the
set is interrupted.)
ust like an alarm clock you can
et the TV to turn itself on at the
same time everyday.
CB_---_
Q._ Select SET ON TIMER
control.
With FEATURES MENU (2 of 3)
on screen, mave the RED highlight
with the MENU (M) l_l, buttons.
Then press the MENU button.
q_ Press the MENU A• and
I MENU (M) buttons to highlightand select "ON" (.t,,').
_ Press the MENU A• and
Ithen the MF,NU (M) buttons to
select "SET 3N TIME .
_ Press the remote's number
buttons to set the "TURN ON"
time for the TV. (Press MENU •
• for AM or PM.)
_ Press the STATUS button to
set the "ON TIME" and clear the
screen.
......._;iiiiiiiii!
_,,, ,,.......
:::::::::: :::+:
' MAIN MENU '
::::::::::::::::::::::::::::::::::
::::::::::::::::::::::::::::::::::::::::::::::::...... EZm._u_Nu.....
::::::::::::::::::::::::::::::::::::::o,c_ -cXSa_
.--q
• FEATURE MENU'
.,.,.,,
• 2o=3. =
!
i
!
' ' SET CLOCK & 0N T_MEP
i-.......................... .i
f
SET ON T_ME_ -
_ ---111.-
,,.,,,
!
I" .......... .i
i
PL2_ ENTEF_ THE _i_
HOJR To TUR_ ON -_
15
Loading ...
Loading ...
Loading ...