Loading ...
Loading ...
Loading ...
36
Refill Water Tank
The water tank is located at the right side of the oven
cavity. Before starting an operation with steam, fill the
water tank with water.
Ensure that the water hardness range has been set
correctly.
9 WARNING
RISK OF INJURY AND FIRE
Only fill the water tank with water or with the
descaling solution we have recommended. Do not
pour any flammable liquids (e.g. alcoholic drinks)
into the water tank. Due to hot surfaces, vapors from
flammable liquids may catch fire in the oven cavity
(explosion). The appliance door may spring open.
Hot steam and flames may escape.
9 WARNING
RISK OF BURNS
The water tank may heat up while the appliance is in
operation. Wait until the water tank has cooled down
after the previous appliance operation. Remove the
water tank from the water tank recess.
NOTICE: The appliance may become damaged due to
the use of unsuitable liquids.
Do not use distilled water, highly chlorinated tap water
(>4 mg/l) or other liquids.
Only use cold, fresh tap water, softened water or non-
carbonated mineral water.
Do not overfill tank above max level line to avoid water
from spilling inside the tank housing.
Notes
▯ If your water is very hard, we recommend that you use
softened water.
▯ If you only use softened water, you can set the water
hardness range to "softened".
▯ If you use mineral water, set the water hardness range
to "4 very hard".
▯ If you use mineral water, you must only use non-
carbonated mineral water.
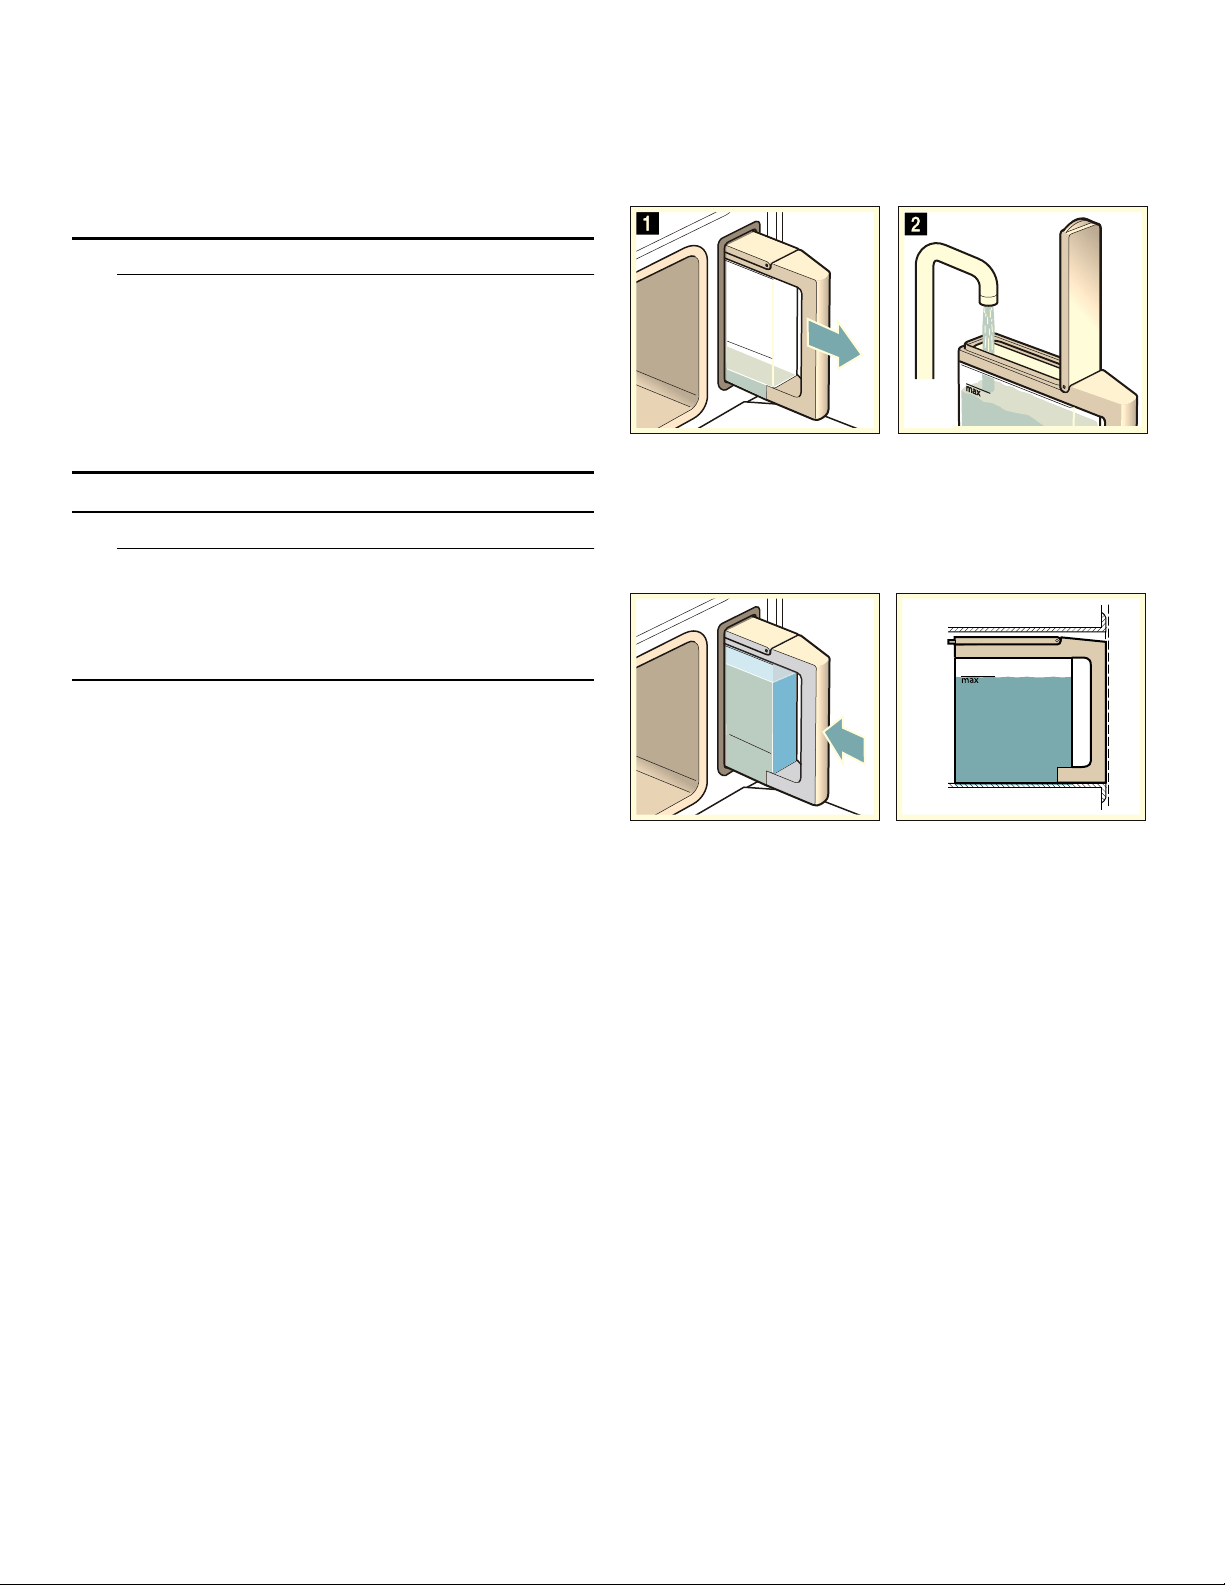
1.
Open the appliance door.
2.
Pull out the water tank from the right side of the oven
cavity (figure
!).
3.
Fill the water tank with cold water up to the “max.”
mark (figure ")
4.
Fully close the tank cover until it locks.
5.
Insert the filled water tank (figure #).
6.
Ensure that the water tank has been pushed in all the
way. The water tank should be level with the tank
cavity (figure $).
7.
Close the appliance door.
Loading ...
Loading ...
Loading ...