Loading ...
Loading ...
Loading ...
▶▶ With standard muer:
Tool Bag «B»
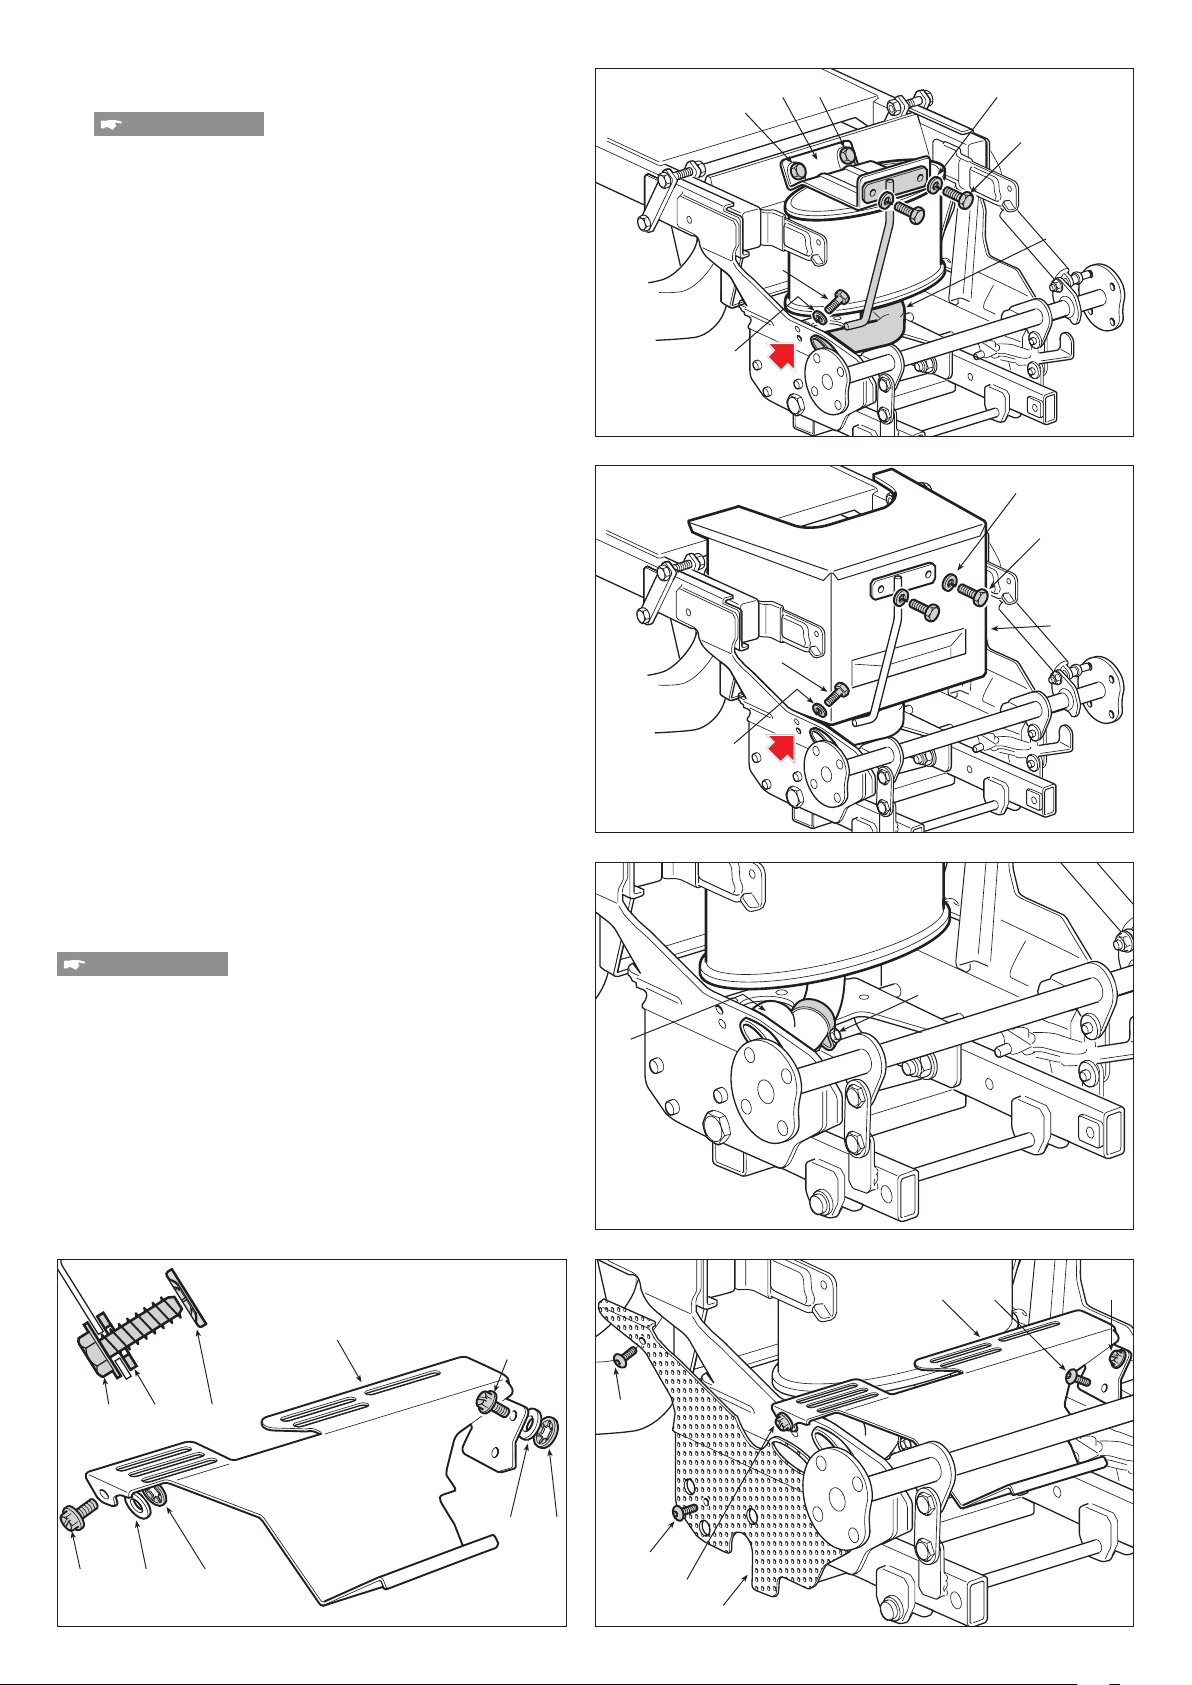
Loosen the nuts that fasten the engine exhaust collec-
tors and the two screws (13) so as to obtain good mo-
bility of the support bracket (14) and facilitate the next
operations.
Assemble the exhaust pipe (15) introducing the tail
pipe into the opening of the right bracket on the lifting
module, and fasten in place using:
– 2 upper screws (16), with the relative washers (17);
– 1 lower screw (18) with relative washer (19), using
the lowest bracket hole.
Check the exhaust pipe (15) is correctly tted, tighten
the fastening nuts on the exhaust collectors and the
two screws (13) to fasten the support bracket (14) in
the correct position obtained in the previous phase.
Remove the exhaust pipe (15) using the relative nuts
and bolts (16 - 17 - 18 - 19).
Apply the muer guard (20) and the exhaust pipe (15)
simultaneously and fasten the ensemble using the pre-
viously removed nuts and bolts
.
▶▶ With Stiga Style muer:
Assemble the exhaust pipe (21) introducing the tail
pipe into the opening of the right bracket on the lifting
module, and fasten in place using the sleeve (22).
Tool Bag «D»
Pre-assemble the upper guard (23) using the two special
screws (24) with washers (24a), and fasten using the crown
xation pins (24b).
Fit the top guard (23) fastening it in place using the two spe-
cial screws (24) and the self-tapping screws (25).
Fit the right (26) and left side grids, fastening them in
place using the self-tapping screws (27).
25
Loading ...
Loading ...
Loading ...