
Loading ...
Loading ...
Loading ...
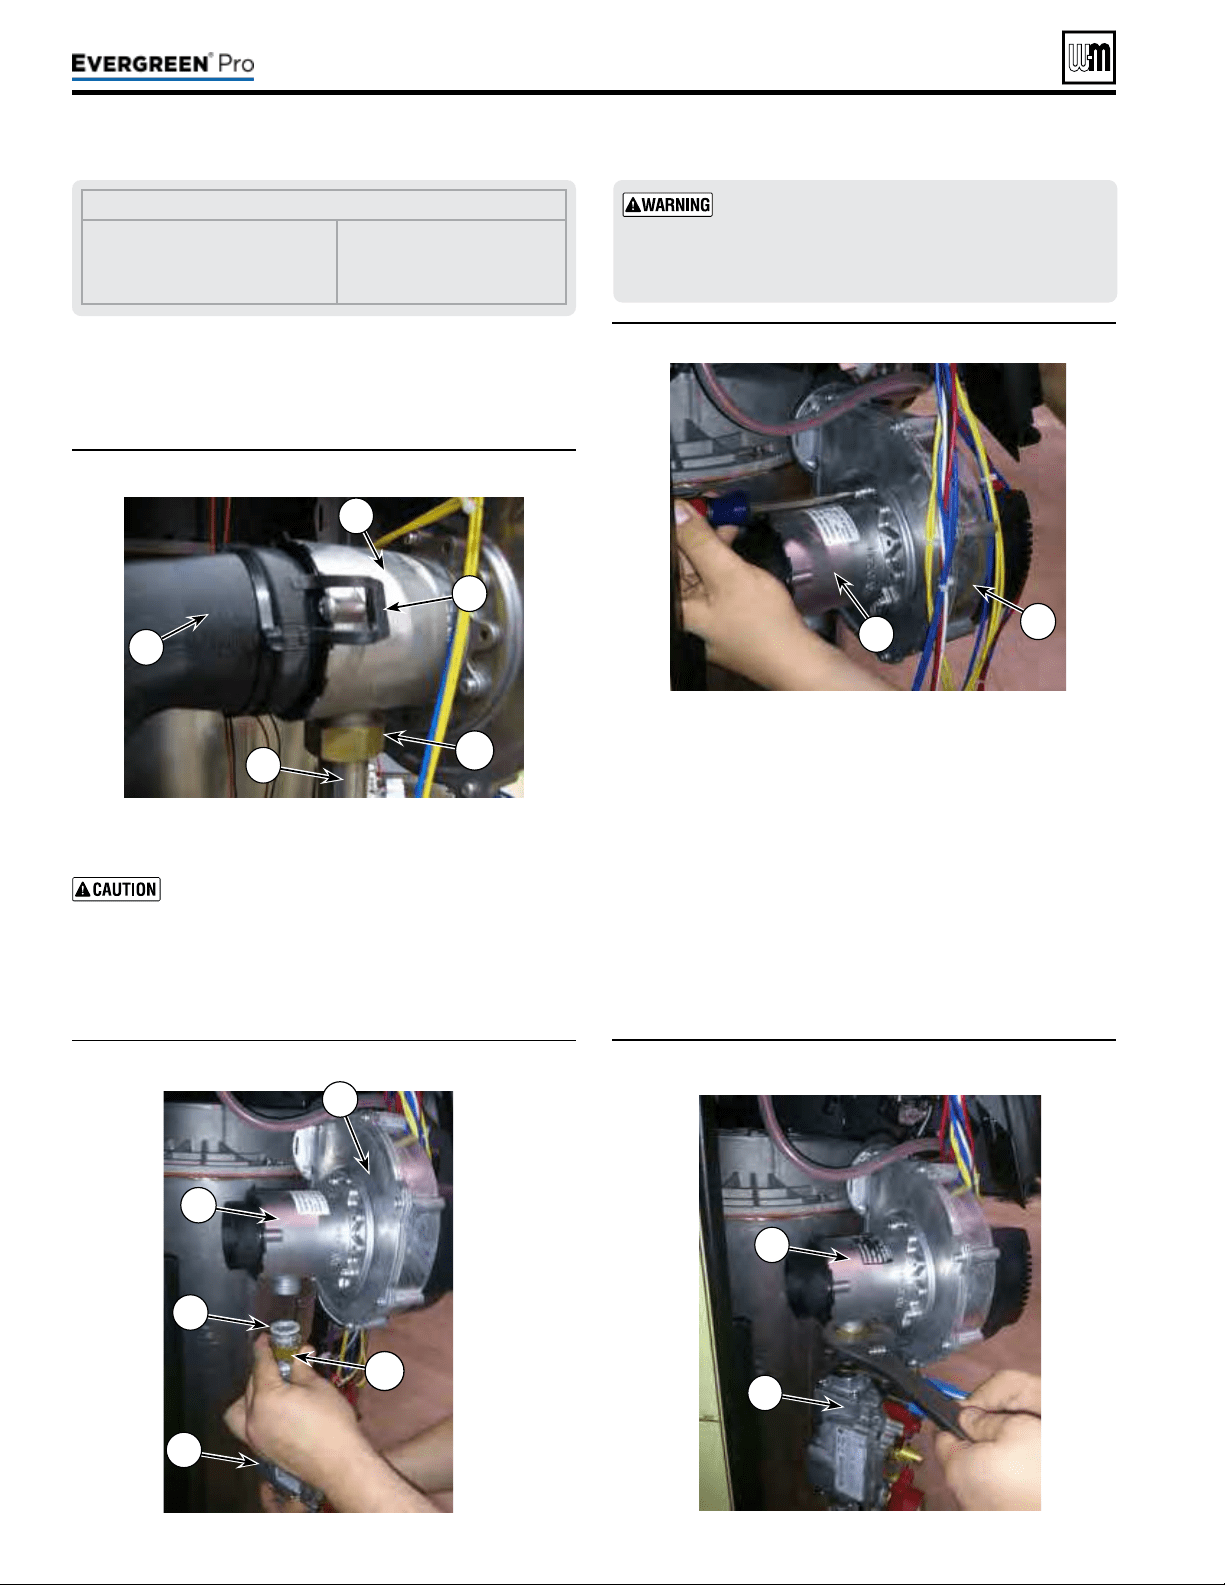
Figure11
Air silencer removal
Figure13 Removal of Natural gas venturi
Figure14 Installing the new propane gas venturi
Part number 550-100-211/0122
– 14 –
Figure12
Gas pipe loosened for propane conversion
4. Locate the blower and venturi (see Figure11).
5. Gently pull on both silencer retaining clips (Figure11, item
2) and remove air silencer from front of venturi (item 3).
Label all wires prior to disconnection when
servicing controls. Wiring errors can cause im-
proper and dangerous operation.
6. Disconnect wire harness from gas valve.
7. Loosen swivel nut (Figure11, item 7) on venturi-gas valve
connection (item 6). See Figure12. Gently set gas valve a side.
LEGENDfor Figures 11, 12, 13 and 14
1 Air Silencer
2 Air silencer clips (2)
3 Venturi
4 Blower
5 Gas valve
6 Gas pipe
7 Swivel nut
8 Fiber Washer
8. Remove three (3) T20 Torx screws holding the venturi,
(Item 3) in place. Remove venturi, o-ring, and inspect
blower surface. Discard old o-ring and ber washer, see
Figure13.
9. Install new propane venturi and o-ring from conversion kit.
10. Ensure o-ring is seated properly in groove on blower.
11. Insert three (3) new Torx screws from conversion kit to
hold venturi in place. Torque screws to no more than 23
inch-pounds.
12. Reassemble gas pipe with new ber washer from conversion
kit to the venturi connection, using two wrenches to tighten
swivel nut. Replace silencer gasket and re-attach air silencer
to venturi. See Figure14.
(continued)
Usetwowrenches when tightening gas piping at
boiler, using one wrench to prevent the boiler gas
line connection from turning. Failure to support
the boiler gas connection pipe to prevent it from
turning could damage gas line components.
220 /29 9/3 00 /39 9
4
8
3
7
5
5
3
1
7
2
6
3
4
3
Loading ...
Loading ...
Loading ...