Loading ...
Loading ...
Loading ...
5453
Troubleshooting
Troubleshooting
TROUBLESHOOTING
POSSIBLE FAULT POSSIBLE FAULT
Food browns unevenly
Oven not preheated
Aluminum foil on oven rack or oven bottom
Baking utensil too large for recipe
Pans touching each other or oven walls
Food too brown on bottom
Oven not preheated
Using glass, dull or darkened metal pans
Incorrect rack position
Pans touching each other or oven walls
Food is dry or has shrunk
excessively
Oven temperature too high
Baking time too long
Oven door opened
Pan size too large
Pie crusts do not brown on
bottom or crust is soggy
Oven temperature too low
Oven not preheated
Oven door opened frequently
Tightly sealed with aluminum foil
Pan size too small
Cakes pale, flat and may not
be done inside
Oven temperature too low
Incorrect baking time
Cake tested too soon
Oven door opened too often
Pan size too small
ZLINE Customer Service is available at 1-614-777-5004.
Oven Light
MAINTENANCE AND CLEANING
REPLACING AN OVEN LIGHT
• Make sure the oven and lights are cool and power to the oven has
been turned off before replacing the light bulb(s).
• The lenses must be in place when using the oven. The lenses serve to
protect the light bulb from breaking.
• The lenses are made of glass. Handle carefully to avoid breakage.
• Failure to do so could result in death, electric shock, cuts or burns.
• The oven light is a standard 25 watt (G9) appliance bulb.
Before replacing the bulb make sure the oven is cool and the controls are
turned off.
1. Disconnect power at the main power supply (fuse or breaker box).
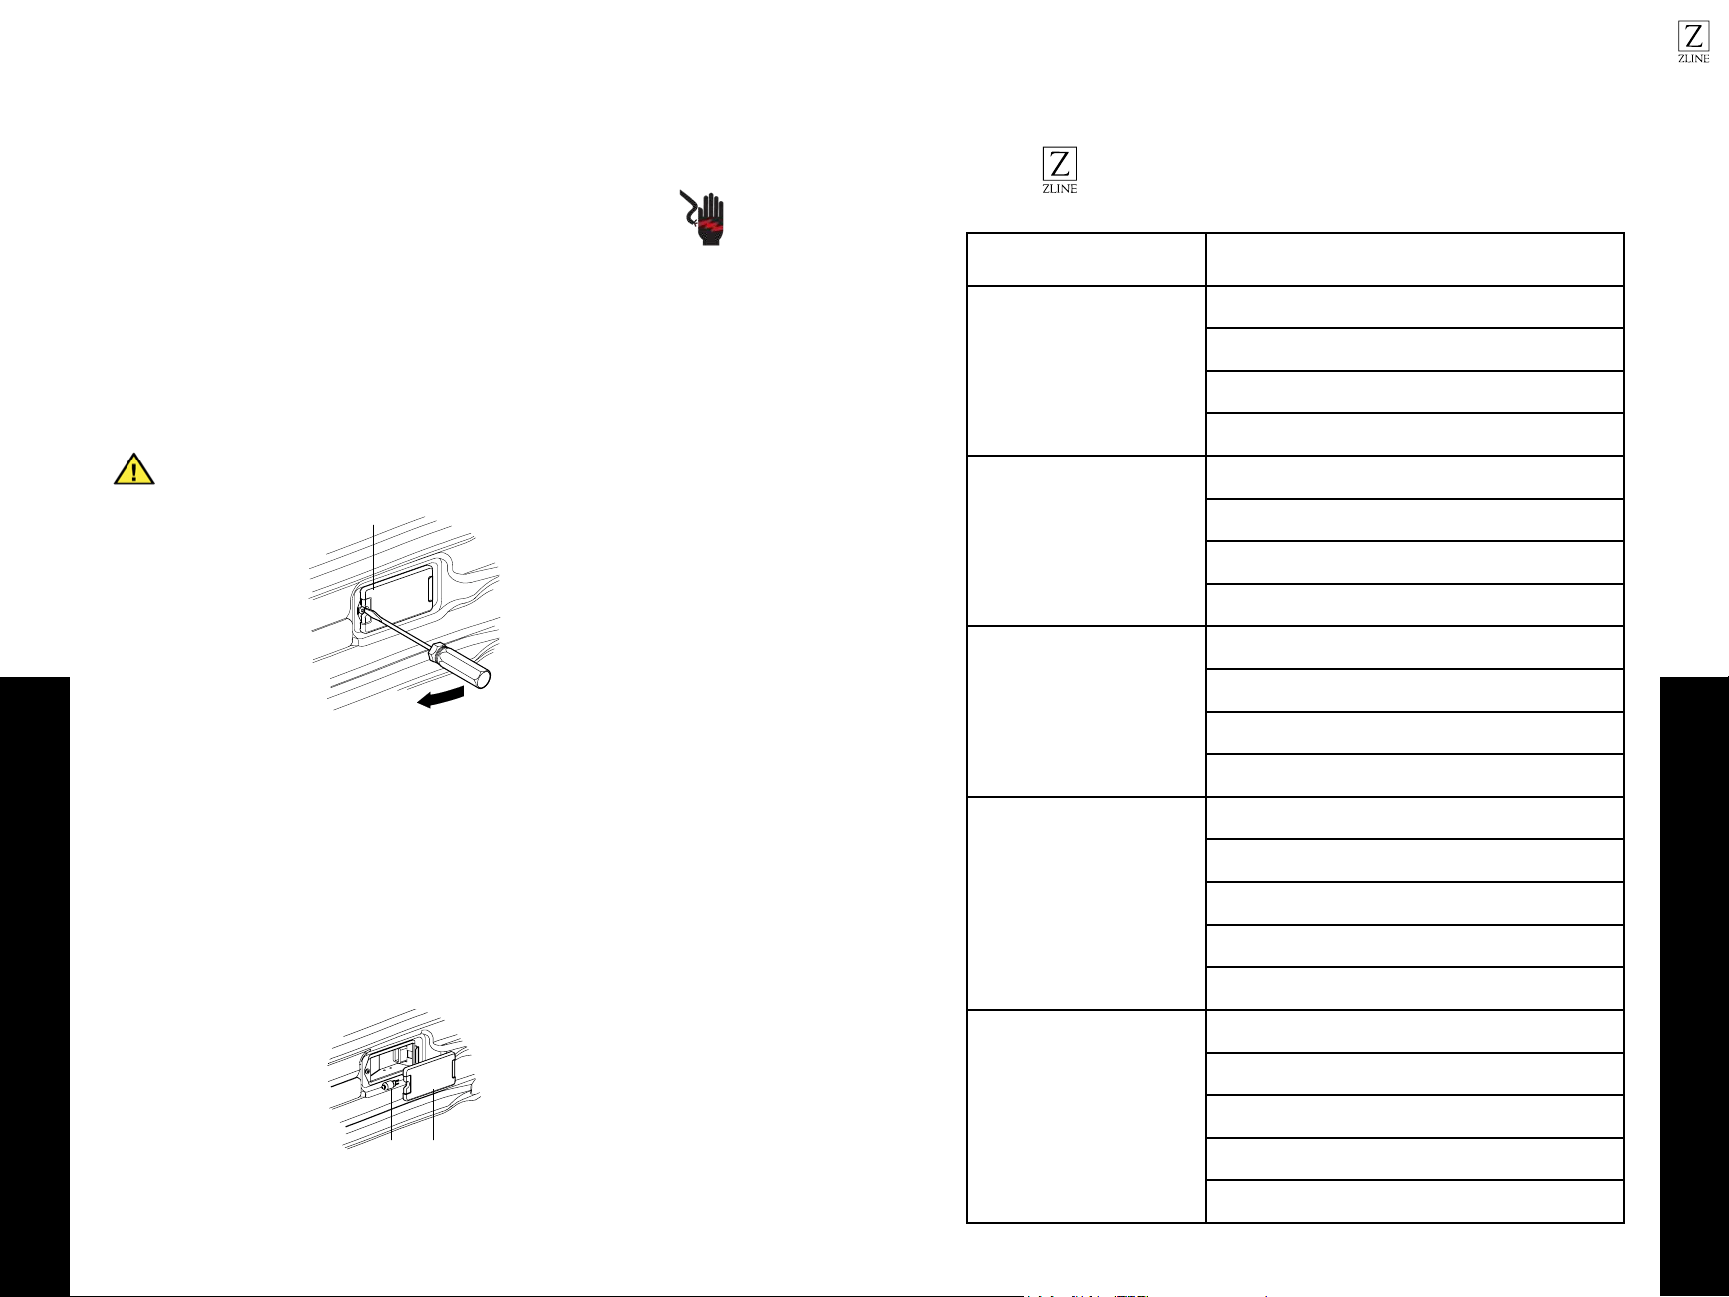
2. Using a Phillips-head screwdriver, remove the screw, and then remove the cover.
3. Remove the burned out bulb from the socket. NOTE: To avoid damage or
decreasing the life of the new bulb, do not touch bulb with bare fingers. Wear
cotton gloves or use a tissue when replacing the light bulb.
4. Replace the bulb, and then replace the bulb cover.
5. Reconnect power at the main power supply (fuse or breaker box).
WARNING
WARNING
Holding the door rmly, insert the upper arms of both hinges
A - Upper Arm
You should hear a “click” sound when the door is
Failure to do so could result in death, electric shock,
The oven light is a standard 25 watt (G9) appliance bulb.
Using a Phillips-head screwdriver, remove the screw, and
hen remove the cover.
A
A - Light Cover
do not touch bulb with bare ngers. Wear cotton gloves or use
A. Light cover
Holding the door rmly, insert the upper arms of both hinges
A - Upper Arm
You should hear a “click” sound when the door is
Failure to do so could result in death, electric shock,
The oven light is a standard 25 watt (G9) appliance bulb.
Using a Phillips-head screwdriver, remove the screw, and
emove the burned out bulb from the socket.
A B
A - Light Bulb
B - Light Cover
do not touch bulb with bare ngers. Wear cotton gloves or use
A. Light bulb
B. Light cover
Loading ...
Loading ...
Loading ...