Loading ...
Loading ...
Loading ...
7
SET-UP
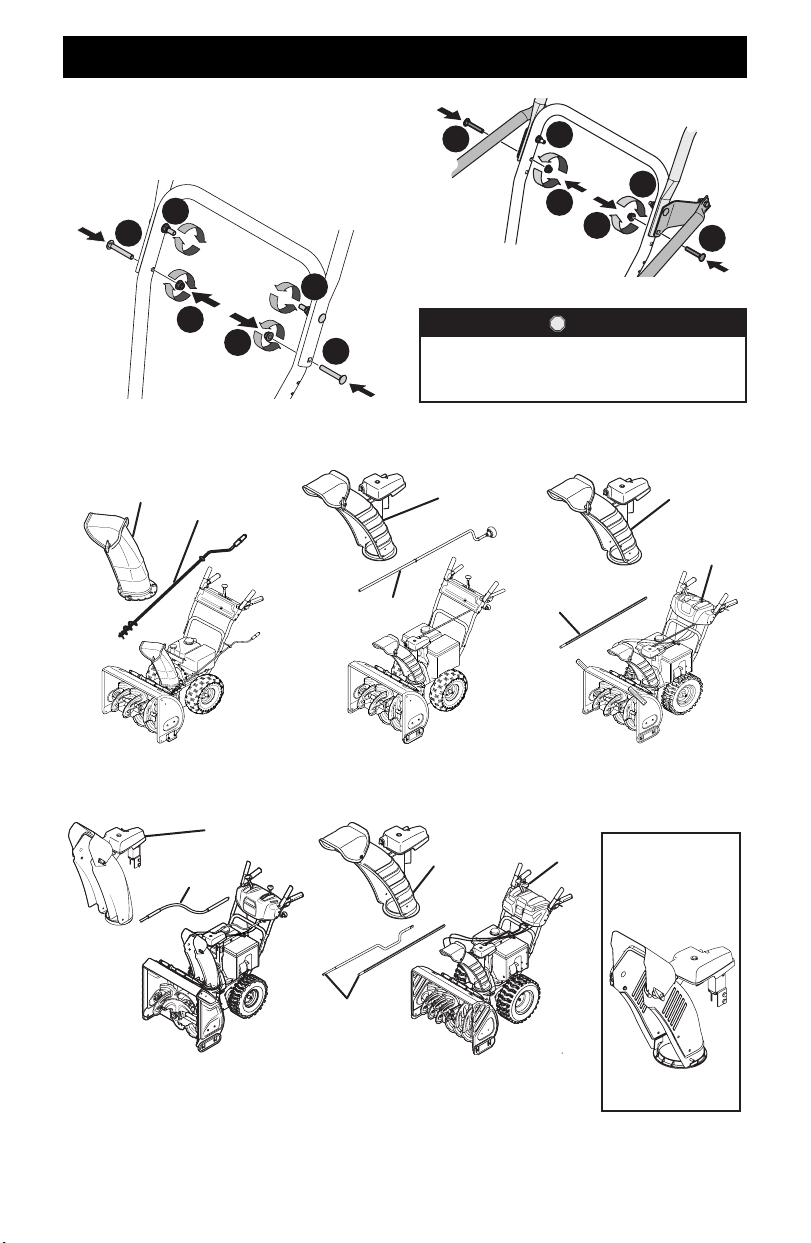
5. Attach the two carriage bolts (b) and nuts (a) removed in Step
2. Finish securing the handle by tightening the top two nuts
(c) loosened in Step 2. See Figure 5 or Figure 6 for models with
side supports.
a
a
b
b
c
c
Figure 5
a
a
c
c
b
b
Figure 6
STOP
Refer to Figure 7 below to identify your “Chute Control
Style” and continue to the “Assembly” instructions for
your specific style on pages13 - 18.
CHUTE CONTROL STYLES
Side Mounted Chute Rotation Control
w/ Manual Pitch on page 8
Chute Control
Rod
Chute
Assembly
Chute Control
Rod
*
Chute
Assembly
Overhead Chute Rotation Control
w/ Manual Pitch on page 8
2-Way & 4-Way
Chute Control
*
Chute
Assembly
Chute
Control Rod
Overhead Chute Rotation Control
w/ 2-Way Pitch or 4-Way Pitch &
Rotation Control on page 9
Overhead Chute Control (Flex Shaft)
w/ Steel Chute & 2-Way Pitch Control
on page 11
Chute Assembly
Chute Control
(Flex Shaft)
Overhead Chute Rotation Control w/ 4-Way
Electric Pitch & Rotation Control on page 12
Electric Chute
Control
Chute Control
Rods
*
Chute
Assembly
*
NOTE: This model may
be equipped with a
metal chute assembly.
Figure 7
Loading ...
Loading ...
Loading ...