Loading ...
Loading ...
Loading ...
WARNING: Be sure planer/molder is unpluggedfrom
any power source and turned off before attempting any
maintenance.
CLEAN PLANER/MOLDER
• Keep planer/molder clean of any wood chips, dust,
dirtor debris.
• Clean the four steel columnsto preventthe relier-
case from bindingwhen raised and lowered.
• Keep the anti-kickbackpawls clean and operating
smoothlyto preventinjurydue to kickback.
• After each ten hours ofoperation, clean the
chain/gear drive mechanism.
• Using a clean, dry cloth, clean all of the chainsand
gears ofwood chips, dust, and oldgrease.
LUBRICATION
• The table surface can be coated with a lubricant,
such as furniture wax, to make the workpiece feed
smoother.Be sure that the lubricant used does not
affect the ability to finishthe workpiece with varnish,
sealer, etc.
For example, do not use any silicone base lubt_cents
because they will ruin any attempt to finishthe wood.
• Use commonautomotive bearinggrease to lubricate
all chains and gears. Be sure all chains and gears
have plenty of grease.
• Motor and cutterheed bearingsare sealed and need
no lubrication,
CHECK FORWORN BLADES
• Condition of blades affects precisionof cut. Observe
quality of cut which planer/molderproducesto check
cendition of blades.
• Dull blades tear, rather than sever wood fibersand
producefuzzy appearance.
• Raised grain occurswhen dull blades poundon
woodthat has varying density.Raised edge will also
be producedwhere blades have been nicked.
REPLACE BLADES
Refer to Figures 29 through 32.
WARNING: Always turn planer/molderOFF and dis-
connect from power source beforestarting any mainte-
nance work.
NOTE: Always reverse or replace both bladesas a set.
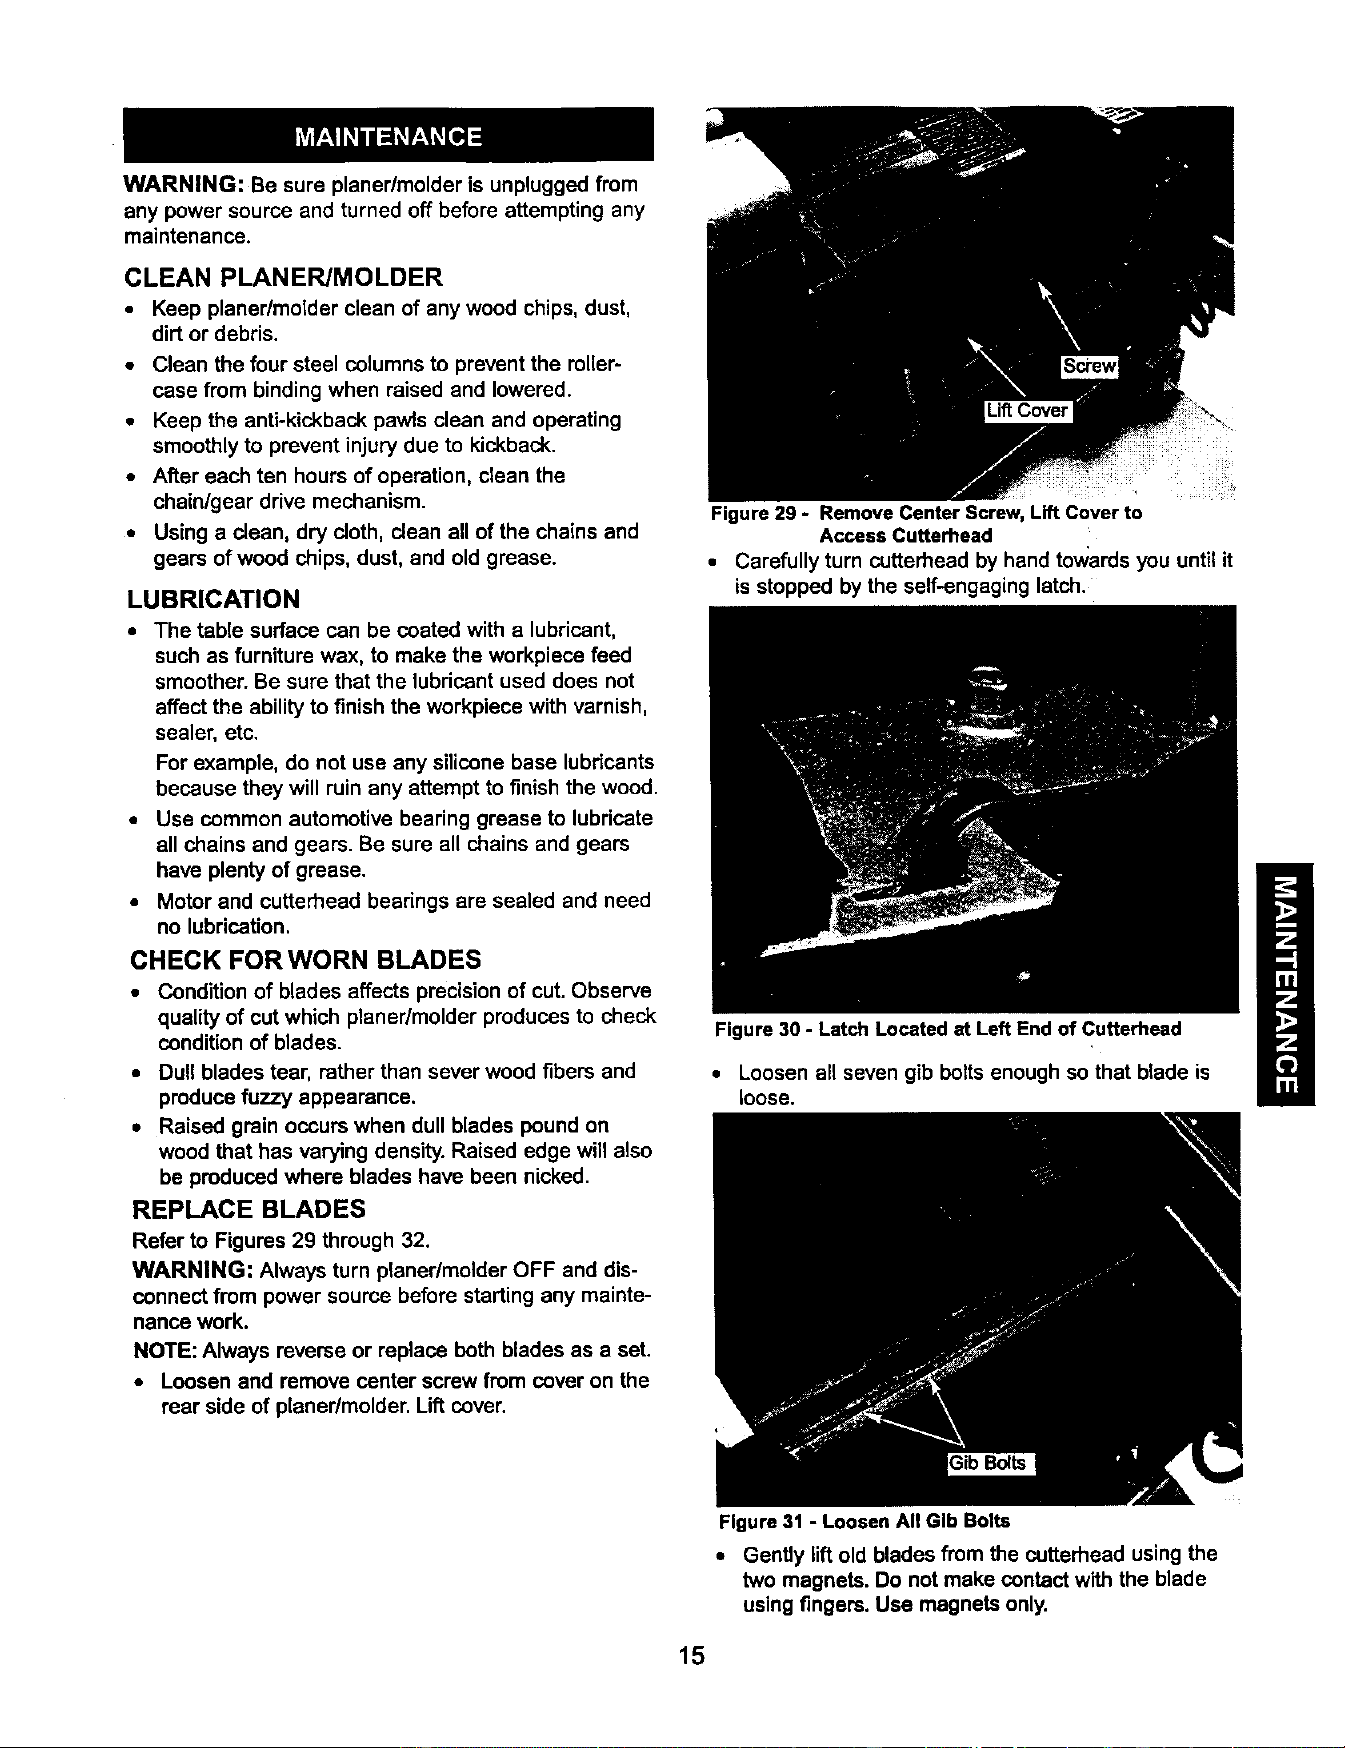
• Loosen and remove center screw from cover on the
rear side of planer/molder.Lift cover.
' +!!;S!_!
Figure 29 - Remove Center Screw, Lift Cover to
Access Cutterhead
• Carefully turn cutterhead by hand towards you until it
is stopped by the serf-engaging latch.
Figure 30 - Latch Located at Left End of Cutterhead
• Loosen all seven gib boltsenoughso that blade is
loose.
Figure 31 - Loosen All GIb Bolts
• GentJylift old blades from the cutterhead usingthe
two magnets.Do not make contactwith the blade
usingfingers.Use magnets only.
15
Loading ...
Loading ...
Loading ...