Loading ...
Loading ...
Loading ...
Ifthe slotfacing you containsthe blade, depress the
red latch at the left hand side of the cutterhead, and
carefully rotate it towardsuntilit stops at the slot with
setting block.
Be sure the slot is clean and free of any dirt, chips
or debris.
Slide molding cutter against edge of setting block,
place gib in slot,then place spacer at opposite end
of gib, and secure in position using the gib screws;
Tighten gib screws equally to produce equal pres-
sure on the cutter and spacer (see Figure 23).
Figure23 - MoldingCutterInstalled
NOTE: For each setup onlytwo molding cutters are
mounted on the cutterhead ofthis planer/molder.
• Depress latch and rotate cutterhead 180=.
• Repeat the same procedurefor mountingthe cutter
in the other cutterhead slot.
• Operate the planer/molderfor five minutesand
check all gibscrews fortightness.
• Make sure to recheckthe gib screws after every two
hoursof use.
NOTE: Make sure spacer is ofthe same thicknessas
the cutter, spacer islocated at oppositeend of gib and
that all gibscrews are secure.
Screw
Gib
Cutter
Figure 24 - Note Odentatlon of Screw and GIb with
Respect to Slot
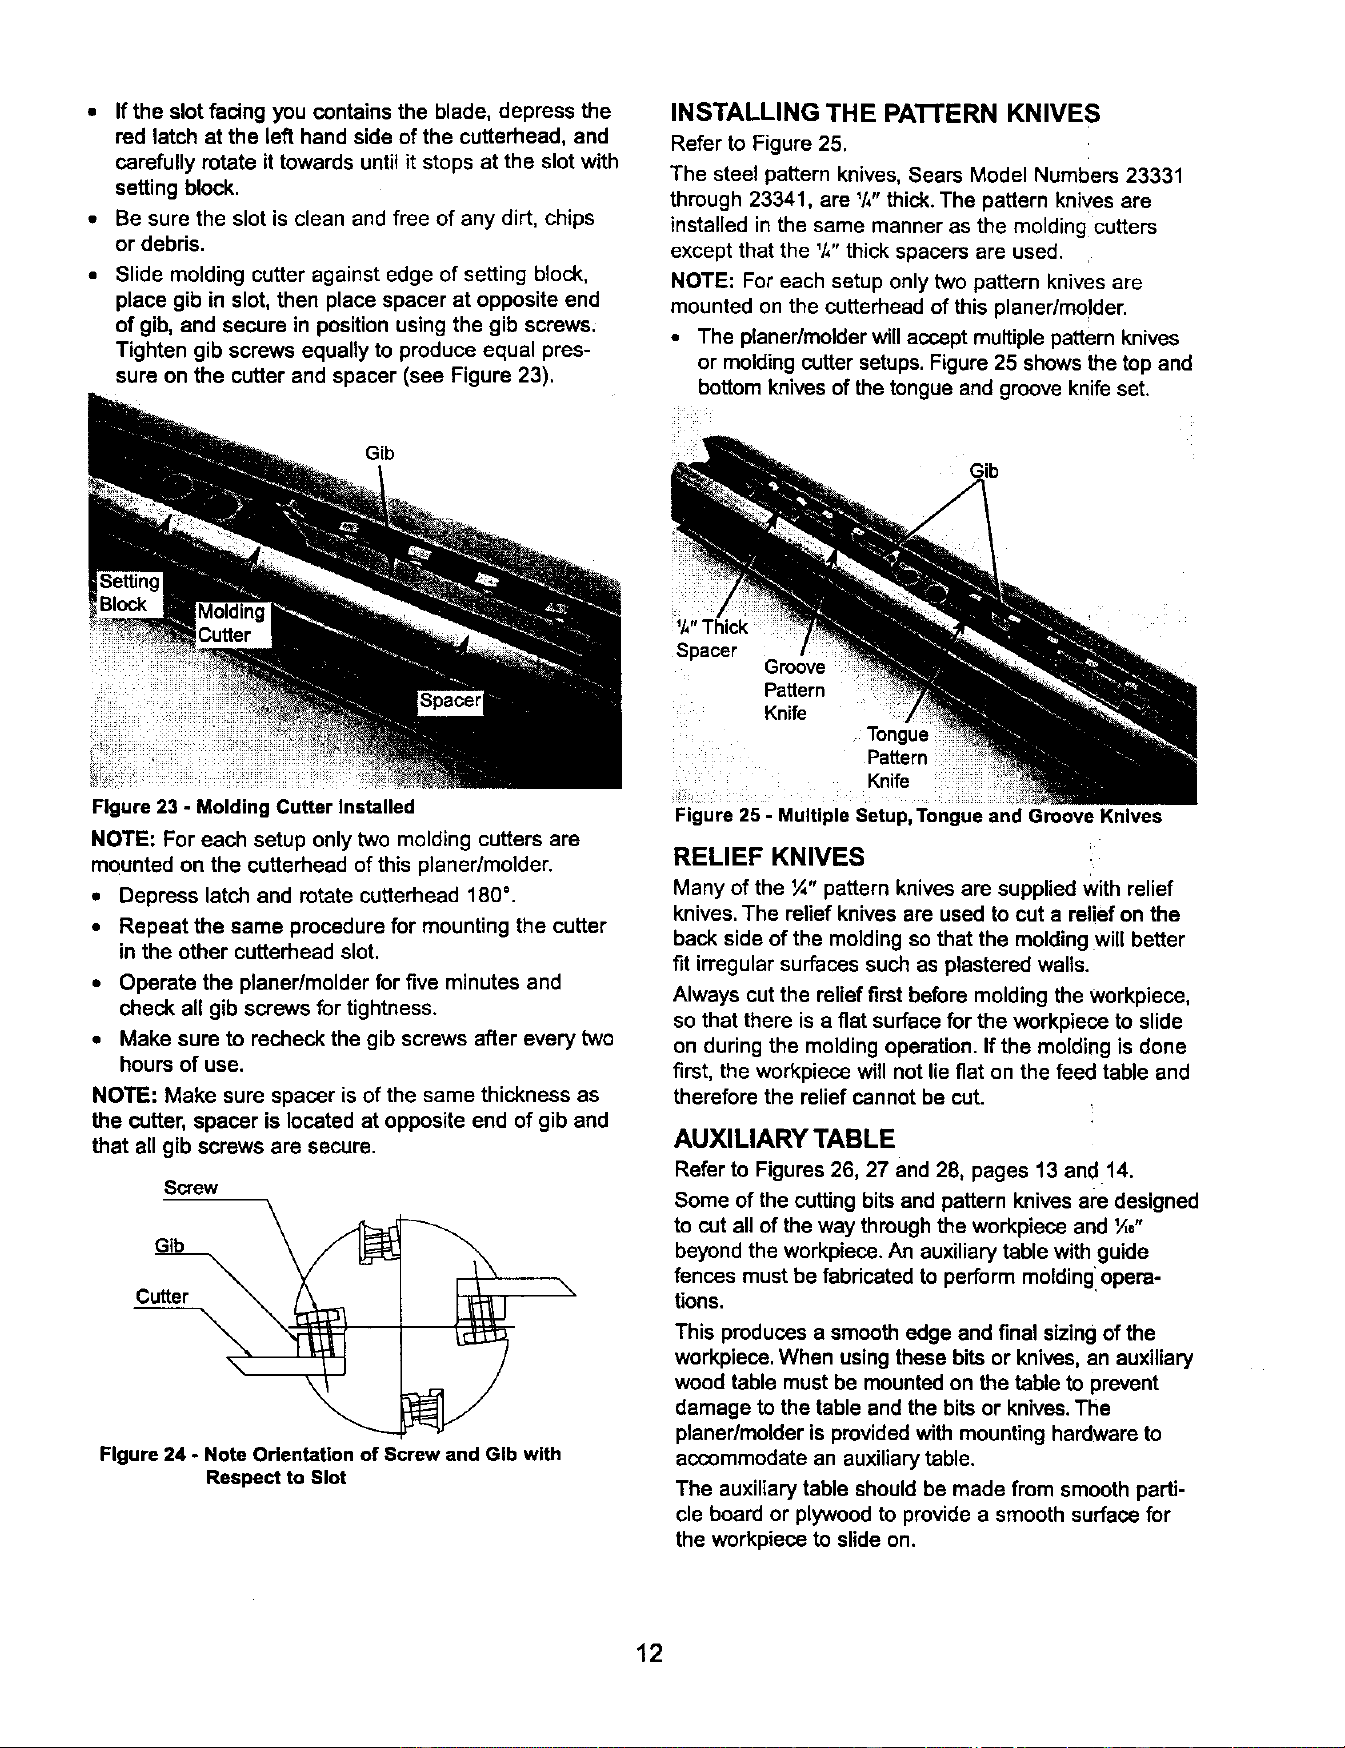
INSTALLING THE PA'I-rERN KNIVES
Refer to Figure 25.
The steel patternknives, Sears Model Numbers 23331
through 23341, are '/,"thick.The patternknives ere
installedin the same manneras the molding cutters
except that the '/,"thick spacersare used.
NOTE: For each setup onlytwo pattern knivesare
mounted on the cutterheadof this planer/mo!der.
• The planer/molderwillacoept multiple patternknives
or moldingcuttersetups.Figure25 showsthe topand
bottomknivesofthe tongueand grooveknifeset.
Gib
1/4"Thick
Spacer /
Groove
Pattern
Knife
Tongue
Pattern
Knife
Figure 25 - Multiple Setup, Tongue and Groove Knives
RELIEF KNIVES
Many of the ¼" pattern knivesare supplied with relief
knives,The reliefknives are used tocut a relief on the
backside of the moldingso that the moldingwill better
fit irregularsurfacessuch as plasteredwalls.
Always cut the relief first before molding the workpieca,
so that there is a fiat surface for the workpieca to slide
on during the molding operation. If the molding is done
first, the workpiece will not lie fiat on the feed table and
therefore the relief cannot be cut.
AUXILIARY TABLE
Refer to Figures26, 27 and 28, pages 13 and 14.
Some of the cuttingbitsand pattern knivesam designed
to cut all of the way through the workpiece and '/,e"
beyondthe workpieca.An auxiliarytable withguide
fences mustbe fabdcated to perform moldingIopera-
tions.
This produces a smoothedge and finalsizingofthe
workpiece.When usingthese bits or knives,an auxiliary
wood table mustbe mountedon the table to prevent
damage to the table and the bitsor knives.The
planer/molderis providedwithmountinghardwareto
accommodatean auxiliarytable.
The auxiliarytable shouldbe made from smoothparti-
cle board or plywoodto providea smooth surfacefor
the workpieceto slide on.
12
Loading ...
Loading ...
Loading ...