
Loading ...
Loading ...
Loading ...
10
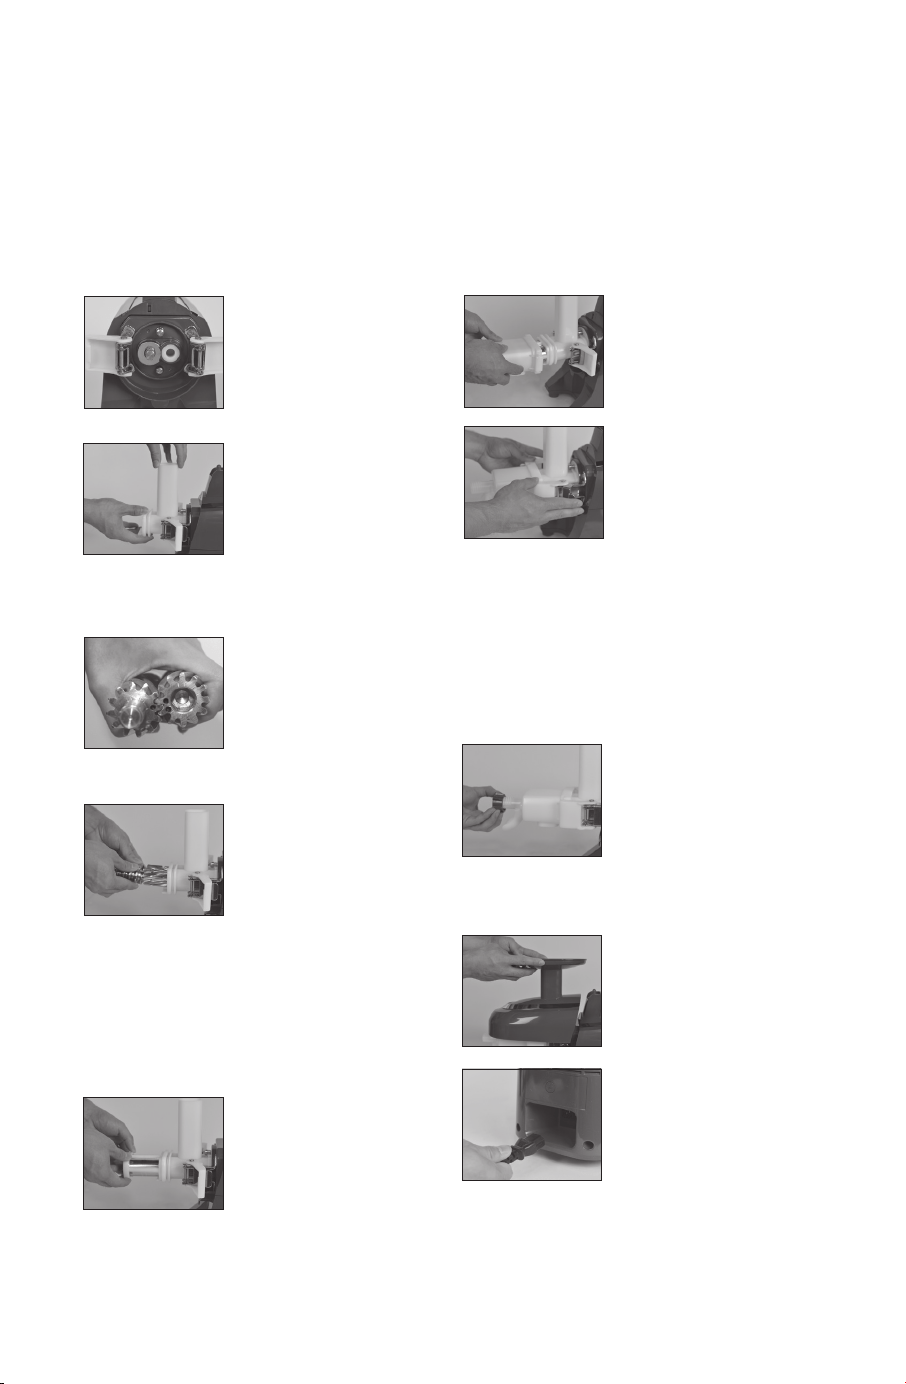
1. Place the Seal Protective
Cap onto the Main Body where
the slot with the red rubber
seal is located. This cap pro-
tects the seal from damage
when juicing fruits with seeds.
2. Slide the Twin Gear
Housing onto the Main Body
and push it all the way back
onto the Main Body until it
fits snugly in place.
3. VERY IMPORTANT!
Assemble the Twin Gears
as follows:
• Find the Locating Dots
marked on the end surface
of each gear.
• Position the Locating Dots
so that the single dot on
the Free Wheel Gear is in
between the two dots on
the Drive Gear.
•
Holding the gears in this
position, slide them into the
Twin Gear Housing, steel
end first, so that the Free
Wheel Gear enters the right
slot, and the Drive Gear
enters the left slot. Push
back until they come to a
stop.
• Rotate the gears while
pushing them in until they
slide in completely and
lock into place.
4. Slide the desired Screen
over the exposed portion of
the Twin Gears. See page
12 for more information on
which screen to select.
5. Slide the Outlet Casing
over the screen.
6. Close each Latch over
the ears of the Outlet Casing
and snap the latches shut by
pushing back on the metal
tabs.
7. Slide the Juicing Knob or
the Breadstick Knob (see
page 12 for details) into the
pulp outlet and turn clock-
wise to tighten. Tighten until
it comes to a comfortable
stop. Do not over tighten by
forcing it to turn.
8. Slide the Safety Hood
over the feeding chute.
9. Attach the Power Cord to
the rear of the machine and
plug the other end into an
electrical outlet.
Failure to properly seat the Twin Gears will
prevent the latches from shutting properly.
If this is the case, remove the Outlet Casing
and screen; rotate the gears while pushing
them in until they slide in completely and
lock into position; and reassemble. Damage
to the machine due to improper assembly is
not covered under your warranty.
SETTING UP YOUR GREENSTAR PRO
A. Assembly
IMPORTANT: Make sure your Greenstar Pro is unplugged from the electrical outlet before assembly.
Loading ...
Loading ...
Loading ...