Loading ...
Loading ...
Loading ...

Installing the RV Charging Station Accessory
NOTICE
Failure to heed these installation requirements could result in damage to the product or vehicle.
• You must choose a suitable mounting location for the charging station before drilling holes in the vehicle
wall.
• You must verify the mounting surface allows the mount to be securely connected and the mounting screws
will not interfere with wiring or features in the wall.
• You must use proper mounting screws for your vehicle's wall material. The included screws are intended for
installation on wood or fiberglass walls. Before installing the screws, you must verify the screws are the
correct length and will not damage the exterior walls or any other components.
To install the RV charging station accessory, you need a Philips screwdriver and a drill with a 1.5 mm
(1/16 in.) drill bit.
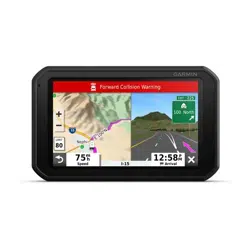
The RV charging station accessory provides a permanent, wall-mounted charging station for your device. This
allows you to use and charge the device in the living area of your RV.
1 Place the mount against the wall, and use the six screw holes to mark the pilot-hole locations.
2 Remove the mount from the surface.
3 Using a 1.5 mm (1/16 in.) drill bit appropriate for the wall material, drill a pilot hole in each of the six
locations you marked.
NOTICE
Do not drill through the mount. This could result in damage to the mount or wall.
4 Line up the screw holes on the wall mount with the pilot holes, and secure the mount to the wall using six
screws.
5 Press the socket in the device mount onto the ball of the wall mount until it snaps into place.
6 Route the bare-wire connectors to the RV battery or a 12 V power source.
7 Connect the black wire to the negative (-) terminal of the battery, and connect the red wire to the positive (+)
terminal of the battery.
60 Appendix
Loading ...
Loading ...
Loading ...