Loading ...
Loading ...
Loading ...
Driving
screen are seen differently and imprecise-
ly.
●
Certain objects may not be shown or may
not be shown v
ery clearly, for example,
posts or thin rails, due to the screen resolu-
tion or if light conditions are insufficient.
●
The cameras have blind spots in which
obstacles and people are not registered.
WARNING
The smart technology incorporated into
the T
op Vie
w Camera* system cannot over-
come the limits imposed by the laws of
physics and it only works within the limits of
the system. The greater convenience provi-
ded by the Area View system should never
tempt you to take any risk that may com-
promise safety. If used negligently or invol-
untarily, it may cause serious accidents
and injuries. The system is not a replace-
ment for driver awareness.
●
Adapt your speed and driving style to suit
visibility, weather, road and traffic condi-
tions.
●
Do not be distracted from the traffic by
looking at the screen.
●
Monitor the area around the vehicle at all
times, since the cameras do not capture
small children, animals and certain objects
in all situations.
●
The system will probably be unable to
represent all areas clearly.
CAUTION
●
The camera images ar
e only two-dimen-
sional. Due to a lack of spatial depth, ob-
jects that jut out or holes on the road, for
example, are more difficult to detect or
may not be seen at all.
●
In certain circumstances, the camera
does not capture objects such as beams,
fences, posts or thin trees, which could
damage the vehicle.
●
The system displays the auxiliary lines
and boxes regardless of the vehicle's envi-
ronment, no objects are detected. The driv-
er is responsible for determining that the
vehicle will fit in the parking space.
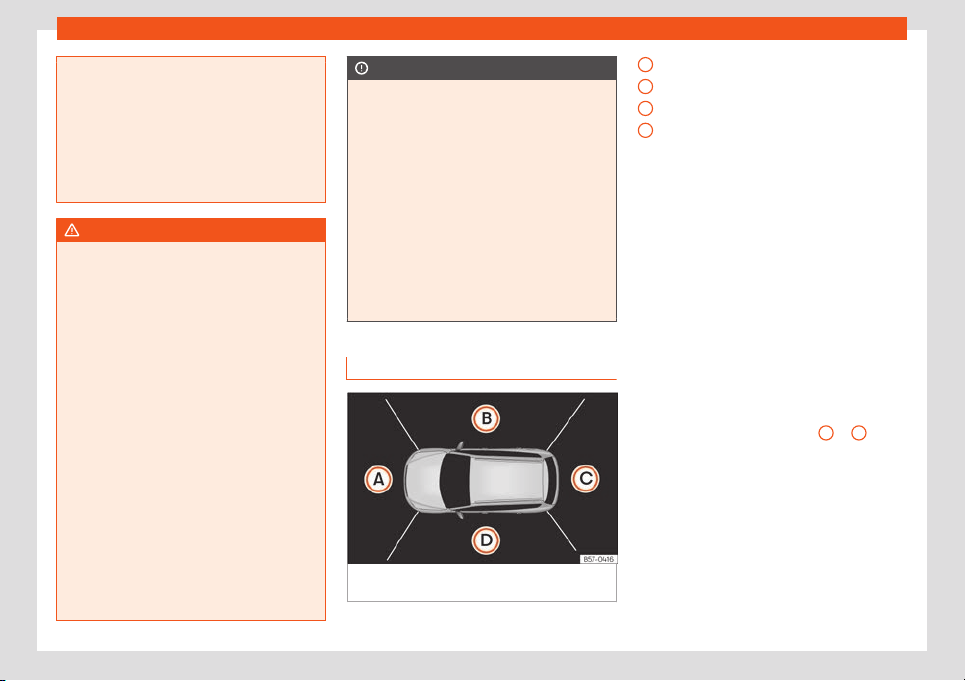
Area View system
Fig. 209
Viewing the top view system: aerial
vie
w
.
There are four different views to choose from:
Front camera area
Right camer
a ar
ea
Rear camera area
Left camera area
Function buttons:
Exit the current display.
Adjust the display: bright, contrast and
colour.
Three-dimensional views
Depending on the equipment: connect-
ing and disconnecting the ParkPilot
sound.
The aerial view is generated by combining
the images from all the cameras
›››
Fig. 209. The aerial view can be selected
by pressing the vehicle in the area.
Select the corresponding view by pressing
the different areas
›››
Fig. 209
A
to
D
of the
aerial vie
w or the r
educed aerial view.
Conditions necessary for the use of the
Area View system
●
The doors and the rear lid must be closed.
●
The image must be reliable and clear. For
this reason, for example, the camera lens
must be clean.
●
The area around the vehicle must be clear-
ly and totally visible.
A
B
C
D
290
Loading ...
Loading ...
Loading ...