Loading ...
Loading ...
Loading ...
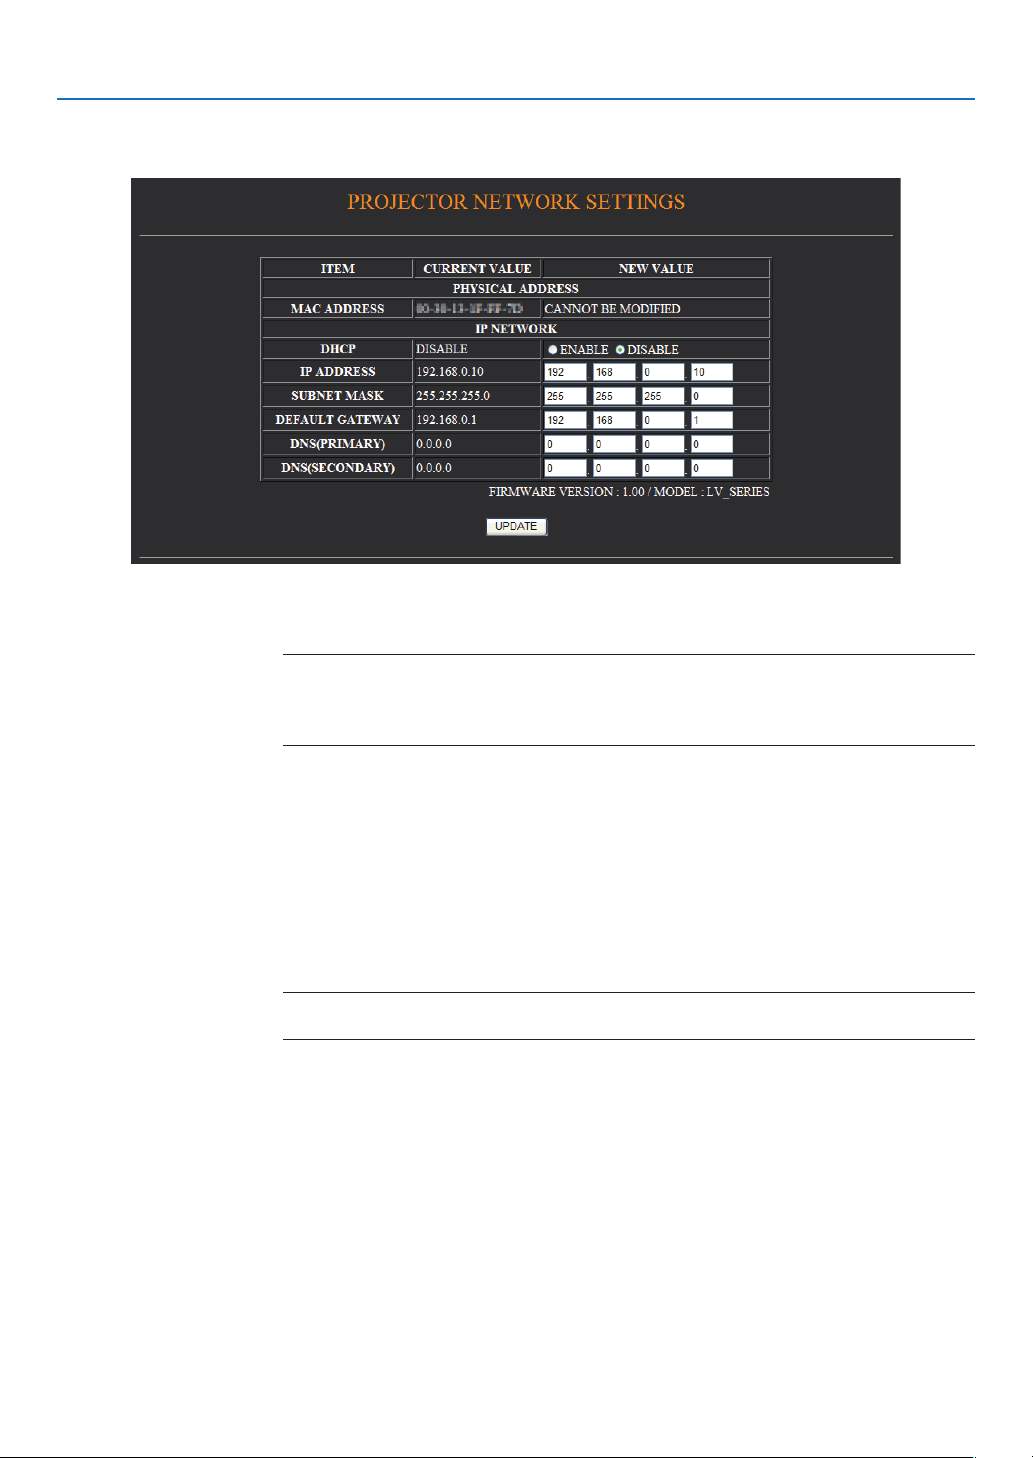
Network Settngs
DHCP ..................................Enabling this option automatically assigns an IP address to the projector from your DHCP serv-
er. Disabling this option allows you to register the IP address or subnet mask number obtained
from your network administrator.
NOTE:
The IP address of the projector is required to change the network setting.
The IP address will not be displayed on the projector’s menu.
Consult your network administrator for the IP address when [ENABLE] is selected for [DHCP].
IP ADDRESS .......................Set your IP address of the network connected to the projector when [DISABLE] is selected for
[DHCP].
SUBNET MASK...................Set your subnet mask number of the network connected to the projector when [DISABLE] is
selected for [DHCP].
DEFAULT GATEWAY
...............Set your default gateway of the network connected to the projector when [DISABLE] is se-
lected for [DHCP].
DNS (PRIMARY) ................Set your primary DNS settings of the network connected to the projector.
DNS (SECONDARY).................
Set your secondary DNS settings of the network connected to the projector.
UPDATE ..............................Reflect your settings.
NOTE: Close the browser after clicking [UPDATE]. The projector will automatically update your
settings.
TIP: Selecting [Network settings] for [Reset] from the projector’s menu allows you to return the following items to the factory
default.
[DHCP]: DISABLE
[IP ADDRESS]: 192.168.0.10
[SUBNET MASK]: 255.255.255.0
[DEFAULT GATEWAY]: 192.168.01
*[DNS(PRIMARY)] and [DNS(SECONDARY)] will remain unchanged.
. Convenent Features
Loading ...
Loading ...
Loading ...