Loading ...
Loading ...
Loading ...
6
ANALOG IN-1
AUDIO IN
AUDIO IN
DIGITAL IN/
ANALOG IN-2
PHONE
PHONE
. Installaton and Connectons
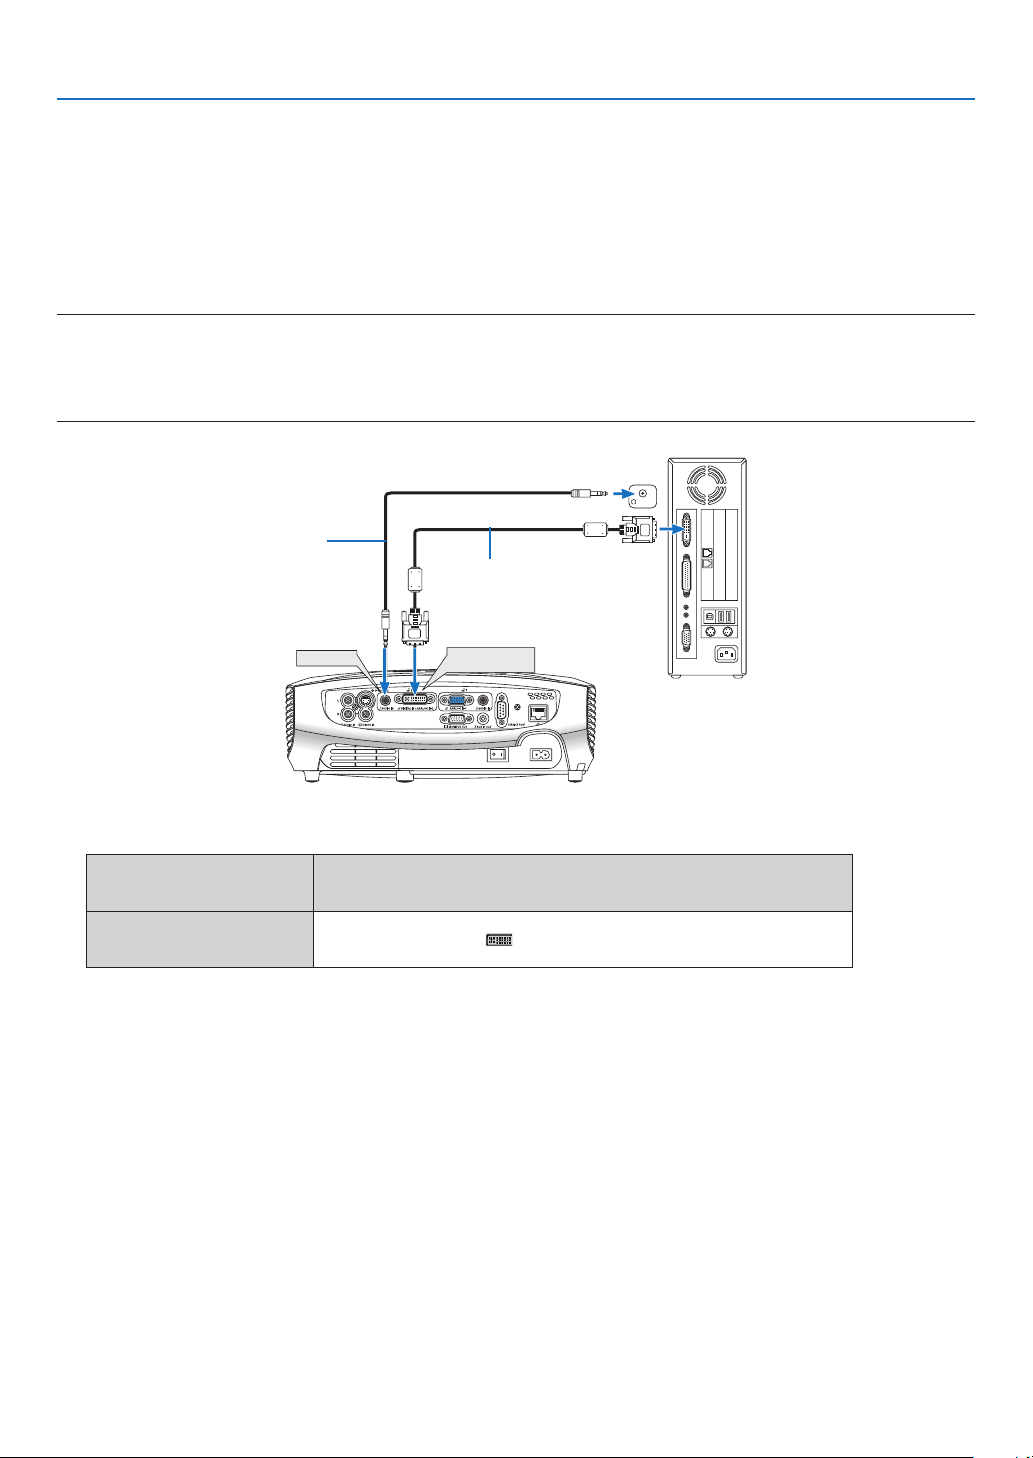
When Viewing a DVI Digital Signal
To project a DVI digital signal, be sure to connect the PC and the projector using a DVI cable (not supplied) before
turning on your PC or projector. Turn on the projector rst and select Computer 2 (Digital) from the source menu
before turning on your PC.
Failure to do so may not activate the digital output of the graphics card resulting in no picture being displayed.
Should this happen, restart your PC.
Do not disconnect the DVI cable while the projector is running. If the signal cable has been disconnected and then
re-connected, an image may not be correctly displayed. Should this happen, restart your PC.
NOTE:
• Use a DVI cable or the one compliant with the DDWG (Digital Display Working Group) DVI (Digital Visual Interface) revision 1.0
standard. The DVI cable should be within 5 m (196) long. Both single and dual types of DVI cable can be used.
• The DVI (DIGITAL) connector accepts VGA (640x480), SVGA (800x600), 1152x864, XGA (1024x768), WXGA (1280x800 @ up
to 60Hz), and SXGA (1280x1024 @ up to 60Hz).
IBM PC or Compatibles (Desktop type)
or Macintosh (Desktop type)
DVI cable (not supplied)
• Select the input name for its appropriate input connector after turning on the projector.
Input connector
Use the INPUT button on the projector cabinet or the remote
control to select the appropriate input from the menu.
DIGITAL IN /
ANALOG IN-2
Computer 2 (Digital)
Loading ...
Loading ...
Loading ...