Loading ...
Loading ...
Loading ...
8
Wireless
®
13
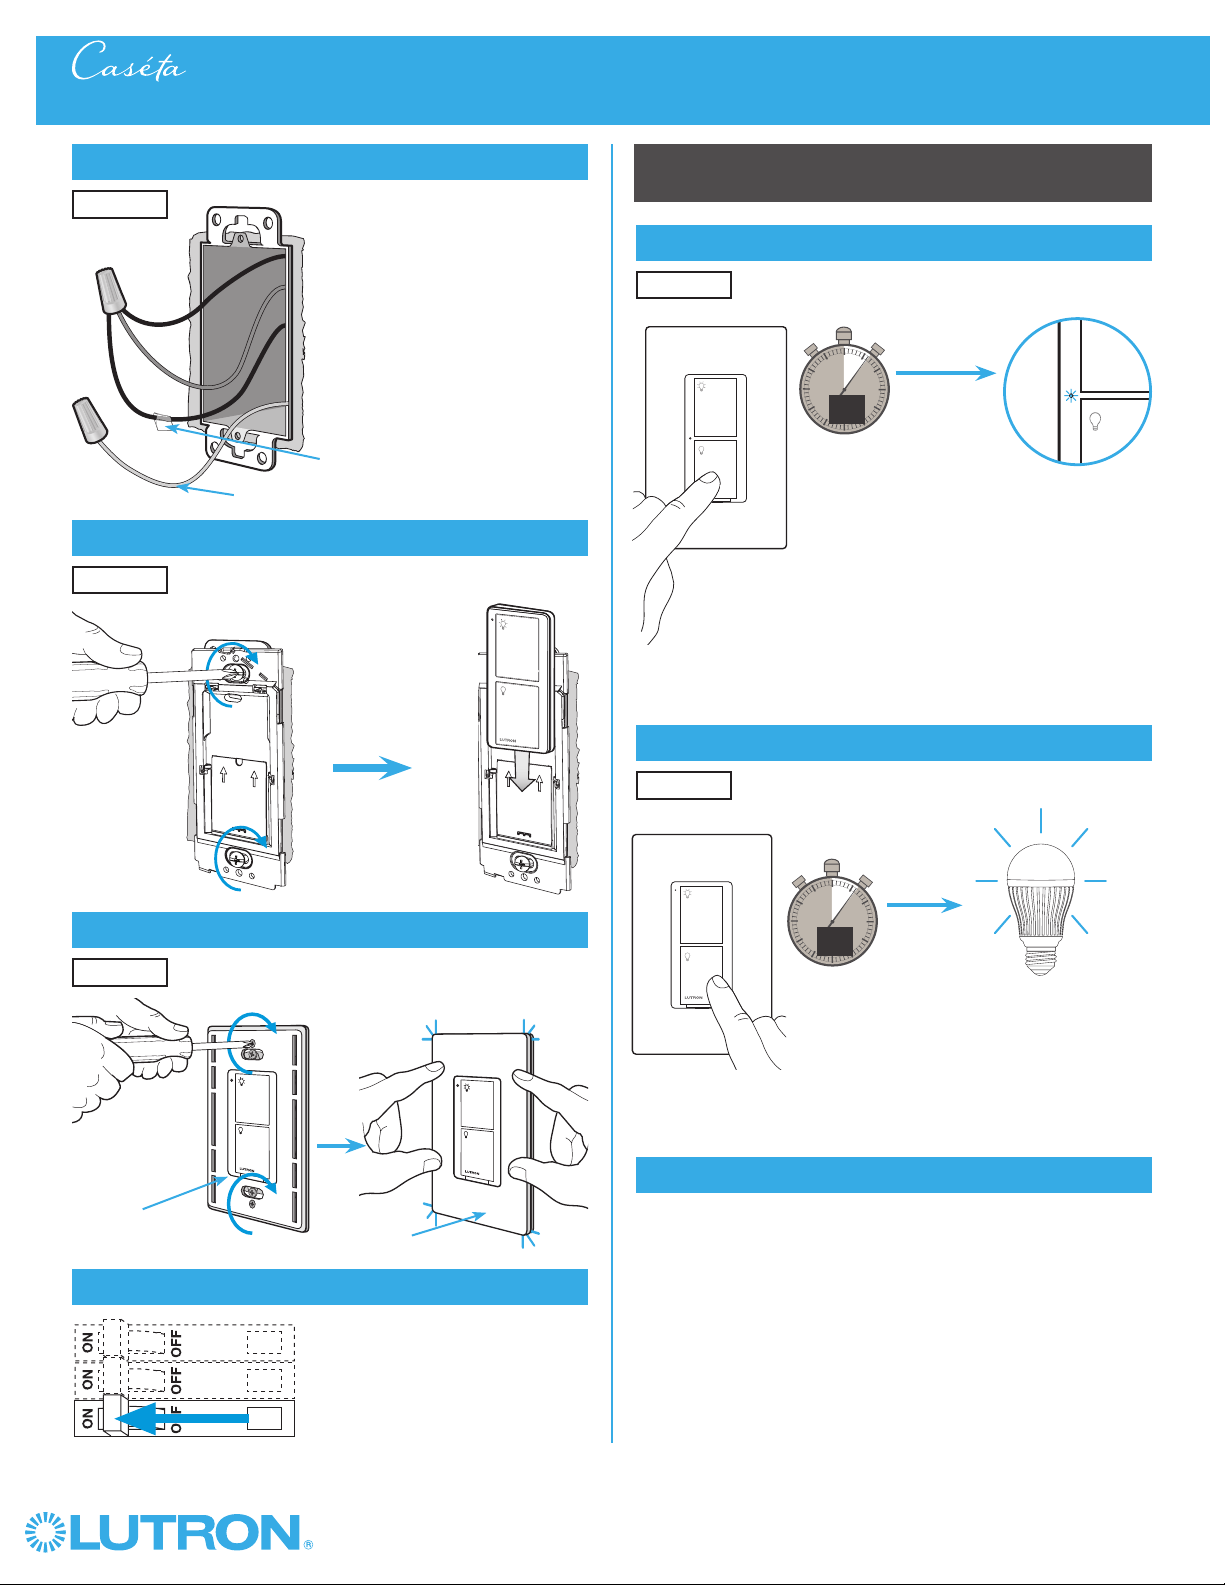
Connect the wires
Ground
14
Attach the wallplate bracket and Pico® remote control
15
Attach the wallplate
‘snap’
16
Turn power on at circuit breaker
3-Way Installation - Caséta® Wireless In-Wall Switch with Pico® Remote Control
Pairing the switch and PicoR remote control
17
Press and hold "Off" button on switch
0
5
10
15
6
sec.
UNTIL
HOLD
Status LED flashes
18
Press and hold "Off" button on remote control
Lights flash
three times
0
5
10
15
6
sec.
UNTIL
Wallplate
Adapter
Wallplate
Location 2
Tagged Wire
Location 2
Location 2
Location 2
Location 1
Repeat steps 17 and 18 to pair additional
remote controls.
19
Pair additional remote controls
HOLD
3x
Loading ...
Loading ...
Loading ...