Loading ...
Loading ...
Loading ...
10
Wireless
®
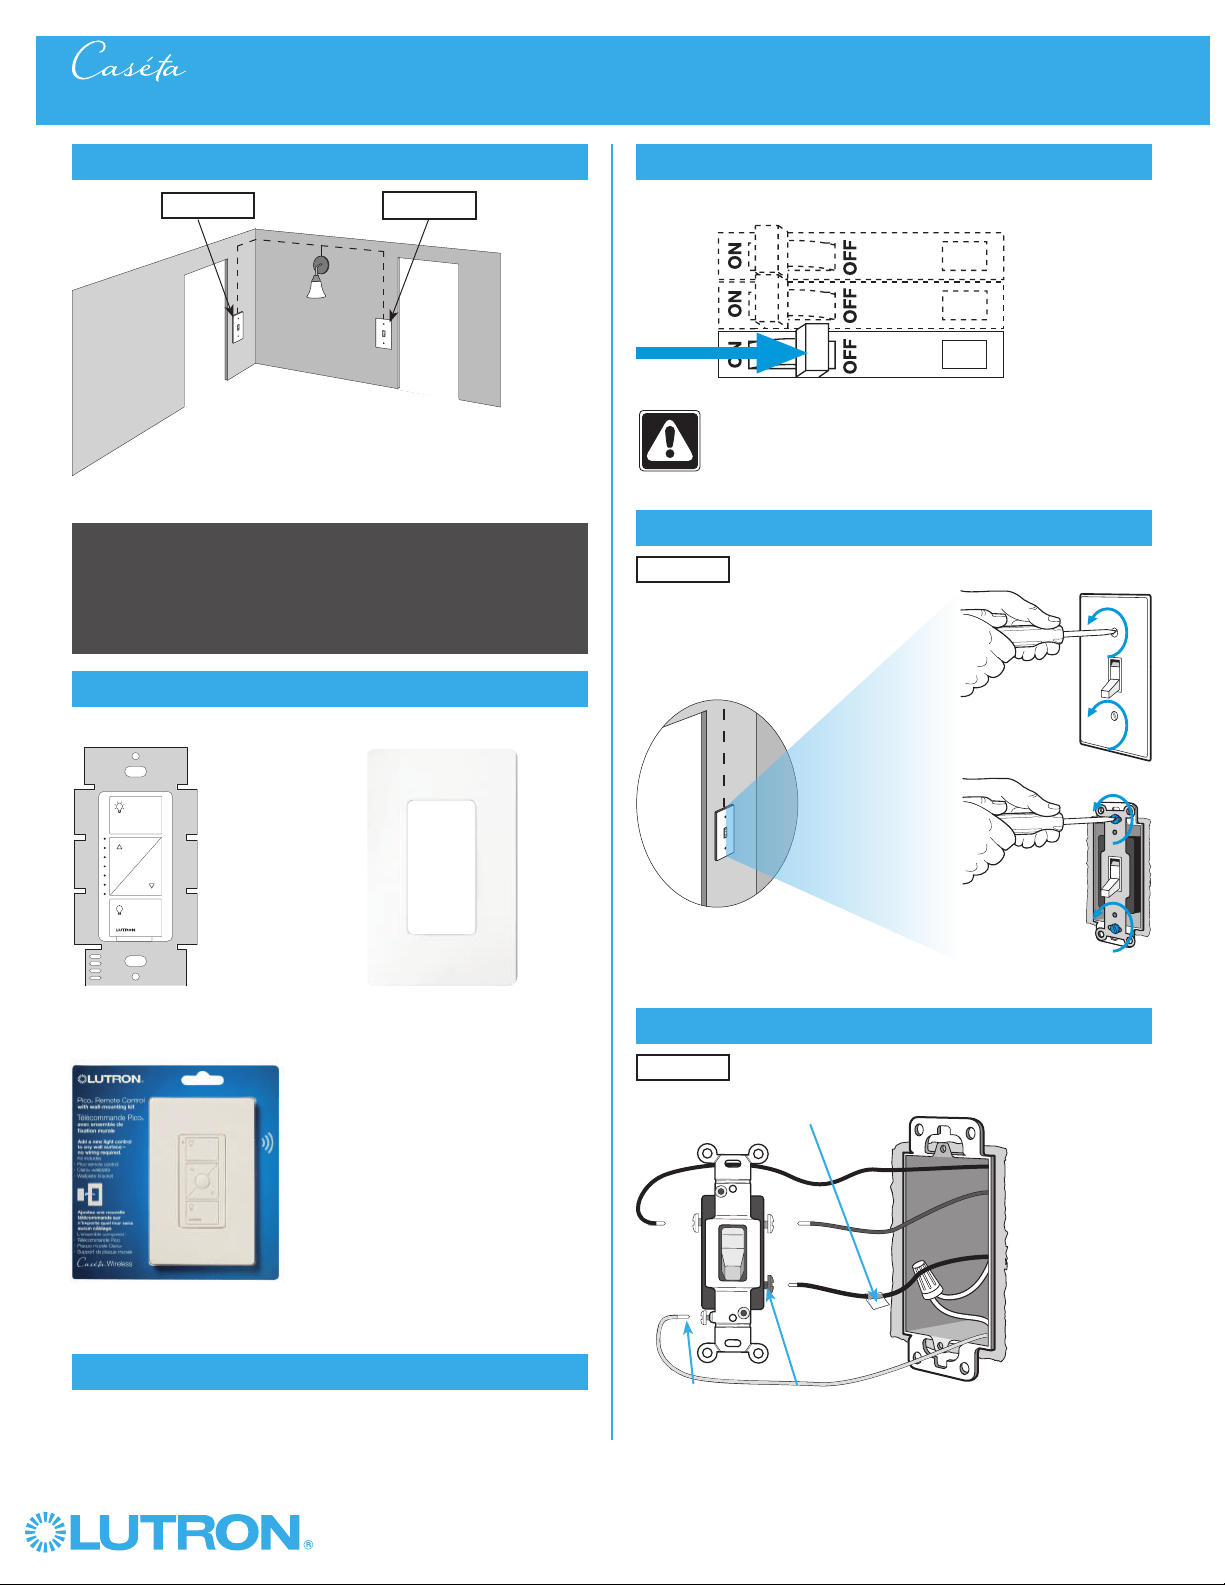
1
Identify existing wiring
Two switches control the lights (3-way installation)
2
What you need for a 3-way installation
+
WARNING! Shock Hazard. May result in serious
injury or death. Turn off power at circuit breaker
before installing the unit.
4
Turn power off at circuit breaker
5
Remove existing switch from wall
6
Tag and disconnect wires from the existing switch
Place tag - to identify wire on
different color screw
Different
Color
Screw
Ground
(Green /
Bare Copper)
3-Way Installation - Caséta® Wireless In-Wall PRO Dimmer with Pico® Remote Control
Location 1 Location 2
In-wall PRO dimmer
PD-10NXD
Pico® remote control
with wall-mounting kit
PJ2-WALL
- If one switch controls the lights (single-pole installation)
See quick-start guide that came with your dimmer
- If three or more switches control the lights
(multi-location installation) See page 36 for details
Important note:
3
Choose a location for your Caséta® Wireless dimmer
Choose which location you want the Caséta® Wireless dimmer installed in.
This will be Location 1.
Location 1
Location 1
Claro® Wallplate
CW-1
+
Loading ...
Loading ...
Loading ...