Loading ...
Loading ...
Loading ...
27
Wireless
®
13
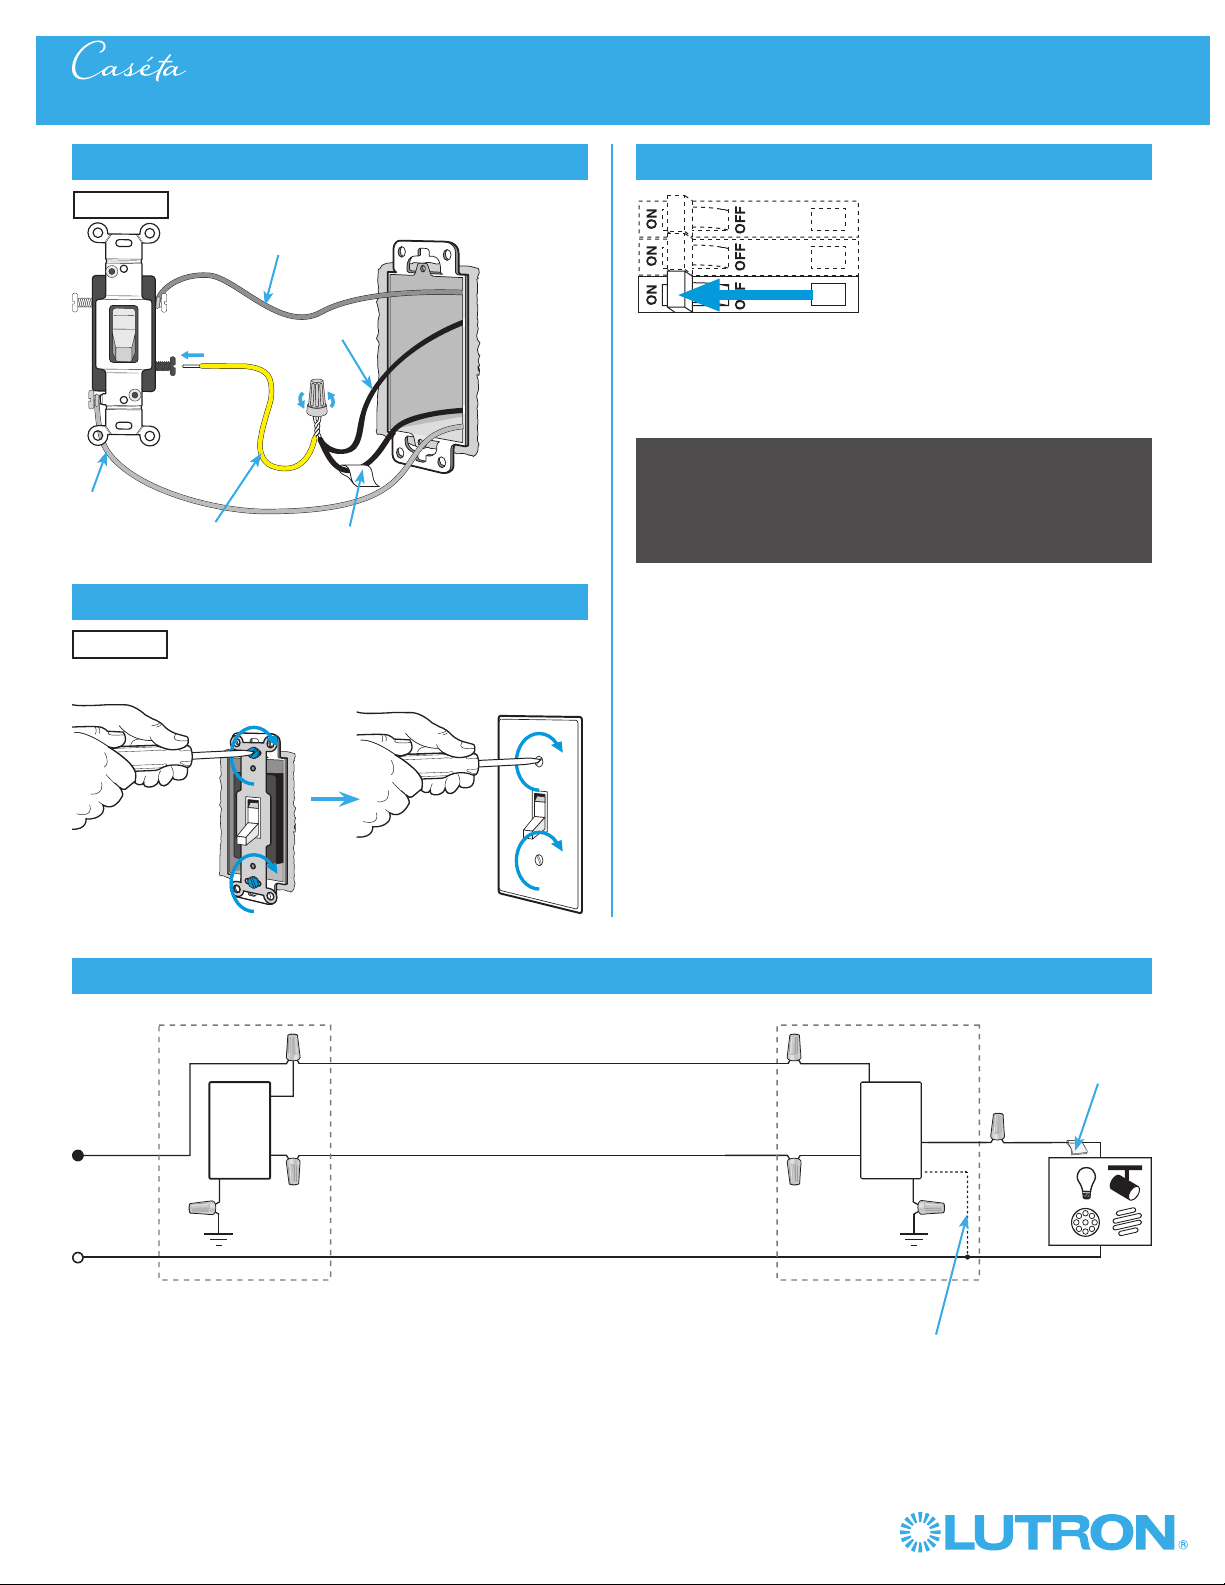
Remount existing switch
14
Turn power on at circuit breaker
3-Way Installation - Caséta® Wireless In-Wall PRO Dimmer with Mechanical Toggle Switch
Location 2
Neutral
Toggle
Switch
Line / Hot
Traveler
Caséta®
Wireless
Dimmer*
Load
LED
DEL
LFC
A
CFL
AFC
INC /
HAL
Schematic Diagram
Traveler
* Dimmer may be installed in either location.
Tagged Wire
Ground
(Green)
Red
White
Blue
Black
Important note: Pico® remote control
(optional)
If you would like to pair a Pico® remote control to the Caséta® Wireless
in-wall dimmer, please follow the procedure described in the quick-start
guide that came with your dimmer.
If available, connect the neutral wire
from the wallbox to the white wire on the
dimmer. If neutral is not available, cap the
white wire with a wire connector.
Neutral required for: MLV loads, LED
drivers, PHPM-PA, PHPM-3F, GRX-TVI.
12b
Modify wiring for existing toggle switch
Location 2
Different Color Screw /
Tagged Wire
Jumper wire
(included in box)
Noted wire color
from Step 8
Remaining wire
Ground
(Green / Bare
Copper)
Loading ...
Loading ...
Loading ...