Loading ...
Loading ...
Loading ...
Emergencies
Note
There is also a valve mark on the back of
the central wheel trim that indicat
es the
correct alignment.
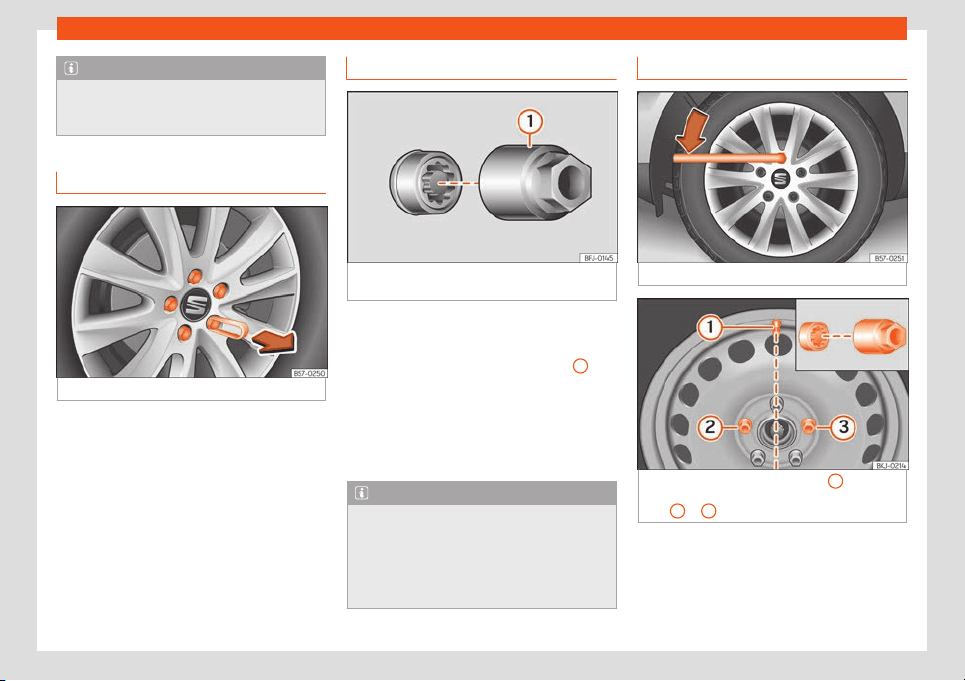
Wheel bolt caps*
Fig. 33
Wheel: wheel nuts with caps.
Removal
●
Fit the plastic clip (vehicle tools
›
›
›
Fig. 30)
over the cap until it clicks into place
›››
Fig. 33.
●
Remove the cap with the plastic clip.
The caps protect the wheel nuts and should
be remounted after changing the tyre.
The anti-theft wheel locking bolt has a
special cap. This only fits on anti-theft locking
bolts and is not for use with standard wheel
nuts.
Anti-theft wheel nuts
Fig. 34
Anti-theft wheel bolt with cap and
adapt
er
.
Loosening the anti-theft wheel bolt
●
Remove the wheel cover* or the cap*.
●
Insert the special adapter
›
›
›
Fig. 34
1
(ve-
hicl
e t
ools
›››
page 40) onto the anti-theft
wheel bolt and push it on as far as it will go.
●
Insert the wheel brace (vehicle tools) onto
the adapter as far as it will go.
●
Remove the wheel bolt
›››
page 44.
Note
Make a note of the code number of the an-
ti-theft wheel bolt and keep it in a saf
e
place, but not in your vehicle. If you need a
new adapter, you can obtain it from the
SEAT Official Service, indicating the code
number.
Loosening wheel nuts
Fig. 35
Wheel change: loosen the wheel nuts.
Fig. 36
Wheel change: tyre valve
1
and the
corr
ect position f
or the anti-theft wheel locking
bolt
2
or
3
.
Use only the wheel wrench belonging to the
car t
o l
oosen the wheel nuts.
Loosen the wheel nuts only about one turn
before raising the vehicle with the jack.
44
Loading ...
Loading ...
Loading ...