Loading ...
Loading ...
Loading ...
Towing bracket device*
●
L
e
ver
›››
Fig. 184
C
is in the lower position.
When adjust
ed in this w
ay, the tow hook is
ready to be installed.
CAUTION
The key cannot be removed or turned in the
standby position.
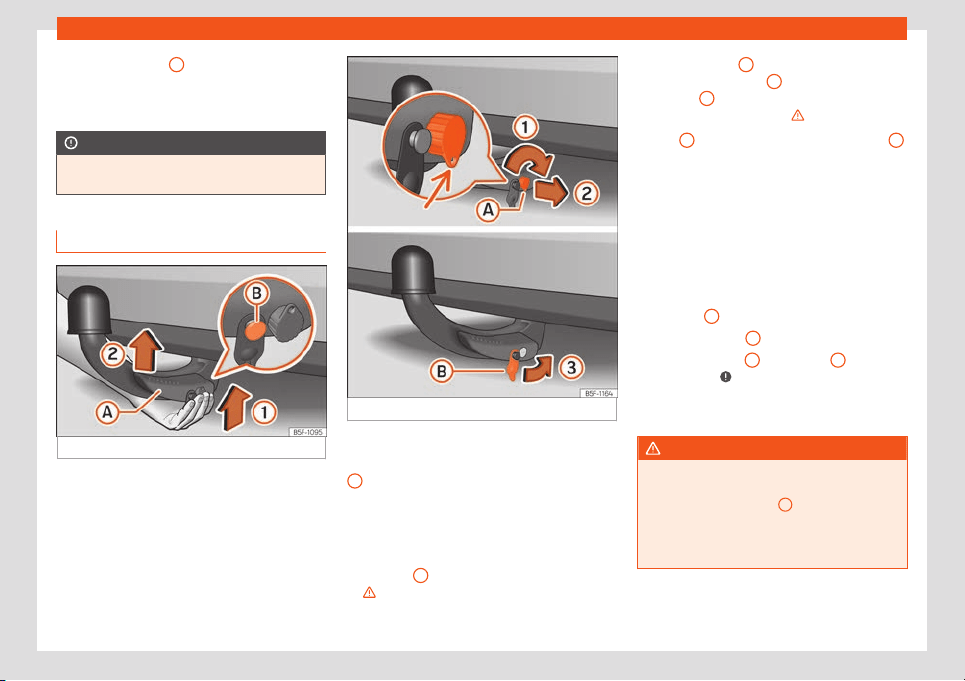
Fitting the tow hook
Fig. 185
Putting the tow hook in place. Step 1.
Fig. 186 Putting the tow hook in place. Step 2.
Step 1.
●
Remove the hook housing cap
›
›
›
Fig. 182
4
downwards.
●
Put the tow hook in its standby position
›
›
›
page 262.
●
Hold the tow hook from below and fit it into
the hook hosing in the direction of the arrow
›››
Fig. 185
1
until it is heard to fit into place
›
›
›
.
Lever
›
›
›
Fig. 185
A
aut
omatically turns in
the dir
ection of arrow
2
upwards, and the re-
l
ease bolt
B
moves outwards (its red and
gr
een parts ar
e visible)
›››
.
If l
e
ver
A
does not turn or the release bolt
B
does not come out, the tow hook should be
r
emo
ved by turning the lever as far as possi-
ble downwards from the housing cavity, and
the tow hook’s support surfaces and the cavi-
ty should then be cleaned.
Step 2.
●
Turn the key to the right just half a turn, until
the hole in the key faces downwards
›››
Fig. 186
1
.
●
Remove the key
2
.
●
Place the cover
B
on the lock
3
›››
Fig. 186
›
››
.
●
Check that the tow hook is correctly fixed in
pl
ace
›
››
page 264, Safety check.
WARNING
●
Keep your hands aw
ay from the lever
when fitting the tow hook to avoid trapping
your fingers
›››
Fig. 185
A
.
●
Do not try to force the lever up to turn the
key. The det
achable ball would not be se-
cured properly!
»
263
Loading ...
Loading ...
Loading ...