Loading ...
Loading ...
Loading ...
Information
41
Turn off the projector and pull the power plug from
the power outlet. Place the projector on table or
somewhere with a flat surface.
Let the lamp cool for one hour before touching it.
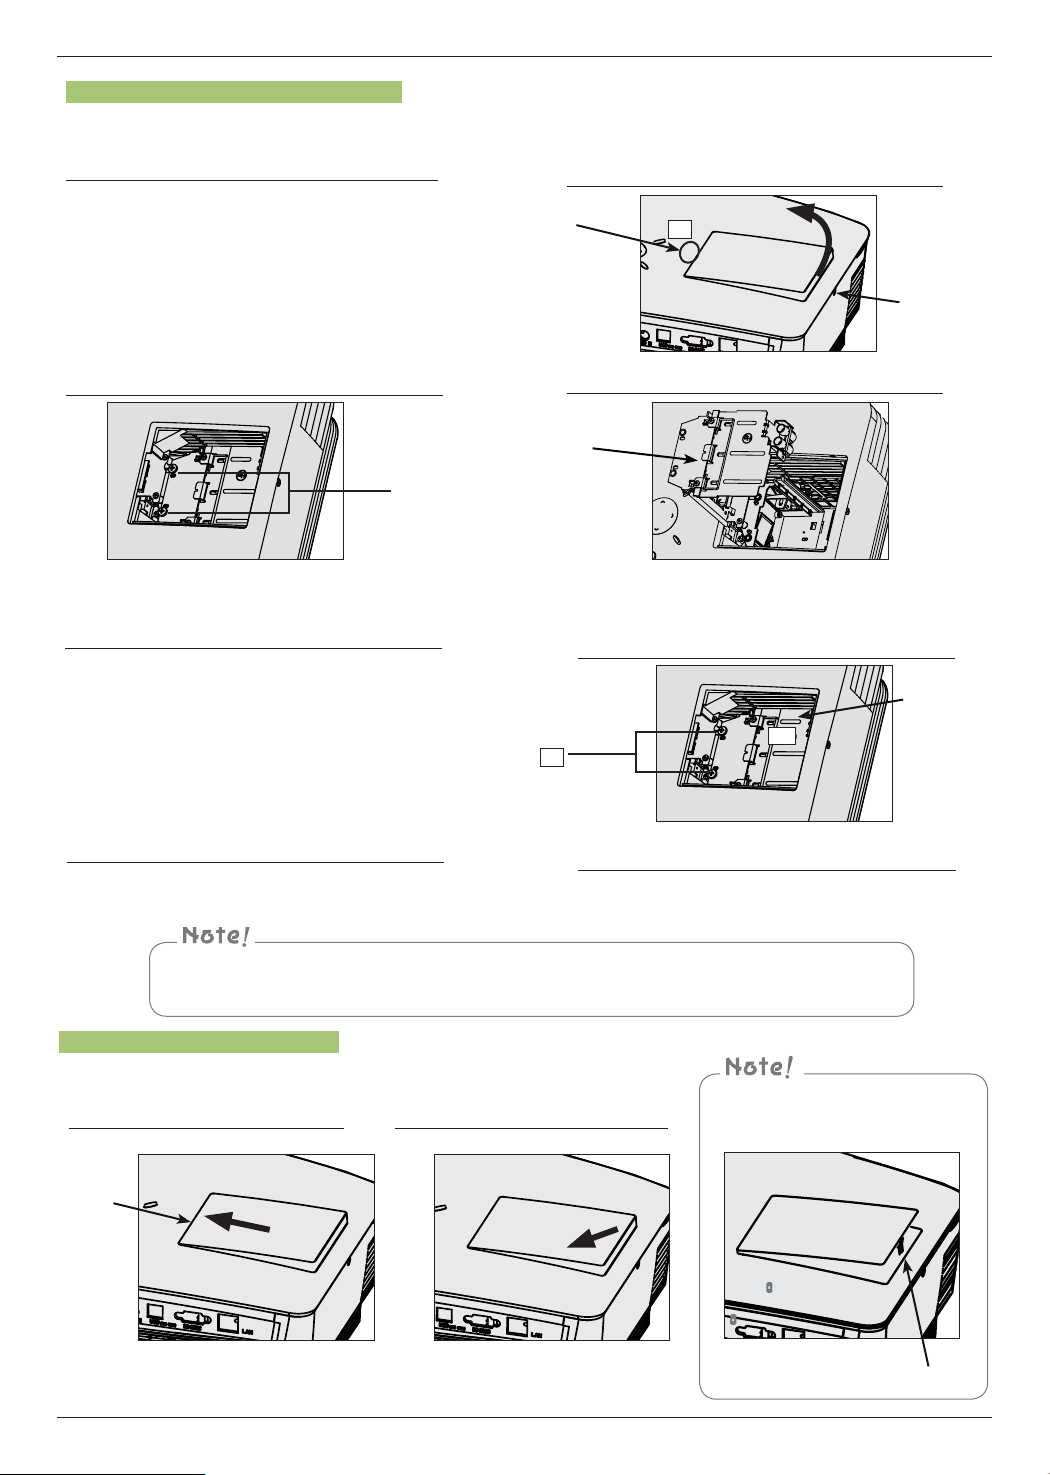
Loosen screws on the side using a screwdriver. Lift
up the lamp cover in the direction of the arrow.
Do not pull the cover in the vertical direction.
Press “A” if the lamp cover does not lift up.
Open lamp cover and loosen the two screws
holding the lamp in.
1
3
2
6
Insert the new lamp case in carefully. Check if it is
inserted correctly. Check if “B” part is inserted
correctly and press “C” part again to verify the new
lamp is inserted completely.
7
Replace the screws removed in step 3.
8
Close the lamp cover and replace the screws removed
in step 2.
The projector will not operate when the lamp cover is
open. A green warning lamp indicates the projector
will not start due to the cover being open.
Lamp cover
fixing screw
Pull the lamp handle from the sill.
4
Open lamp cover to change lamp
Please use appropriate lamp for the model.
Projector might not be turned on if the lamp cover is not closed correctly after replacement. In this
case, please contact our service representative after checking if the lamp is fixed correctly.
5
Pull the lamp out slowly using the handle
attached to it.
Press here.
A
Screw
Knob
To re-assemble lamp cover
Press the lamp cover against the
support line. Maintain a slope of
about 30°.
1
support
line.
Do not push vertically. Push
diagonally to insert.
2
Do not over-tighten the side screws.
Do not apply unreasonable force to
the tab below during replacement
tab
Press here.
C
B
Loading ...
Loading ...
Loading ...