Loading ...
Loading ...
Loading ...
perlick customer service (800)558-5592 | 15
PERLICK RESIDENTIAL ICE MAKER MANUAL
INSTALLATION INSTRUCTIONS
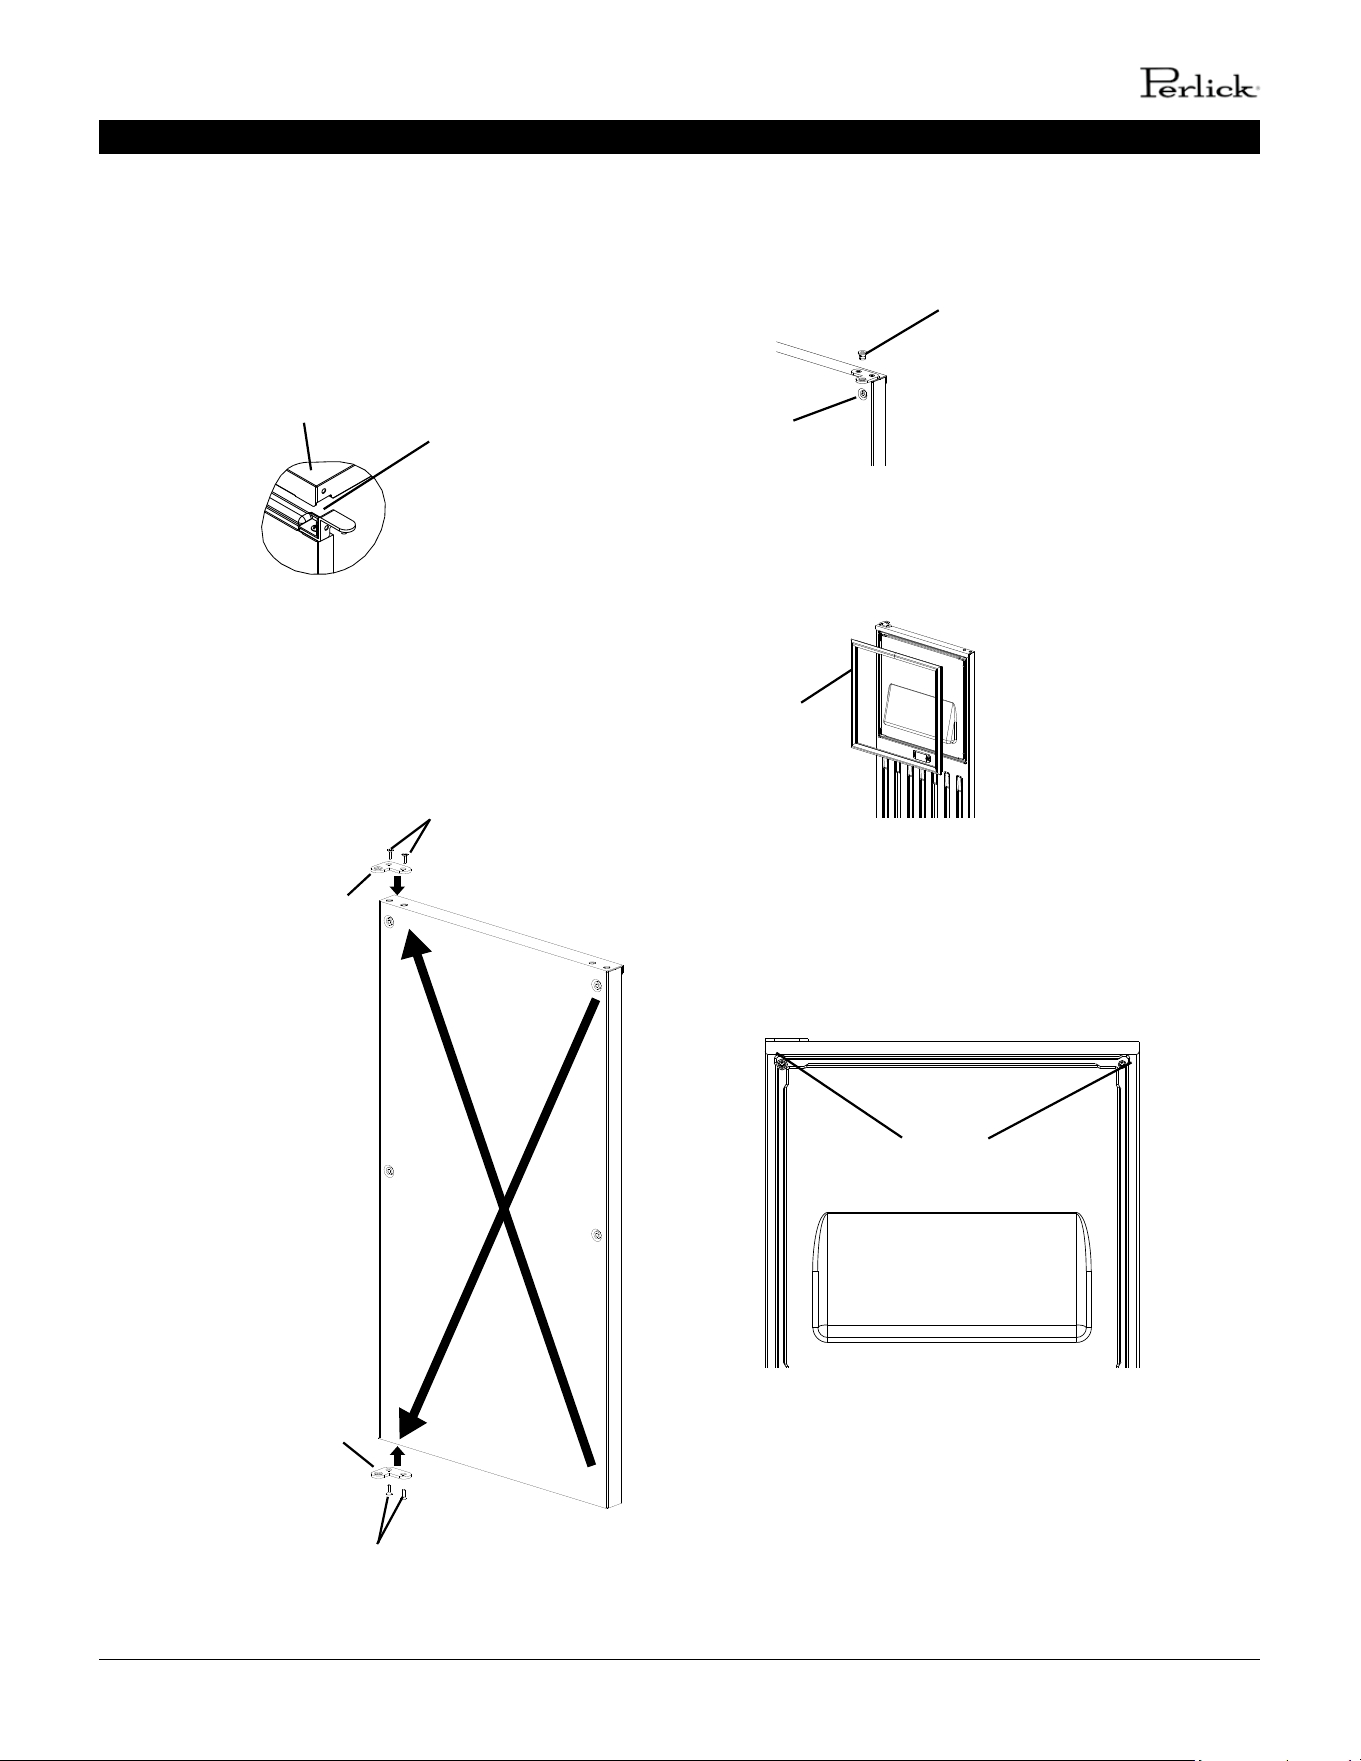
Fig. 7
Top Panel
Notch
Fig. 8
Screws
Hinge (C2)
Hinge (C1)
Screws
9. Rotate the top panel 180° from its previous posion. This
brings the notch that was previously in the right rear to
the le front. See Fig. 7. Hook the rear part of the panel
on the body, then secure the front with the 2 screws
removed in step 6a.
10. Remove hinge (C1) from the top right part of the door, ip
it and reaach to the boom le. Remove hinge (C2) from
the boom right part of the door, ip it and reaach to
the top le. See Fig. 8.
11. Remove the bushings from hinge (C1) and hinge (C2)
(the hinges aached to the door). See Fig. 9.
12. Remove the gasket from the door. See Fig. 10.
Fig. 11
Fig. 10
13. Temporarily fasten the overlay panel to the overlay
panel to the door using 2 of the M4x25 pan head screws
provided. See Fig. 11.
Fig. 9
Hinge
Bushing
Gasket
Screws
Loading ...
Loading ...
Loading ...