Loading ...
Loading ...
Loading ...
14 | perlick.com/residential
PERLICK RESIDENTIAL ICE MAKER MANUAL
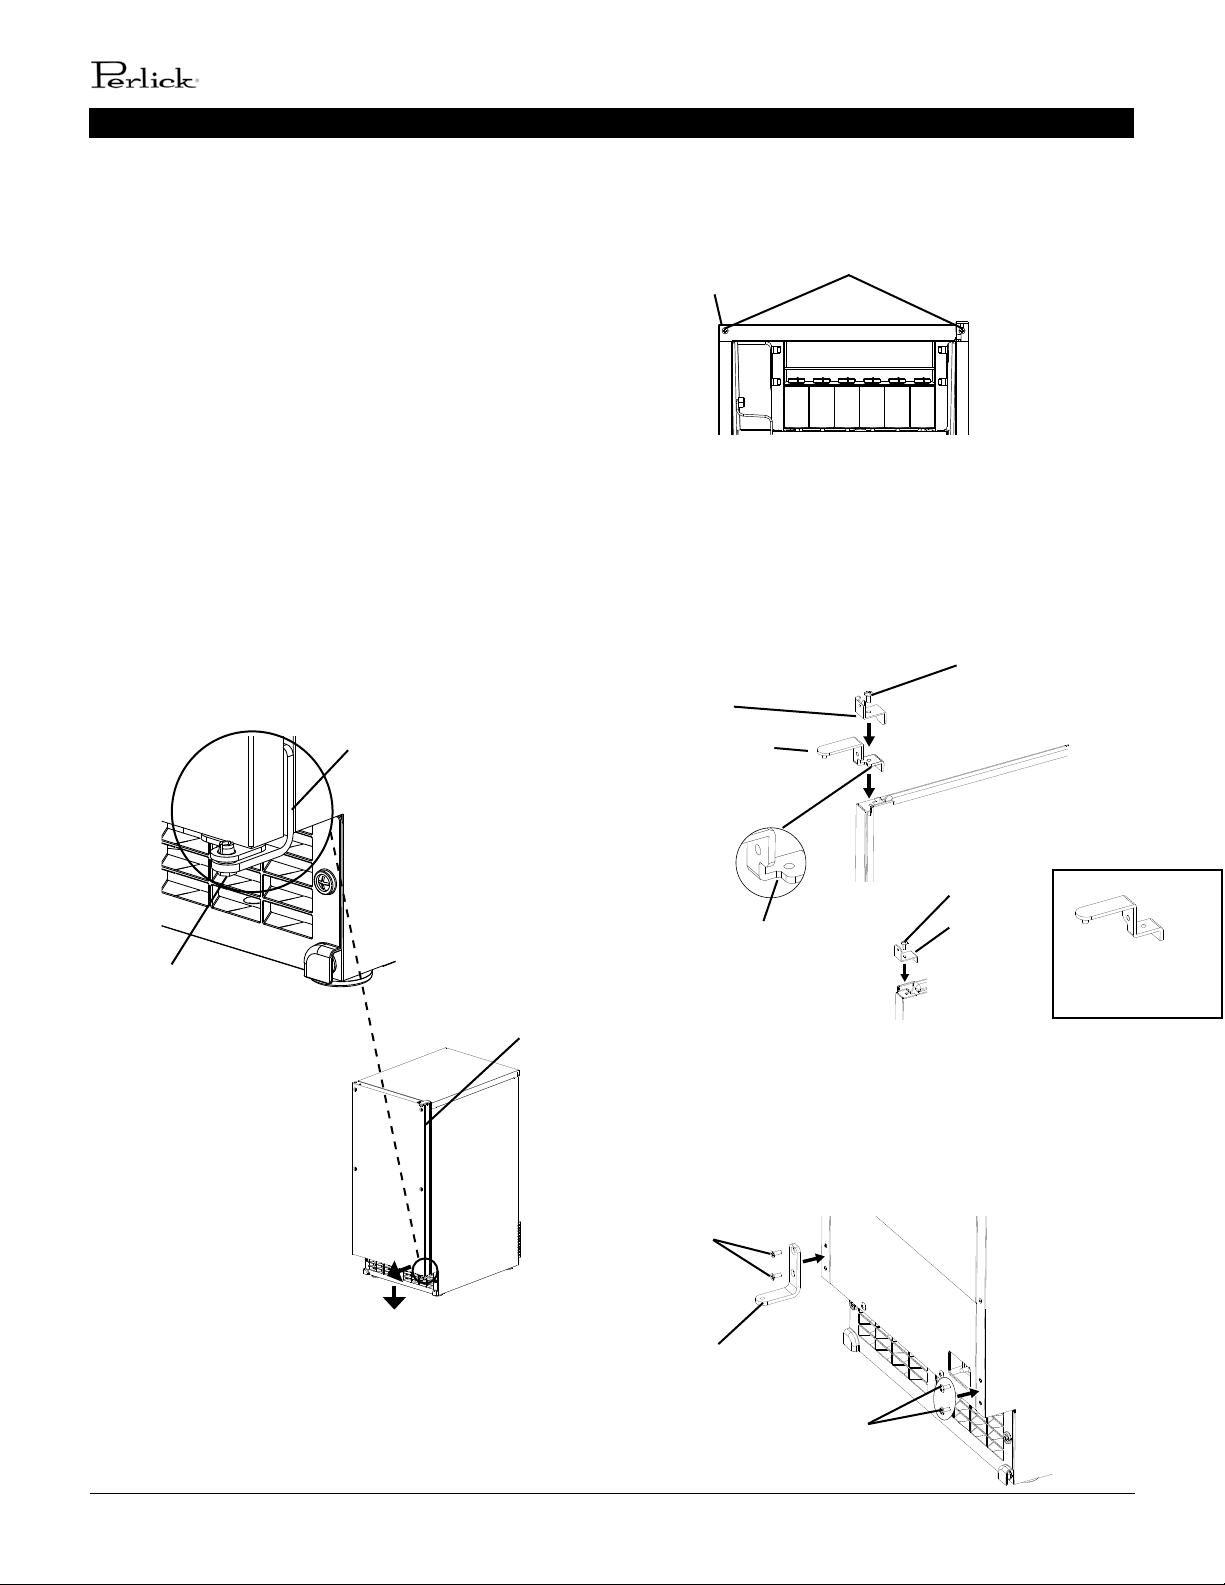
3. Screw the 6 threaded wood inserts into the 1/4” holes
drilled in the previous step. Make sure that the inserts
are threaded straight and that the tops of the inserts
are ush to the overlay panel surface. Otherwise, the
overlay panel cannot be properly fastened to the door.
4. Mount the door handle hardware. Perlick recommends
that the door handle hardware be mounted on the
edge opposite of the door hinge side (oponal hinge
reversal is covered in step 6. Countersunk screw heads
are required to ensure that the hardware fasteners do
not interfere with the overlay panel ng ush with
the door.
5. While maintaining a hold on the door, remove the
hinge stop pin from hinge (B). Pull out the boom of
the door slightly and gently remove the door from
hinge (A) (See Fig. 3). If you are leaving the door right
hinged, skip to step 7. If you would like to reverse the
door hinges, proceed to step 6.
Fig. 3
Hinge Stop Pin
Hinge (B)
Hinge (A)
INSTALLATION INSTRUCTIONS
6. Remove hinge (A)-le from the accessory bag. Remove the
2 screws securing the top panel, then li it o. (See Fig. 4).
7. Remove hinge (A)-right and the bracket from the right
side of the unit. Set aside hinge (A)-right; it is not needed.
Remove the top brace from the le side. Fasten hinge (A)-
le and the bracket to the le side and the top brace to
the right side. See Fig. 5. Note: When on the proper side,
the gasket notch for hinge (A) is to the inside.
Hinge (A)-Right
Not Needed
Hinge (B)
Screws
Filler
Screws
Fig. 6
Fig. 4
Top Panel
Screws
Fig. 5
Gasket Notch
Bracket
Screw
Hinge (A) Le
8. Remove hinge (B) from the right side of the unit and the 2
ller screws from the le side. Aach the 2 ller screws to
the right side and aach hinge (B) to the le side.
(See Fig. 6).
Screw
Top Brace
Loading ...
Loading ...
Loading ...