Loading ...
Loading ...
Loading ...
11Get Started
Pro 3 Floodlight Camera
User Manual
Prep: Check the LED
The LED lights when your oodlight is powered on. The LED changes color and blinks
depending on the battery charge and to indicate the status of activities such as pairing the
camera and updating the camera rmware.
• Slow blinking blue. The oodlight is in the process of pairing.
• Fast blinking blue. The oodlight successfully paired.
• Blinking amber. The oodlight is out of range, an error occurred during pairing, or the
battery charge is low (15% or less).
• Alternating blue and amber. The oodlight failed to pair, or a rmware update is in
process, or a reset is in process.
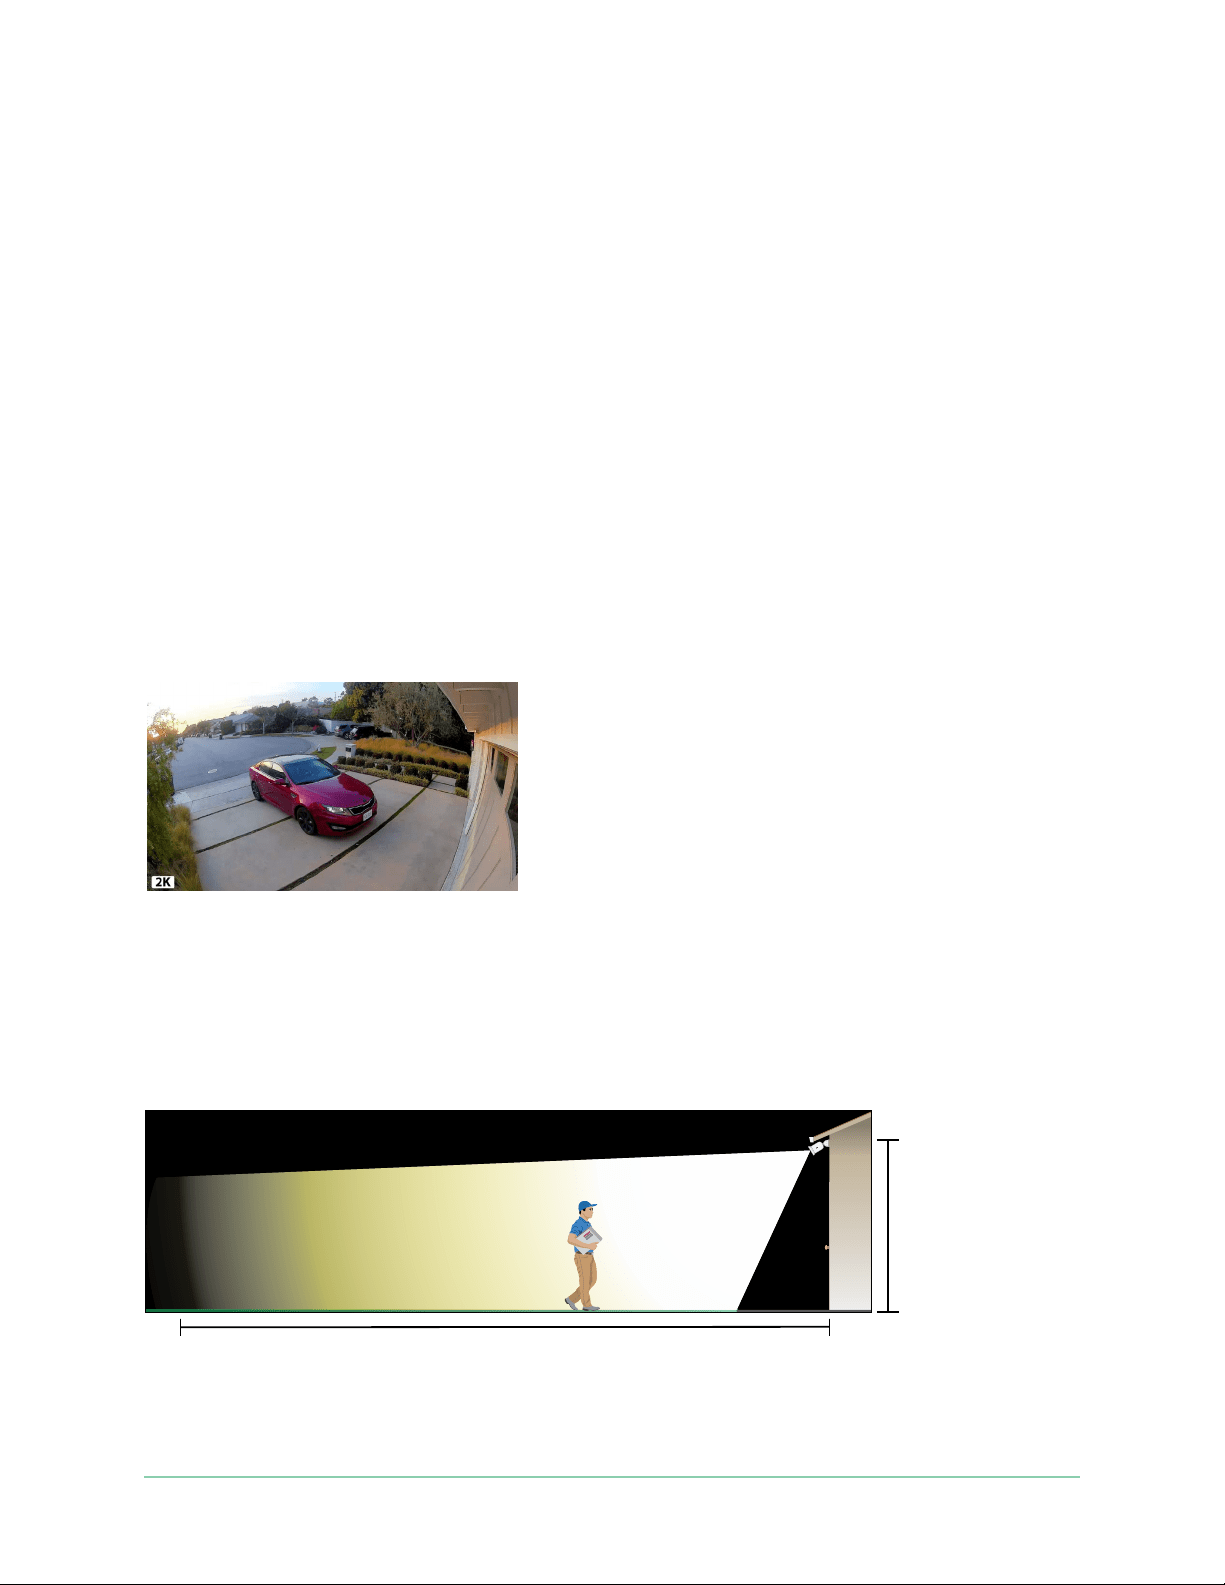
Prep: Find a good location for your oodlight
Select a location for your oodlight with a clear vantage point to fully optimize the wide eld
of view.
For the best experience, choose a location with a strong WiFi signal. You can check the WiFi
signal strength in the Arlo app. For information about WiFi connections, see WiFi connection
options for your floodlight on page 18.
We recommend mounting your oodlight 8-10 feet (2.5-3 meters) o the ground, angled
toward the ground. Each home system setup is unique, so use these guidelines as general
best practices.
This illustration shows the oodlight’s beam spread within the camera’s eld of view. The area
lit by the oodlight extends beyond what is shown here.
26.2 ft (8 m)
8.2-9.8 ft
(2.5-3 m)
40˚camera tilt
Loading ...
Loading ...
Loading ...