Loading ...
Loading ...
Loading ...
Suspension
(cont’d)
Servicing Your Honda 91
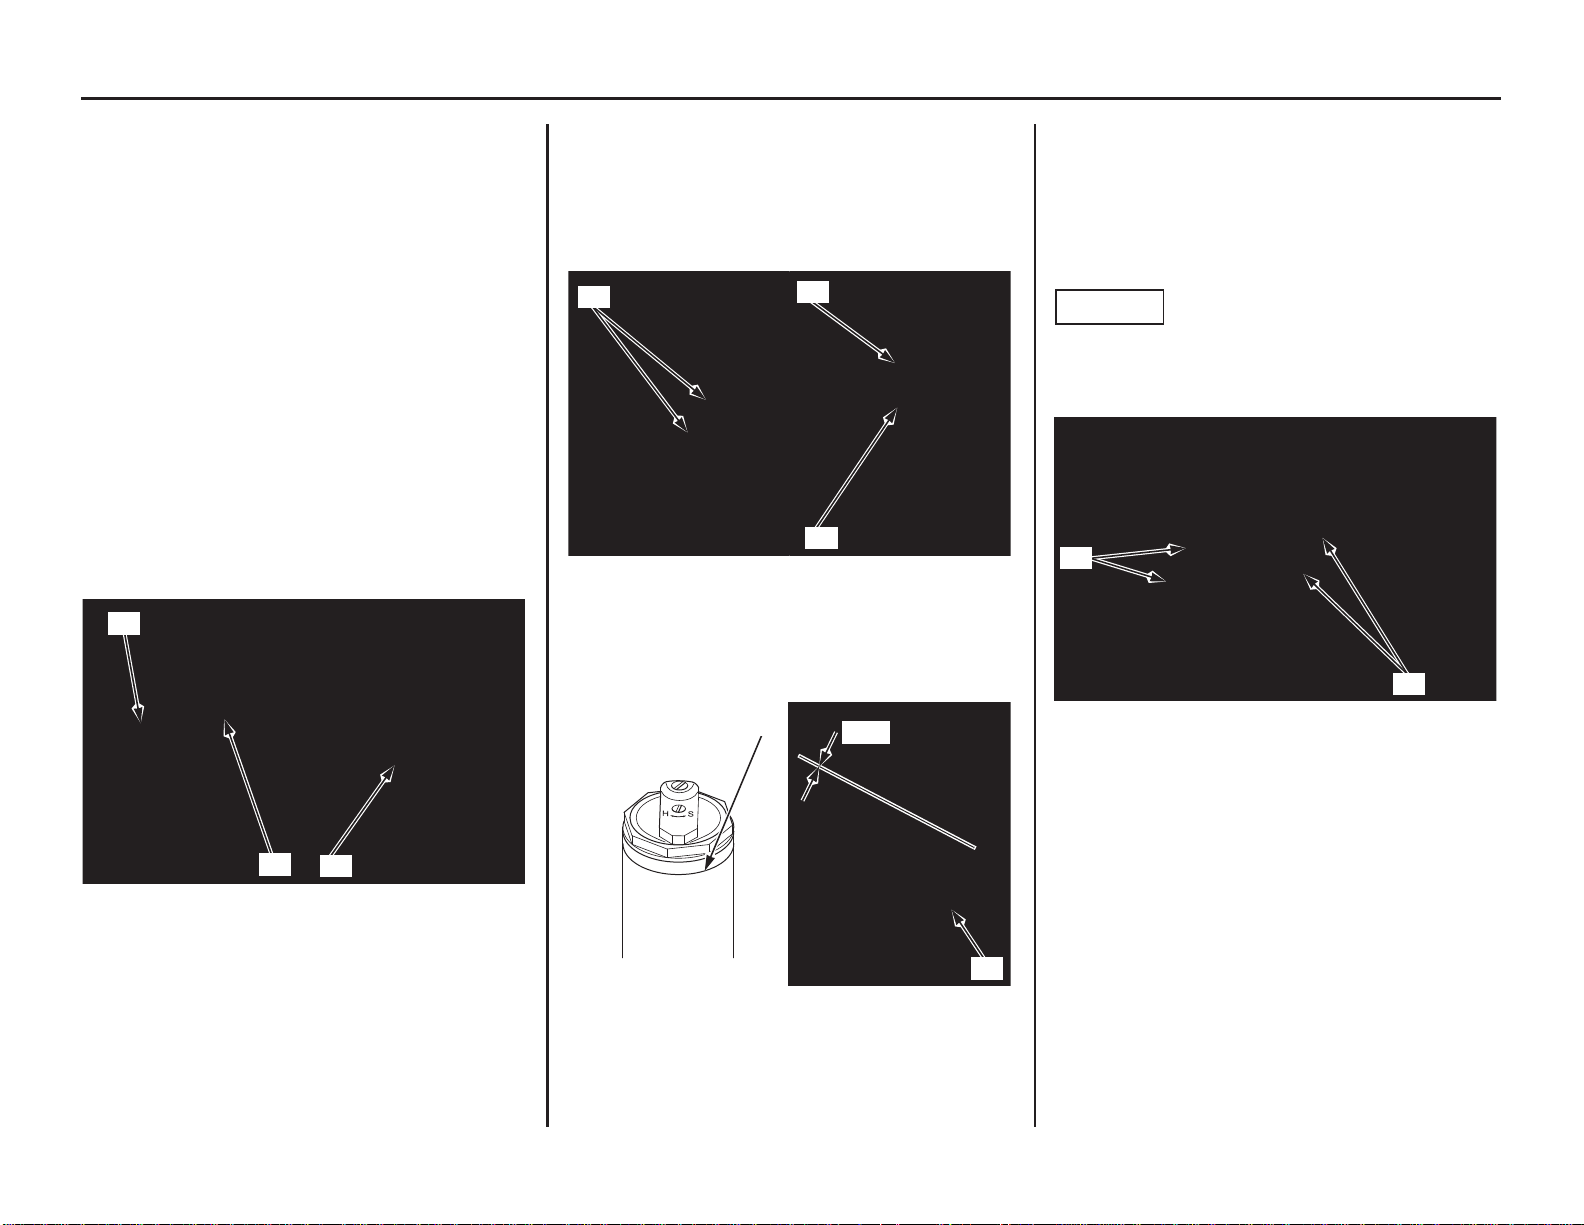
2. Tighten the fork damper assembly (2) to the
specified torque using the lock nut wrench (3):
Actual:
56 lbf·ft (76 N·m, 7.7 kgf·m)
Torque wrench scale reading:
51 lbf·ft (69 N·m, 7.0 kgf·m), using a 20 in
(500 mm) long deflecting beam type torque
wrench.
• Lock nut wrench 07WMA-KZ30100
When using the lock nut wrench, use a 20 in (500
mm) long deflecting beam type torque wrench.
The lock nut wrench increases the torque wrench’s
leverage, so the torque wrench reading will be less
than the torque actually applied to the fork damper
assembly.
3. Tighten the fork bolt assembly (4) to the
specified torque:
22 lbf·ft (30 N·m, 3.1 kgf·m)
4. For ease of releasing air pressure after the forks
are installed, loosen the fork bridge lower
pinch bolts (1) and position the outer tubes so
that the fork air pressure release screws (5) are
in front of the compression damping adjuster
(6).
5. Align the groove (7) in the outer tube with the
top surface of the upper fork bridge (8).
6. Tighten the fork bridge lower pinch bolts (1) to
the specified torque:
15 lbf·ft (20 N·m, 2.0 kgf·m)
7. Tighten the fork bridge upper pinch bolts (9) to
the specified torque:
16 lbf·ft (22 N·m, 2.2 kgf·m)
NOTICE
Over-tightening the pinch bolts can deform the
outer tubes. Deformed outer tubes must be
replaced.
(2) fork damper assembly
(3) lock nut wrench
(4) fork bolt assembly
(4)
(2)
(3)
(1) fork bridge lower pinch bolts
(5) pressure release screw
(6) compression damping adjuster
(7) groove (8)
upper fork bridge
(6)
(5)
(1)
Align
(7)
(8)
(1) fork bridge lower pinch bolts
(9) fork bridge upper pinch bolts
(1)
(9)
Loading ...
Loading ...
Loading ...