Loading ...
Loading ...
Loading ...
4. Select a setting item using the up/down side of the control wheel or by turning the
control wheel, then press in the center.
5. Set [Daylight Savings], [Date/Time], and [Date Format] using the up/down/left/right
sides, then press in the center.
Midnight is indicated as 12:00 AM, and noon as 12:00 PM.
6. Repeat steps 4 and 5 to set other items, then select [Enter] and press in the center.
To cancel the date and time setting procedure, press the MENU button.
Note
This camera does not have a function for inserting the date on images. You can insert the
date on images and then save and print them using PlayMemories Home.
If the date and time setting is cancelled halfway, the setting screen for the date and time
appears every time you turn on the camera.
[26] How to Use
Confirming the operation method Confirming the operation method
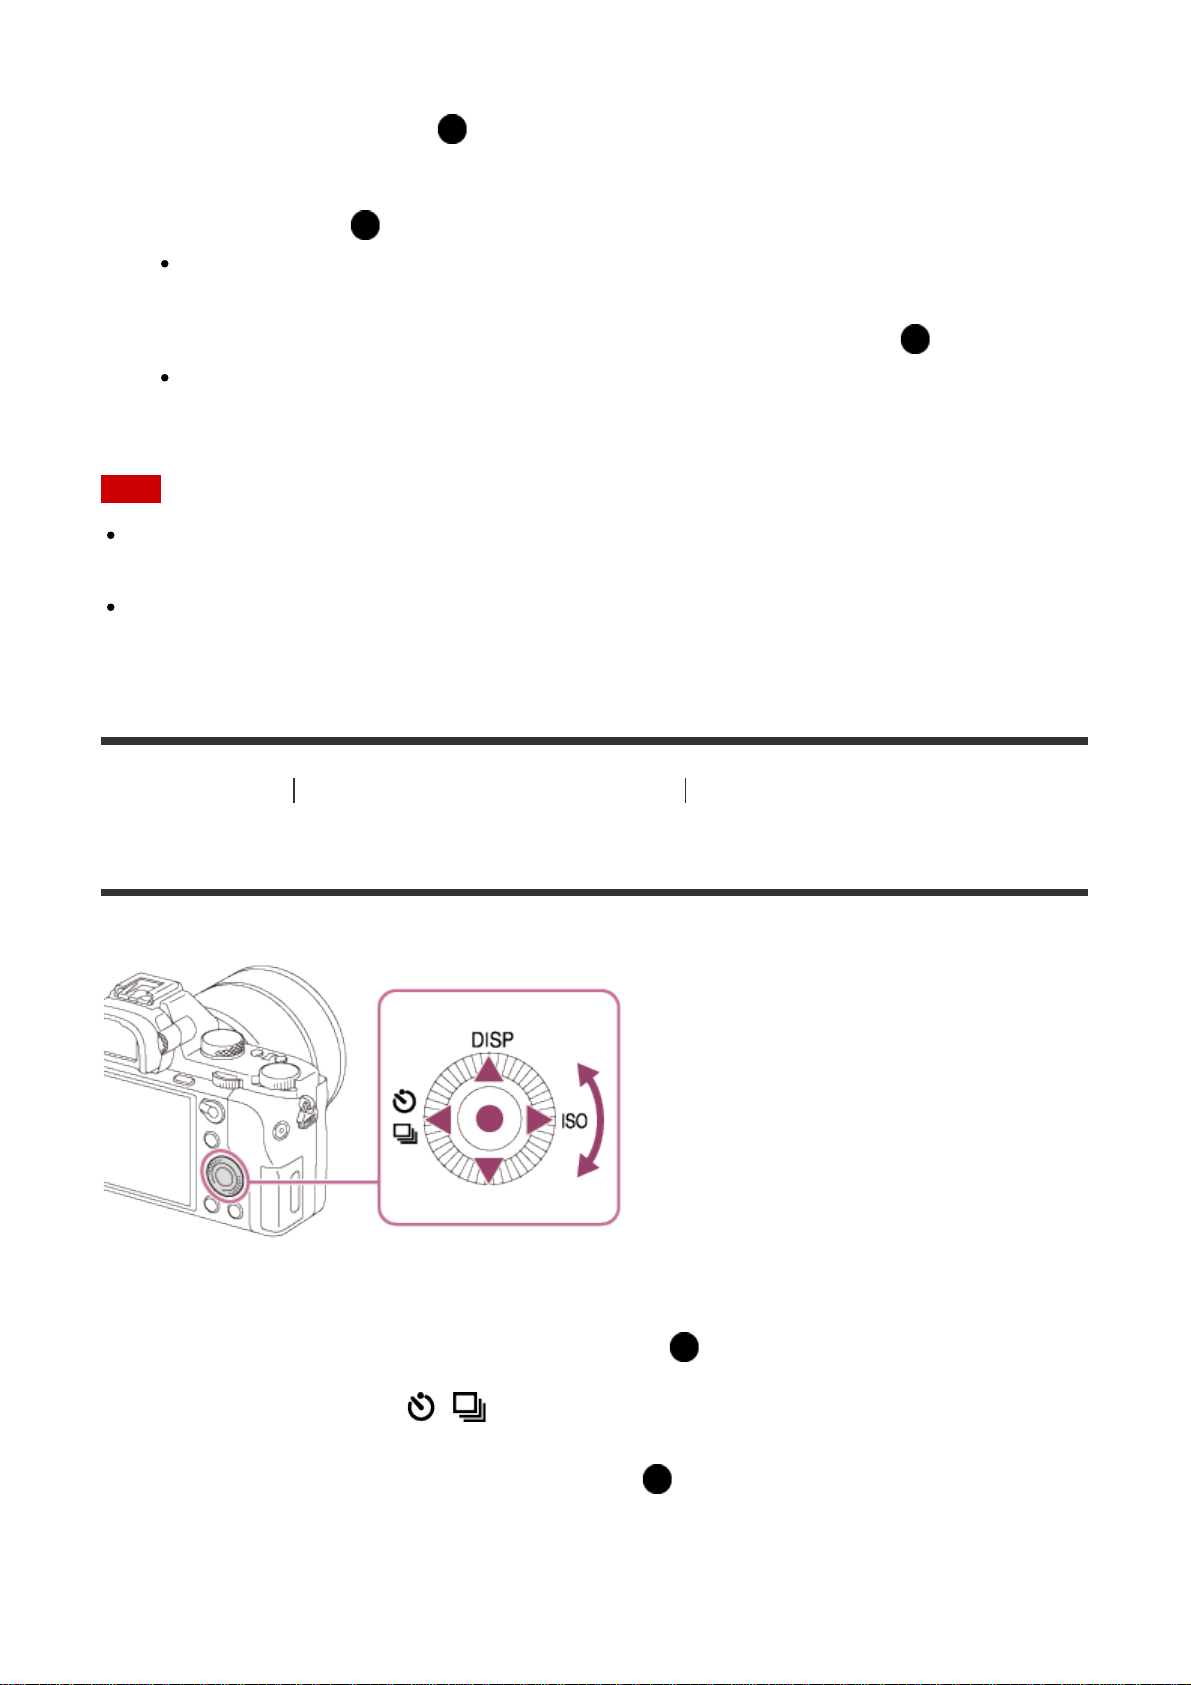
Using the control wheel
You can select setting items by turning or pressing the top/bottom/right/left side of the control
wheel. Your selection is determined when you press on the center of the control wheel.
The DISP (Display Setting), / (Drive Mode), and ISO (ISO) functions are assigned to
the top/left/right side of the control wheel. In addition, you can assign selected functions to
the left/right/bottom side of the control wheel or to in the center, and to the rotation of
the control wheel.
During playback, you can display the next/previous image by pressing the right/left side of
Loading ...
Loading ...
Loading ...