Loading ...
Loading ...
Loading ...
35 36
Assembly - JB & DB
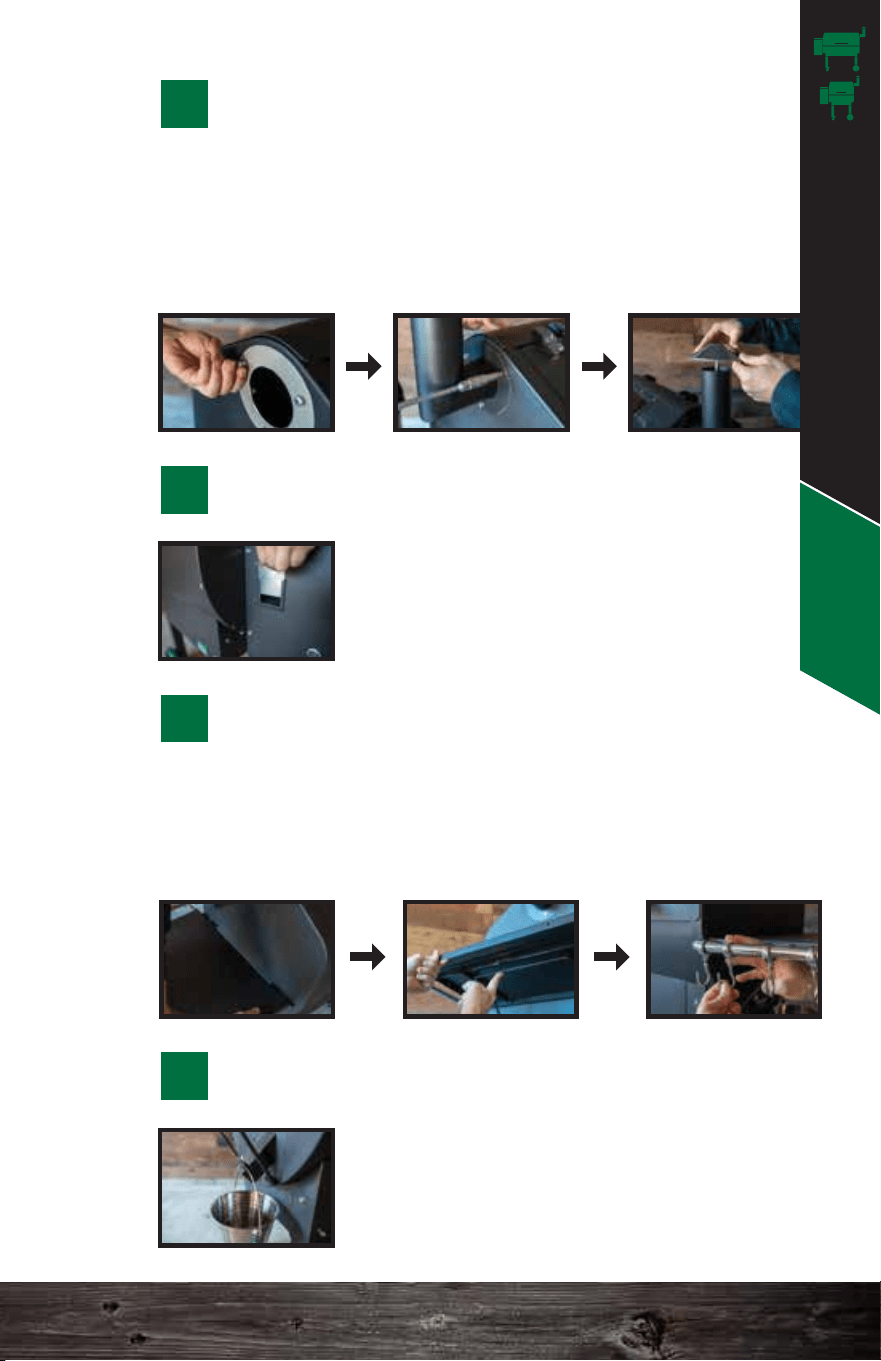
GREASE TRAY
Insert the grease tray with the circle
cutout on the LEFT SIDE near the
thermal sensor and the half-moon
cutout on the RIGHT SIDE.
GRILL GRATES
Insert the grates so that they sit flush
with the back and front edges of the
grill surface.
Slide the stainless steel door into the
door slot. ALWAYS make sure the
door is shut before filling the hopper
with pellets and while the grill is on.
Make sure the grease tray is installed
correctly to ensure proper grease
drainage and thermal sensor reading.
HEAT SHIELD ADJUSTER
Insert the rod into the hole on the right
side of the grill to align and thread into
the right side of the heat shield.
Secure each end of the handle with a thermal insulation
washer between the stainless handle base on the outside
and the metal lid. Insert another one between the bolt and
the metal lid on the inside. This will prevent the handle from
becoming too hot during operation.
INSTALL THE LID HANDLE
9
Line up the bullets with the pins on the side of the grill and
slide to the right. Lift up the side tray support, underneath the
side tray, and push the side tray down to snap it into place.
Fasten the nuts on the hanger hooks to lock them in place.
INSTALL THE SIDE SHELF
Unscrew the 3 bolts from the side of the grill. Install the
chimney using those 3 bolts. Make sure the gasket is
between the chimney and the grill. Finally, twist on the
chimney cap. Make sure there is at least a 1.5 in. open
gap for proper ventilation.
INSTALL THE CHIMNEY
10
INSERT THE PELLET DUMP DOOR
11
Hang the bucket properly on the slot of
the drip spout underneath the side tray.
INSTALL THE DRIP BUCKET
13
12
CIRCLE
LEFT SIDE
HALF-MOON
RIGHT SIDE
Jim Bowie & Daniel Boone Assembly
Loading ...
Loading ...
Loading ...