Loading ...
Loading ...
Loading ...
Chapter 4: Installing the Gateway
PN 365-095-31684 x.1 SURFboard SBG6950AC2 & SBG7400AC2 Wireless Gateway User Guide
Copyright 2017, ARRIS Enterprises, LLC. All rights reserved. 19
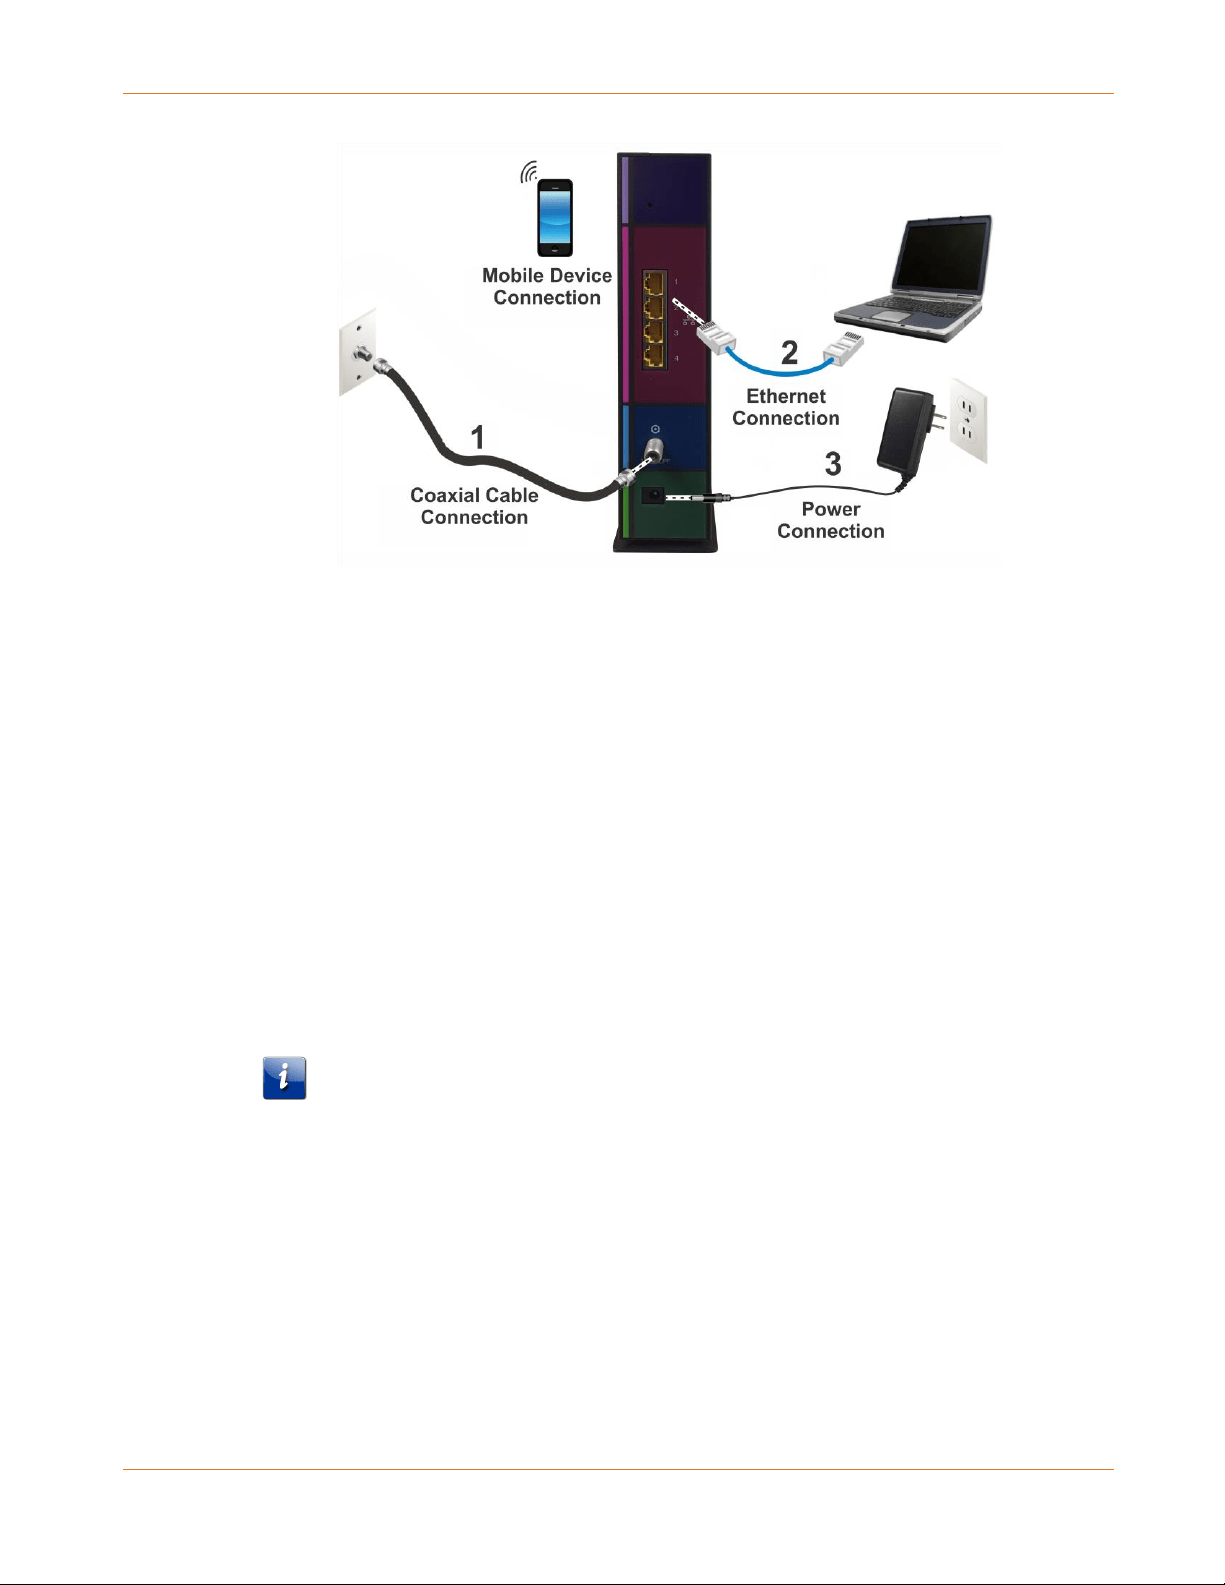
Figure 4: Wireless Gateway Connection Diagram
1. Check that a coaxial cable is already connected to a cable wall outlet or RF splitter (not
included).
2. Connect the other end of the coaxial cable to the Cable connector on the rear of your
wireless gateway.
Use your hand to tighten the connectors to avoid damaging them.
3. Connect the Ethernet cable to an available Ethernet port on the rear of your wireless
gateway.
4. Connect the other end of the Ethernet cable to the Ethernet port on your computer.
Optional: Repeat steps 3 and 4 for an additional computer or other network device that
you want to install as a wired connection on your home network.
5. Connect the power cord to the Power port on the rear of your wireless gateway.
6. Plug the other end of the power cord into an electrical wall outlet that is not controlled by
a wall switch.
Note: This automatically powers ON your wireless gateway. There may be up to a 15
second delay for the Power LED on the gateway front panel to light up after the
power is connected.
Establish an Internet Connection
Although your computer may already be configured to automatically access the Internet, you
should still perform the following gateway connectivity test to verify that the devices were
connected properly.
1. Power ON the computer connected to your wireless gateway if it is turned off, and then
log in.
Loading ...
Loading ...
Loading ...