Loading ...
Loading ...
Loading ...
(11) throttle body (13) insulator band screw
(12) insulator
7. Set the rear shock absorber (14) and install the
rear shock absorber upper bolt (15) and nut
(16).
Tighten the rear shock absorber upper nut to
the specified torque:
32 lbf·ft (44 N·m, 4.5 kgf·m)
84 Servicing Your Honda
Piston/Piston Rings/Piston Pin
(17) radiator hose
(18) water hose joint
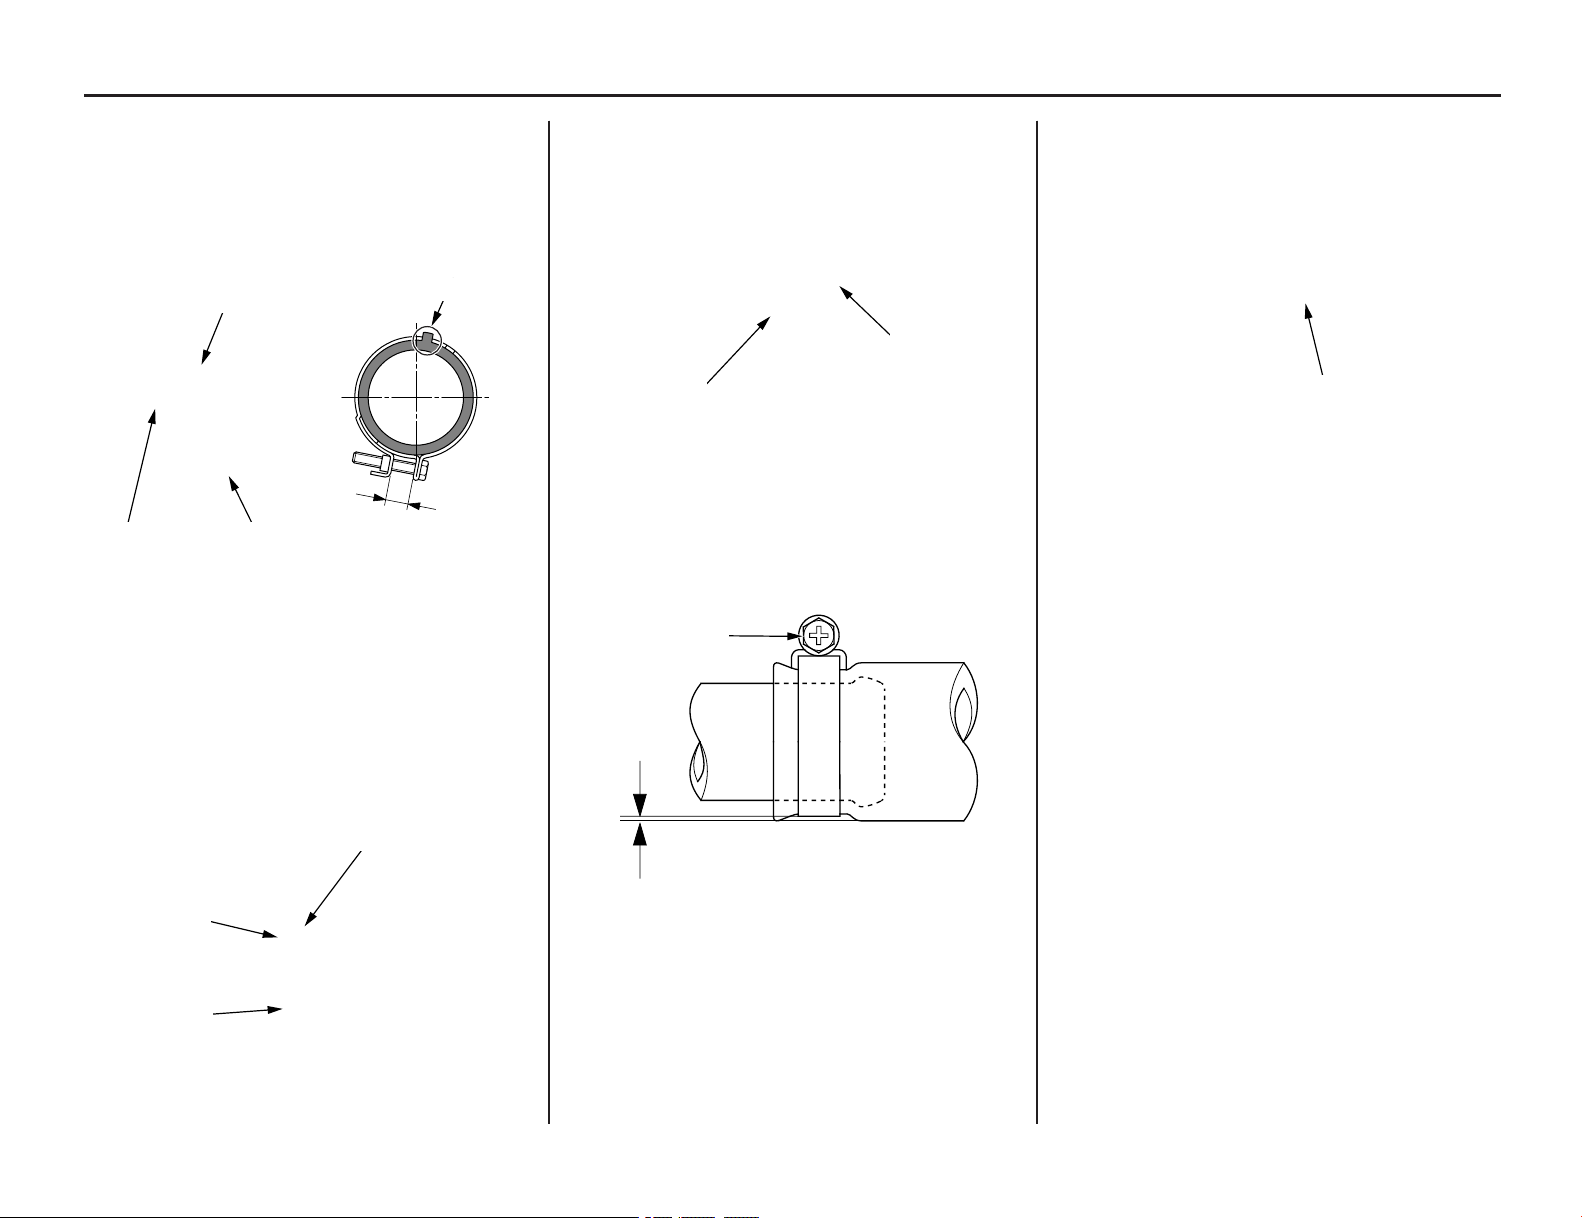
9. Tighten the radiator hose clamp screw (19) as
illustrated below.
(19) radiator hose clamp screw
(19)
0 – 0.04 in
(0 – 1.0 mm)
(16)
(15)
(14)
(14) rear shock absorber (16) nut
(15) rear shock absorber upper bolt
8. Connect the radiator hose (17) to the water
hose joint (18) of the cylinder head.
(17)
(18)
10. Connect the ECT sensor connector (20).
(20) ECT sensor connector
11. Install the shims, valve lifters, camshaft and
camshaft holder (page 73).
12. Install the crankshaft hole cap (page 75).
13. Install the cylinder head cover (page 75).
14. Install the spark plug (page 67).
15. Install the exhaust pipe (page 102).
16. Install the subframe (page 37) and muffler
(page 101).
17. Install the fuel tank and seat (pages 33, 35).
18. Fill and bleed the cooling system (page 143).
Check for the following:
– compression leaks
– abnormal engine noise
– secondary air leaks
– coolant leaks
– oil leaks
(20)
6. Install the throttle body (11) to the insulator
(12) by aligning the tab of the throttle body
with the groove of the insulator and tighten
the insulator band screw (13) so the distance
between the band ends is 0.43 ± 0.04 in (11.0 ±
1.0 mm).
(12)
(11)
(13)
0.43 ± 0.04 in
(11.0 ± 1.0 mm)
Align
Loading ...
Loading ...
Loading ...