Loading ...
Loading ...
Loading ...
Servicing Your Honda 37
Subframe
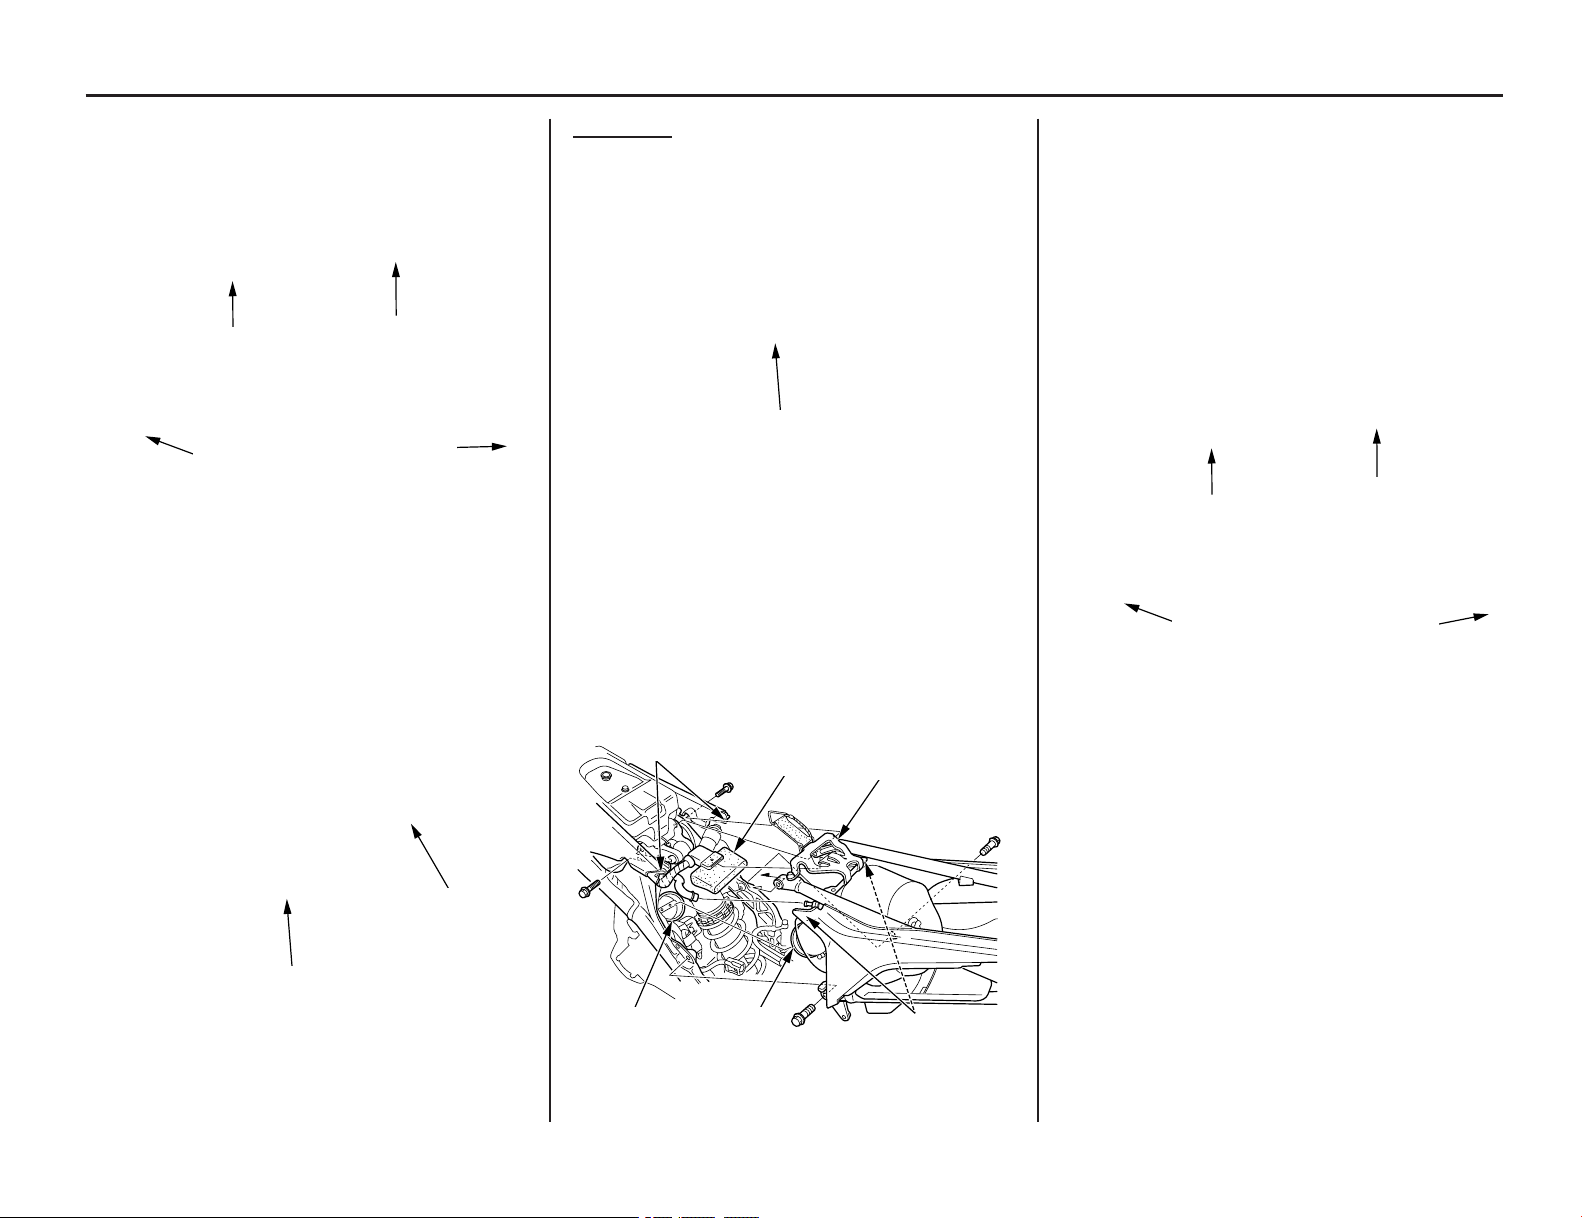
8. Remove the right subframe lower bolt (17)
and left subframe lower bolt (18).
Remove the subframe upper bolts (19).
(17) right subframe lower bolt
(18) left subframe lower bolt
(19) subframe upper bolts
9. Slightly pull the subframe (20) backward and
disconnect the crankcase breather tube (21)
from the air cleaner connecting tube.
Remove the subframe.
Be careful not to damage the ECM and wires.
(20) subframe
(21) crankcase breather tube
Right side:
(19)
(19)
(17)
(18)
Left side:
(21)
(20)
(1)
(1) crankcase breather tube
2. Position the ECM (2) in the bracket (3).
3. Align the shroud tabs (4) with the air cleaner
housing cover tabs (5).
4. Loosely attach the upper and lower end of the
subframe to the main frame while connecting
the air cleaner connecting tube (6) to the
throttle body (7).
5. Loosely install all subframe bolts.
Installation
1. Connect the crankcase breather tube (1).
(2) ECM (5) air cleaner housing cover tabs
(3) bracket (6) air cleaner connecting tube
(4) shroud tabs (7) throttle body
(2)
(3)
(7)
(6)
(5)
(4)
6. Align the subframe with the rear wheel and
tighten the subframe upper bolts (8), left
subframe lower bolt (9) and right subframe
lower bolt (10) to the specified torque:
subframe upper bolts:
24 lbf·ft (33 N·m, 3.4 kgf·m)
left subframe lower bolt:
24 lbf·ft (33 N·m, 3.4 kgf·m)
right subframe lower bolt:
36 lbf·ft (49 N·m, 5.0 kgf·m)
(8) subframe upper bolts
(9) left subframe lower bolt
(10) right subframe lower bolt
Right side:
(8)
(10)
(9)
Left side:
(8)
(cont’d)
Loading ...
Loading ...
Loading ...