Loading ...
Loading ...
Loading ...
1-4
BEFORE USING THE MACHINE
Contents
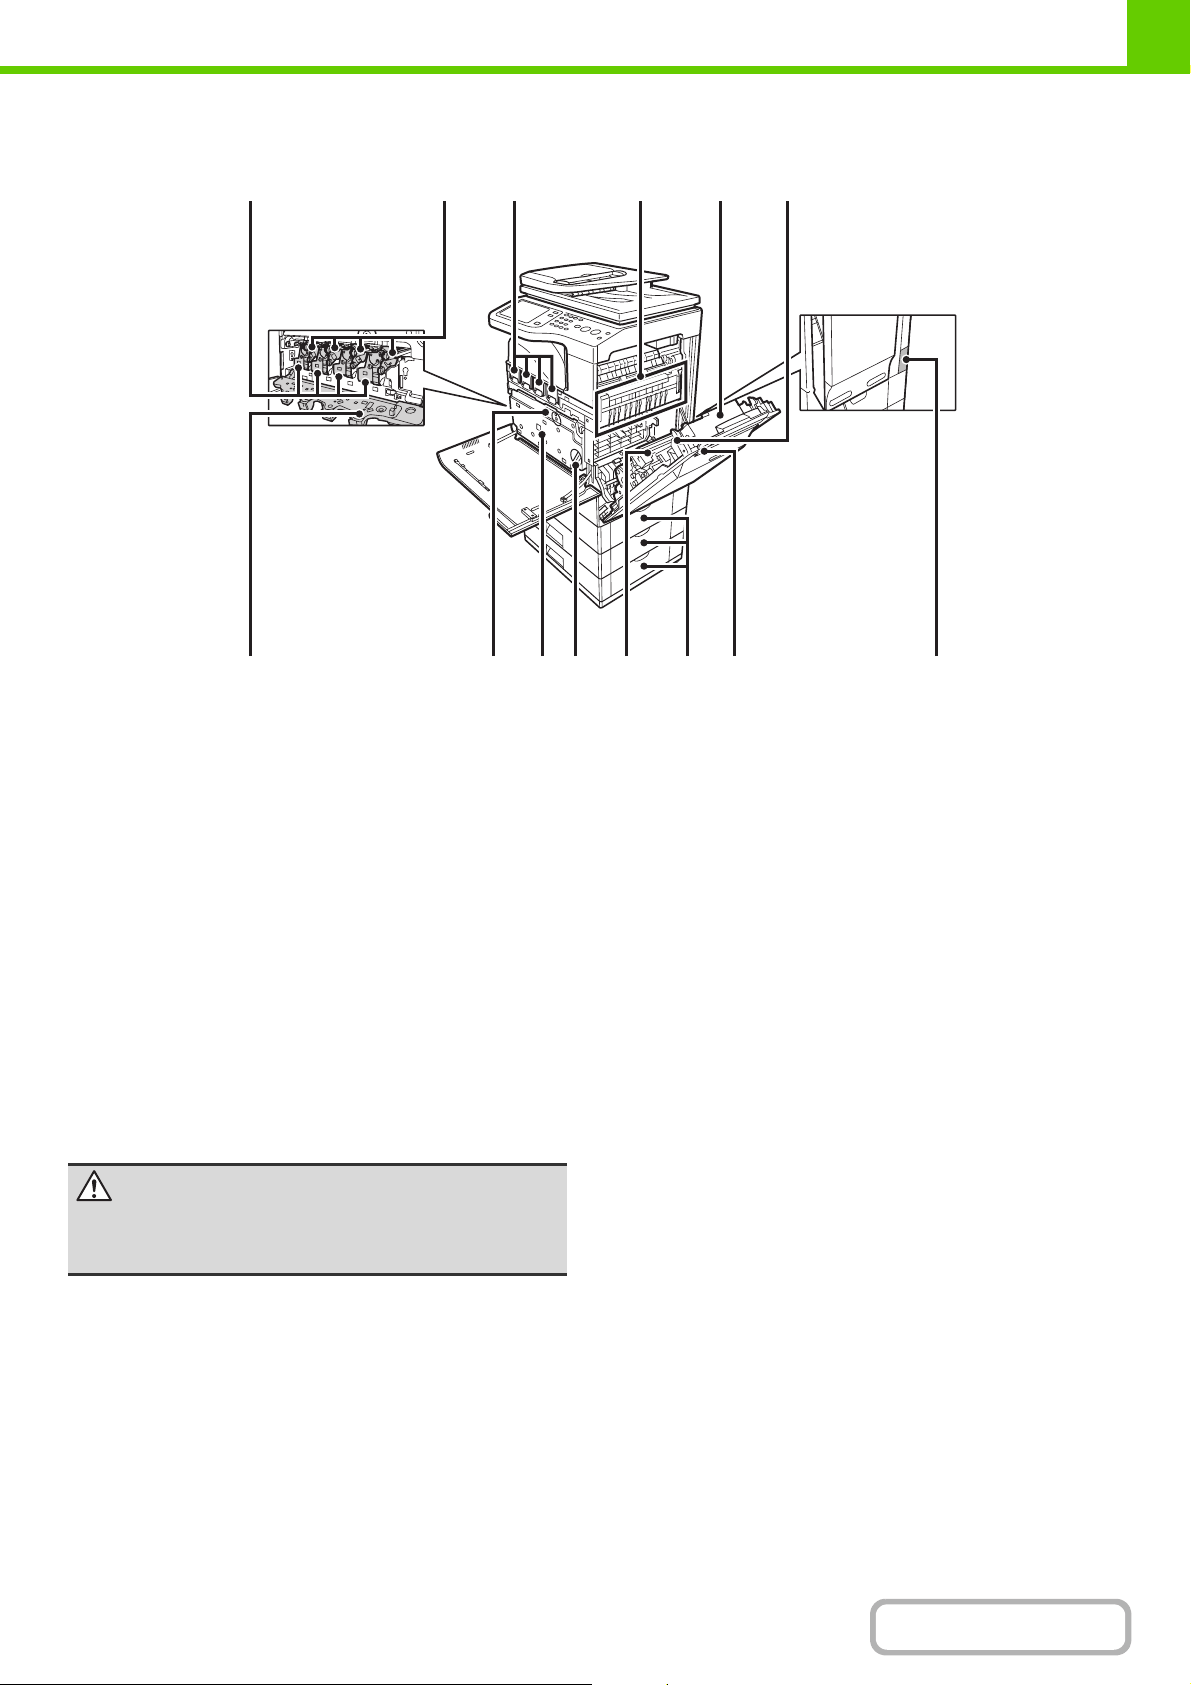
INTERIOR
(12) Developer cartridges
This contains the developer that is necessary to transfer
the toner to the paper.
When replacing the drum cartridge, the developer cartridge
must be removed before the drum cartridge is replaced.
☞
Maintenance & Safety Guide
(13) \Drum cartridges
This contains the photosensitive drum that is used to
create images for copying and printing.
☞
Maintenance & Safety Guide
(14) Toner cartridges
These contain toner for printing. When the toner runs out
in a cartridge, the cartridge of the color that ran out must
be replaced.
☞
Maintenance & Safety Guide
(15) Fusing unit
Heat is applied here to fuse the transferred image onto
the paper.
(16) Right side cover
Open this cover to remove a misfeed.
☞
8. TROUBLESHOOTING "REMOVING MISFEEDS"
(page 8-2)
(17) Paper reversing section
This is used when 2-sided printing is performed. Open
this part to remove a paper misfeed.
☞
Maintenance & Safety Guide
(18) Main charger cover
Open this cover to clean the main charger.
☞
Maintenance & Safety Guide
(19) Primary transfer belt unit
The images created on the drum cartridges are
combined into a single image and transferred to the
secondary transfer roller unit.
☞
Maintenance & Safety Guide
(20) Toner collection container
This collects excess toner that remains after printing.
☞
Maintenance & Safety Guide
(21) Toner collection container release lever
Turn this lever when you need to release the toner
collection container lock to replace the toner collection
container or clean the laser unit.
☞
Maintenance & Safety Guide
(22) Secondary taransfer roller unit
The image that was transferred from the primary transfer
belt unit is transferred to the paper.
☞
Maintenance & Safety Guide
(23) Paper tray right side cover
Open this to remove a paper misfeed in trays.
☞
8. TROUBLESHOOTING "REMOVING MISFEEDS"
(page 8-2)
(24) Right side cover release lever
To remove a paper misfeed, pull and hold this lever up to
open the right side cover.
☞
8. TROUBLESHOOTING "REMOVING MISFEEDS"
(page 8-2)
(25) Remove this cover to replace the ozone filter
(14)(13) (15) (17)(16)
(21)(20)(18) (23) (24)(19) (22) (25)
(12)
Toner collection
container removed
and main charger
cover open
Caution
The fusing unit is hot. Take care not to burn
yourself when removing a paper misfeed.
Loading ...
Loading ...
Loading ...