Loading ...
Loading ...
Loading ...
16 17
Owner’s ManualOwner’s Manual
OPERATING INSTRUCTIONS (Continued)
Icon
Default
Min. : Sec.
Min. Max.
Notes
Min. : Sec.
1-10 (With Vacuum)* 2:00 0:05 3:00 Adjustable speed
1-10 (Without Vacuum) 3:00 0:05 5:00 Adjustable speed
Ice 0:15 0:05 2:00 Smoothie and sorbet
Frozen 0:35 0:05 2:00 Ice-based drinks
Fresh 0:30 0:05 2:00 Sauces
Nuts 1:30 0:05 2:00 Jam and spread
Soup 3:00 0:05 5:00
Soup and hot
chocolate
Clean** 0:15 0:05 2:00 Self-cleaning
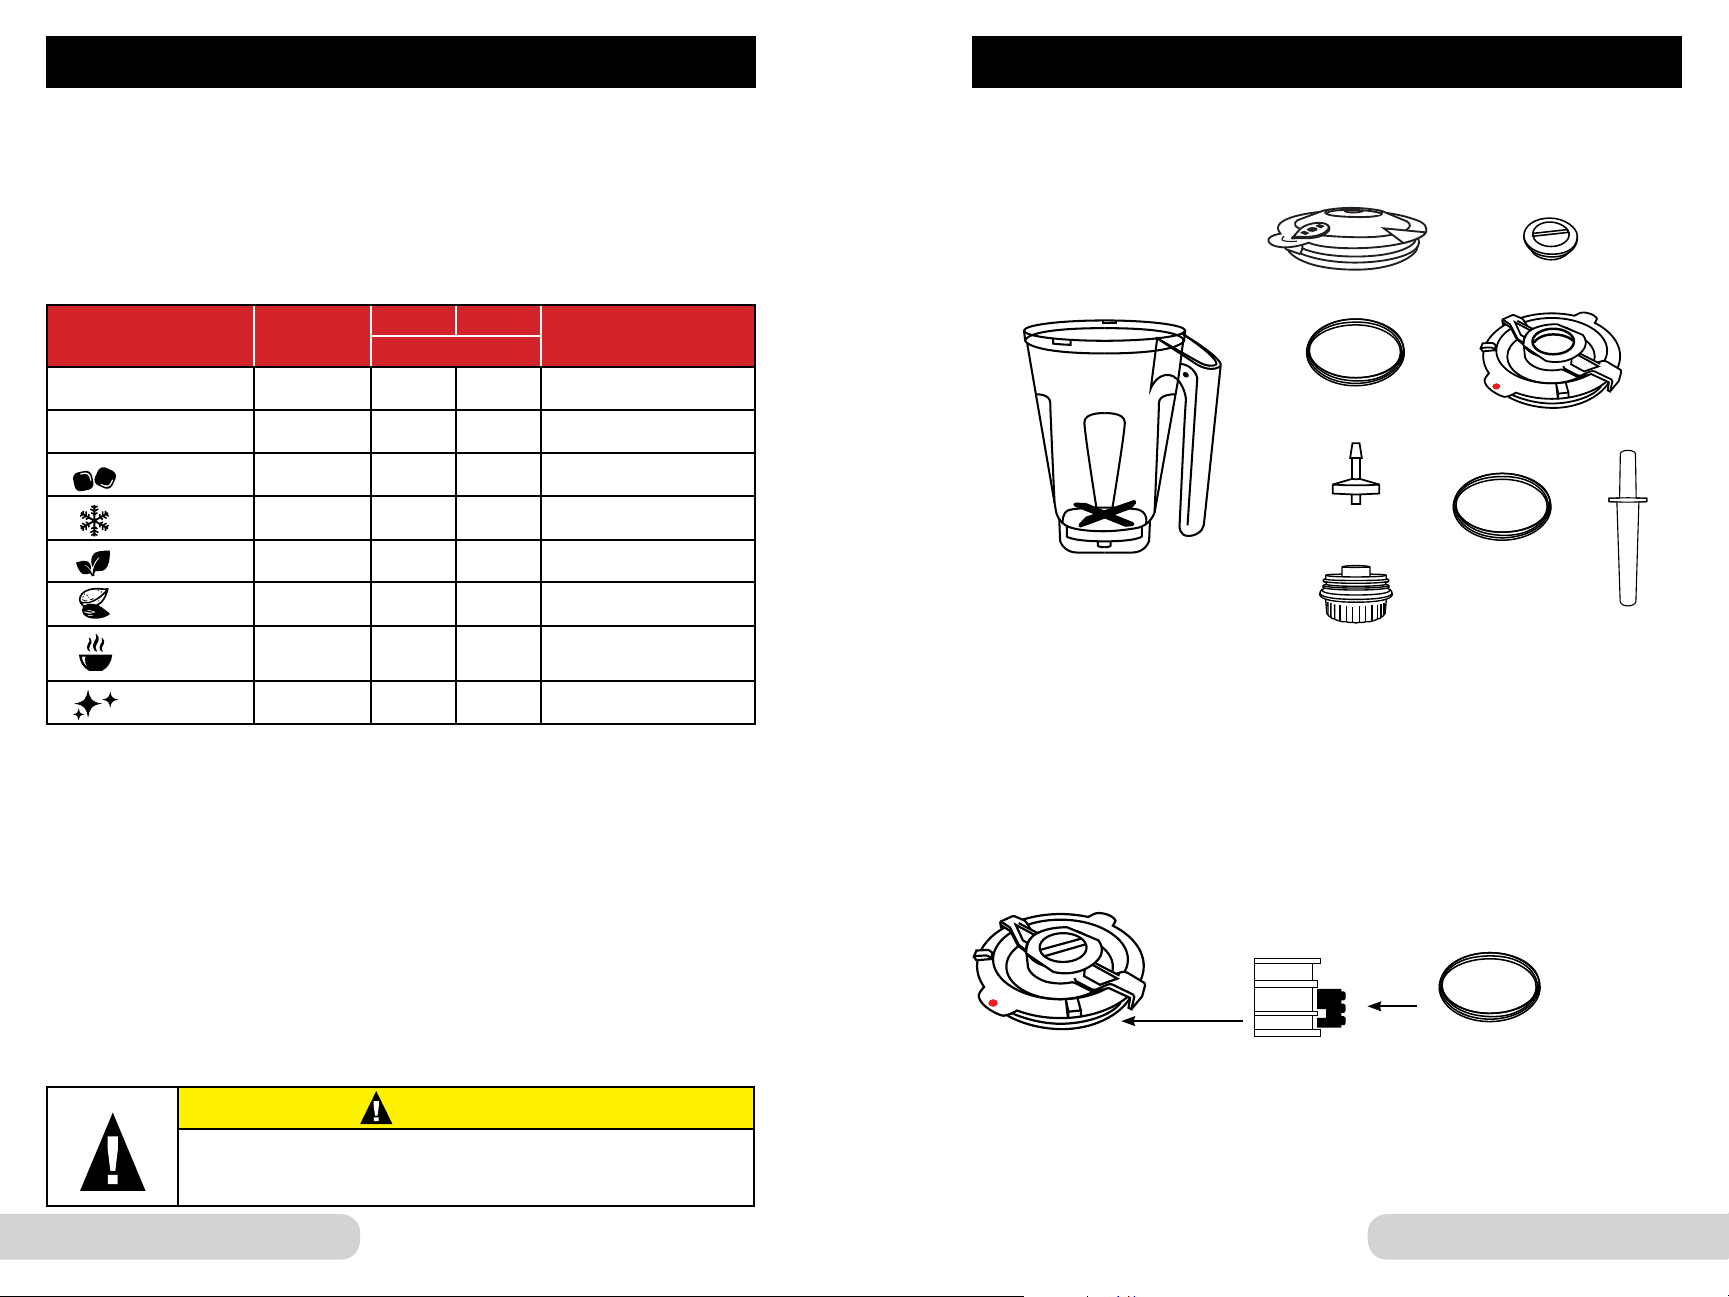
CARE & MAINTENANCE
Removal of Lid Seal Ring may be necessary for cleaning or if the part
is worn, damaged, or needs replacing. To assemble:
1. Line the inside of the Lid Seal Ring into the rim.
2. Press the Seal Ring into the rim to ensure it is properly sealed.
3. Make sure the lower part of the Seal Ring lines up with the bottom side
of the rim.
Lock
Close
Open
Close
Open
Seal Ring
Plunger and
Vacuum Lid Rim
Lock
Close
Open
Close
Open
Lock
Close
Open
Close
Open
Icon Setting
For more specialized blending tasks, select one of the preset icons with
the dial. Each icon setting has a default time and RPM built into the unit.
1. Turn the dial to your desired icon setting. The LCD display will show the
default time.
2. Adjust the time, if needed, then press “Start/Stop” to begin blending at your
selected setting.
• If desired, increase or decrease time at any point while blending.
*Note:
• When blending for a long period of time, steam may escape from Plunger Cap.
• Always start with cold liquids when blending. DO NOT add hot liquids to
the blender.
• Do not fill Jar above 3/4 capacity. For best results, do not fill more than 1.5
liters (51 fl oz) of liquid.
**Tips for Cleaning:
• Add water and 1-2 drops of liquid dish soap to the Jar, place on the Base, and
close the Lid.
• Turn the dial to “Clean”. “0:15” will be shown on the LCD display. Adjust the
time if desired, then press “Start/Stop”.
• Once finished, remove the Jar, rinse thoroughly, and dry before using.
For detailed instructions on cleaning, see “Care and Maintenance.”
Before First Use:
Wash all removable parts in warm, soapy water or in the dishwasher, top rack
only. The Jar can be washed using the “Clean” function. See “Operating
Instructions” for details.
Lock
Close
Open
Close
Open
Lock
Close
Open
Close
Open
Lock
Close
Open
Close
Open
Pull down and remove the Vacuum Plug if cleaning is necessary. After part is
cleaned and dried, push the Vacuum Plug firmly back into place. Remember to
reattach Vacuum Cap before use.
Residue and moisture may build up inside Vacuum Cap and on Vacuum Plug.
Clean and dry thoroughly after each use.
Unscrew the Vacuum Cap counterclockwise, and hand-wash or clean in
dishwasher, top rack only. Make sure that the Vacuum Cap is screwed tightly
into place prior to use.
Jar
Vacuum Lid
Seal Ring
Vacuum Plug
Vacuum Cap
Plunger Cap
Plunger Lid
Seal Ring
Plunger
CAUTION
Moving parts may become hot with extended use.
DO NOT TOUCH.
Loading ...
Loading ...
Loading ...