Loading ...
Loading ...
Loading ...
14 15
Owner’s ManualOwner’s Manual
OPERATING INSTRUCTIONS
OPERATING INSTRUCTIONS (Continued)
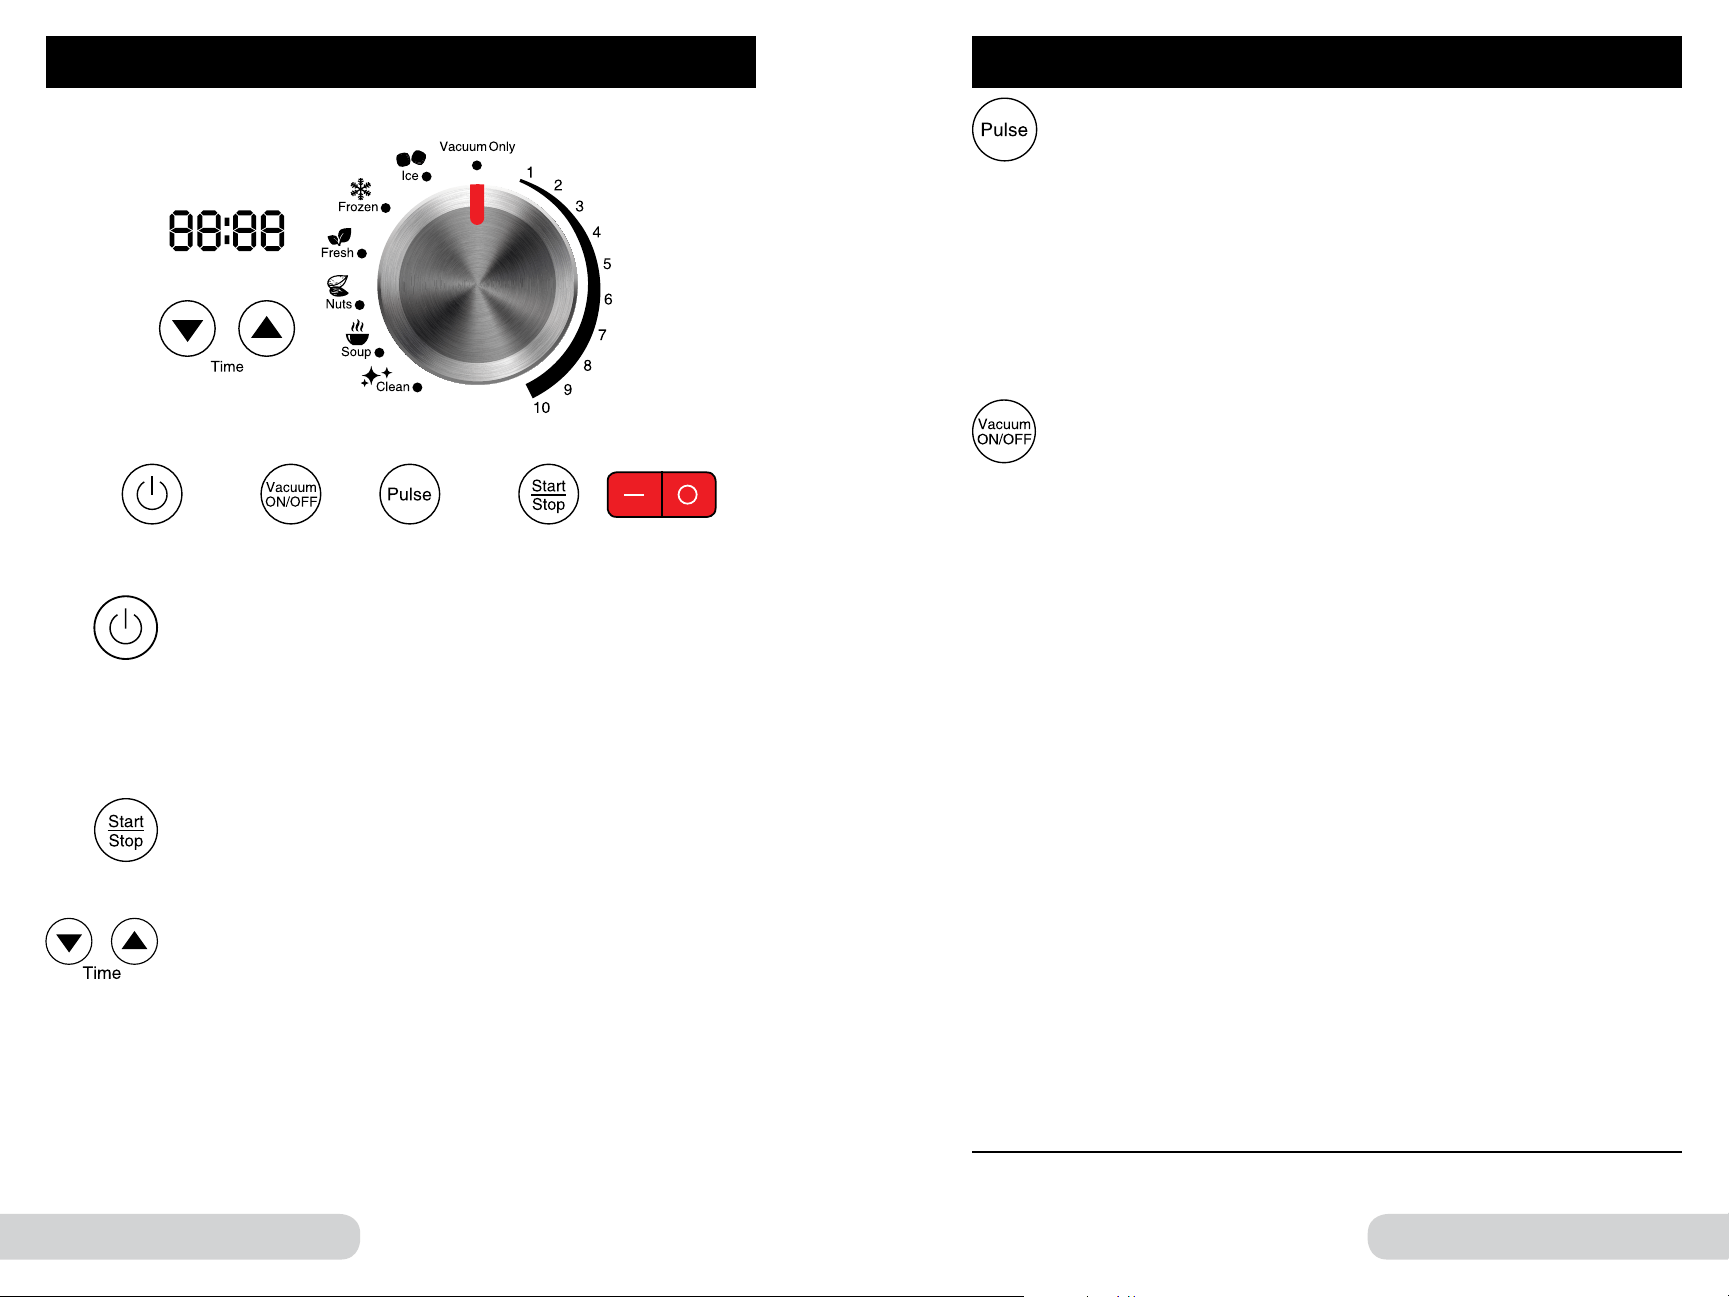
ON OFF
Power Button ON/OFF
1. Turn the red main Base Power Switch ON. Switch is located
on the right side of Blender Base.
• The “Power” button will flash.
2. Press “Power” button once to turn the unit on. The LCD
display will show the default time for the selected setting.
3. Press “Power” button again to turn the unit off.
Start/Stop
1. Turn the dial to choose the appropriate blending function.
2. Press “Start/Stop” to start blending.
3. Press “Start/Stop” again to stop blending.
Time Setting
Press the up and down arrows to increase or decrease the
time on the display.
• Times are displayed in minutes and seconds.
• This can be done on all settings except vacuum only.
Example:
Press “Power Button”. Turn dial to “Ice”. “0:15” (15 seconds)
will be displayed. Press up and down arrows to adjust the time.
Press “Start/Stop”.
Numbered Settings
For standard blending, select from one of the numbered settings
between 1 and 10.
1. Turn the dial to your desired setting between 1 and 10. When in
Vacuum, default will be set to “2:00”.
2. Adjust the time if desired
1
, then press “Start/Stop” to begin
blending at your selected setting.
3. Adjust the number setting using the dial at any point while
blending, if needed.
• The lowest setting is #1 (5,000 RPM). The highest setting is
#10 (27,000 RPM).
Vacuum
By vacuuming the air out of the blender, you can ensure no air is being
mixed with your ingredients during the blending process, maximizing
the nutritional value and ensuring your blender creations will remain
fresher longer.
Follow these steps to take advantage of the unit’s vacuum
capabilities BEFORE blending:
1. Turn the unit on (press red switch on the side of Base. Then press
“Power” button).
2. Select your desired setting using the dial.
3. Press “Vacuum ON/OFF”. The button will be lit blue.
4. Press “Start/Stop”. The display will flash default time for selected setting.
• Unit will remove all air from Jar.
• Once all air has been removed, unit will automatically
start blending.
Example:
1. Turn dial to Frozen. “0:35” seconds will be displayed.
2. Press “Vacuum On/Off”. The button will be lit blue.
3. Press “Start/Stop”. Once all air has been removed, the blender will
start blending.
Vacuum Only
Follow these steps to take advantage of the unit’s vacuum capabilities
AFTER blending:
1. Turn the dial to “Vacuum Only”. “0:00” will be shown on the LCD display.
2. Press “Start/Stop”. The unit will vacuum excess air from the blender, then
automatically power off. The display will show “0:00”.
1 If blending for more than 3 minutes, use Plunger Lid.
Loading ...
Loading ...
Loading ...