Loading ...
Loading ...
Loading ...
Shelf supports en
27
18.4 Fourth step ( )
1.
Fill the water tank with 150ml water and insert it.
a At the end of the rinse cycle, : appears in the
display.
2.
Remove the water tank and clean thoroughly with
water.
3.
Dry the water tank and re-insert it.
a Descaling is complete and the appliance is ready
for use again.
18.5 Descaling interrupted
If descaling is interrupted (for example, due to a power
failure or because the appliance is switched off), the
symbol appears in the display after the appliance is
switched back on. You will be prompted to rinse three
times. The appliance cannot be used for other opera-
tions until the third rinse cycle comes to an end.
Note:If you set another operation, (Cleaning) ap-
pears in the display. Repeat the interrupted descaling
programme after rinsing.
1.
Empty the water tank and clean thoroughly with wa-
ter.
2.
Insert the empty water tank.
3.
Use the function selector to set descaling .
4.
Turn the temperature selector.
a appears in the display.
a After a few seconds, the appliance pumps the re-
maining liquid into the water tank.
5.
Empty the water tank and clean thoroughly with wa-
ter.
6.
To rinse the steam system, run the three rinse
cycles in the descaling programme.
→"Second step ( )", Page26
7.
Restart descaling.
19 Shelf supports
To clean the rails and the cooking compartment, or to
replace the rails, you can remove these.
19.1 Detaching the shelf supports
WARNING‒Risk of burns!
The shelf supports get very hot
▶
Never touch the shelf supports when hot.
▶
Always allow the appliance to cool down.
▶
Keep children at a safe distance.
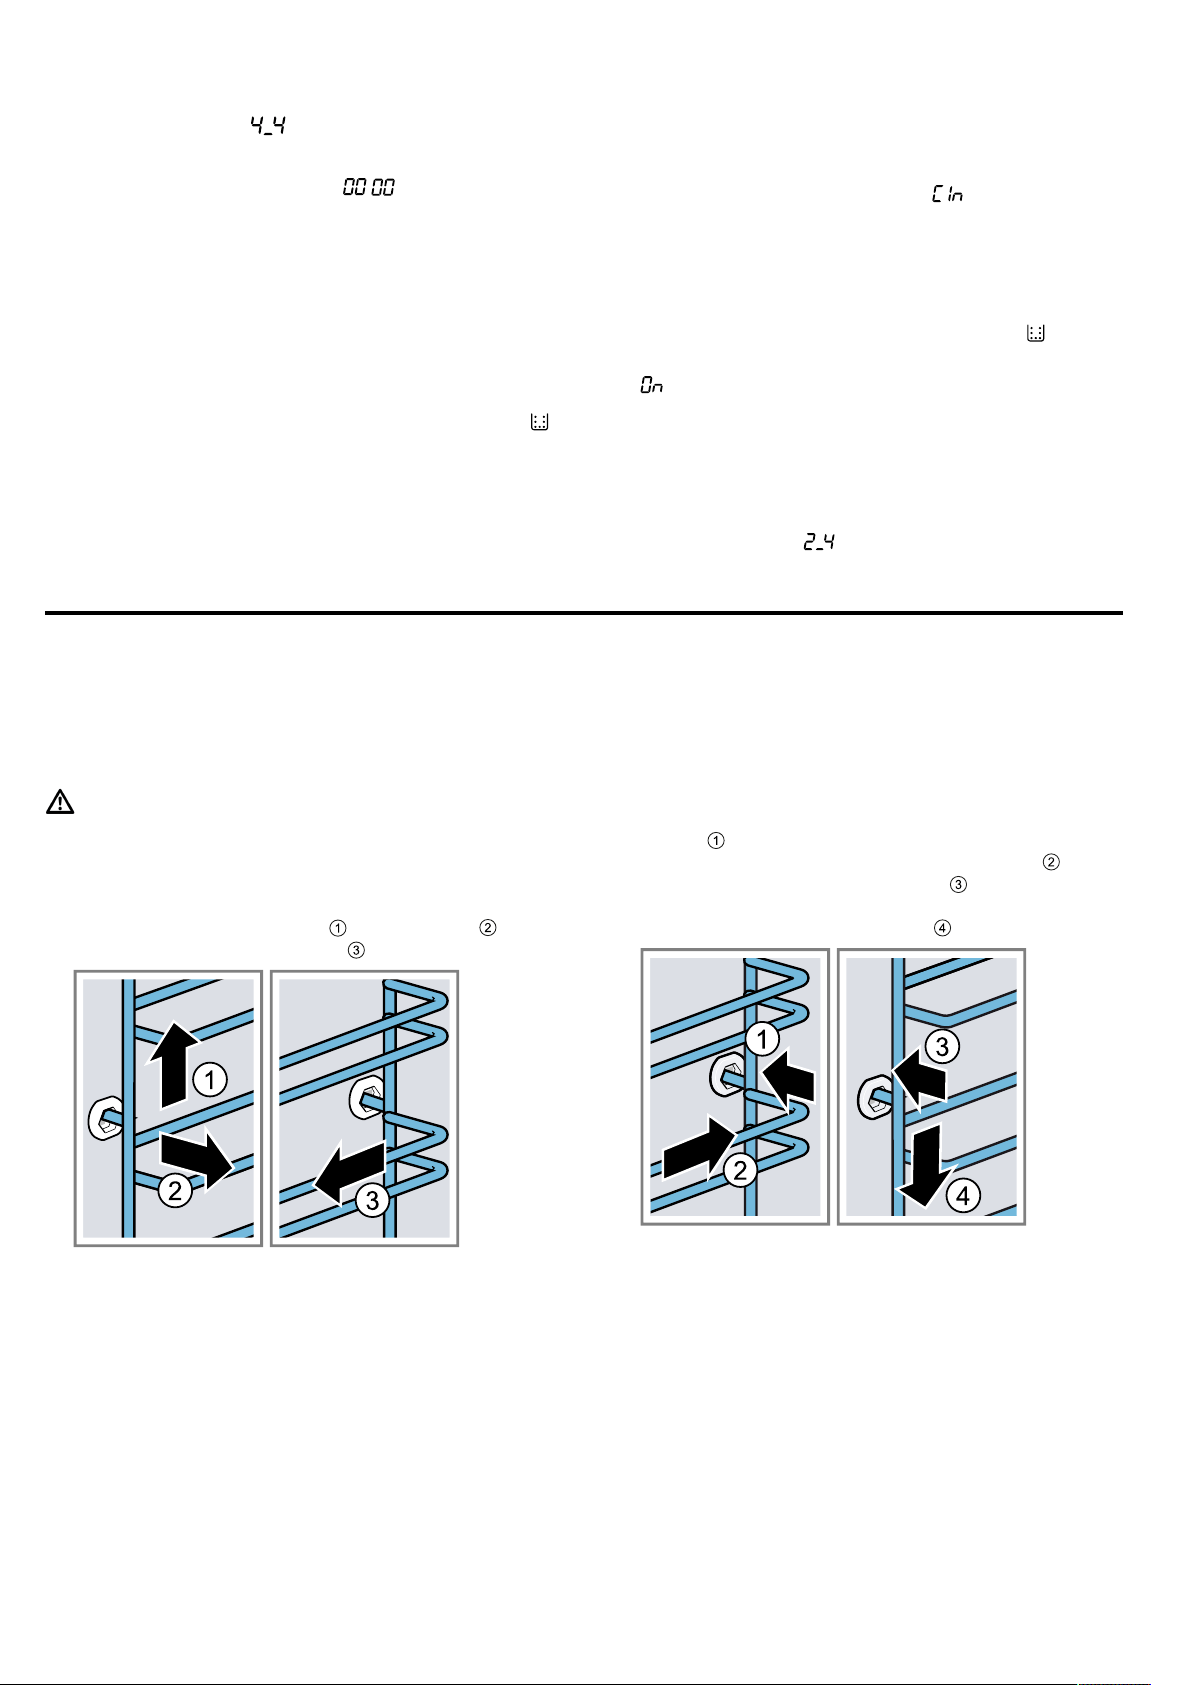
1.
Lift the rail forwards slightly and detach it .
2.
Pull the whole rail to the front and remove it.
3.
Clean the rail.
→"Cleaning products", Page23
19.2 Attaching the shelf supports
Notes
¡ The rails only fit on the right or left.
¡ For both rails, ensure that the curved rods are at the
front.
1.
First, push the rail into the middle of the rear
socket until the rail rests against the cooking
compartment wall, and then push this back .
2.
Push the rail into the front socket until the rail
also rests against the cooking compartment wall,
and then press this downwards .
Loading ...
Loading ...
Loading ...