Loading ...
Loading ...
Loading ...
71
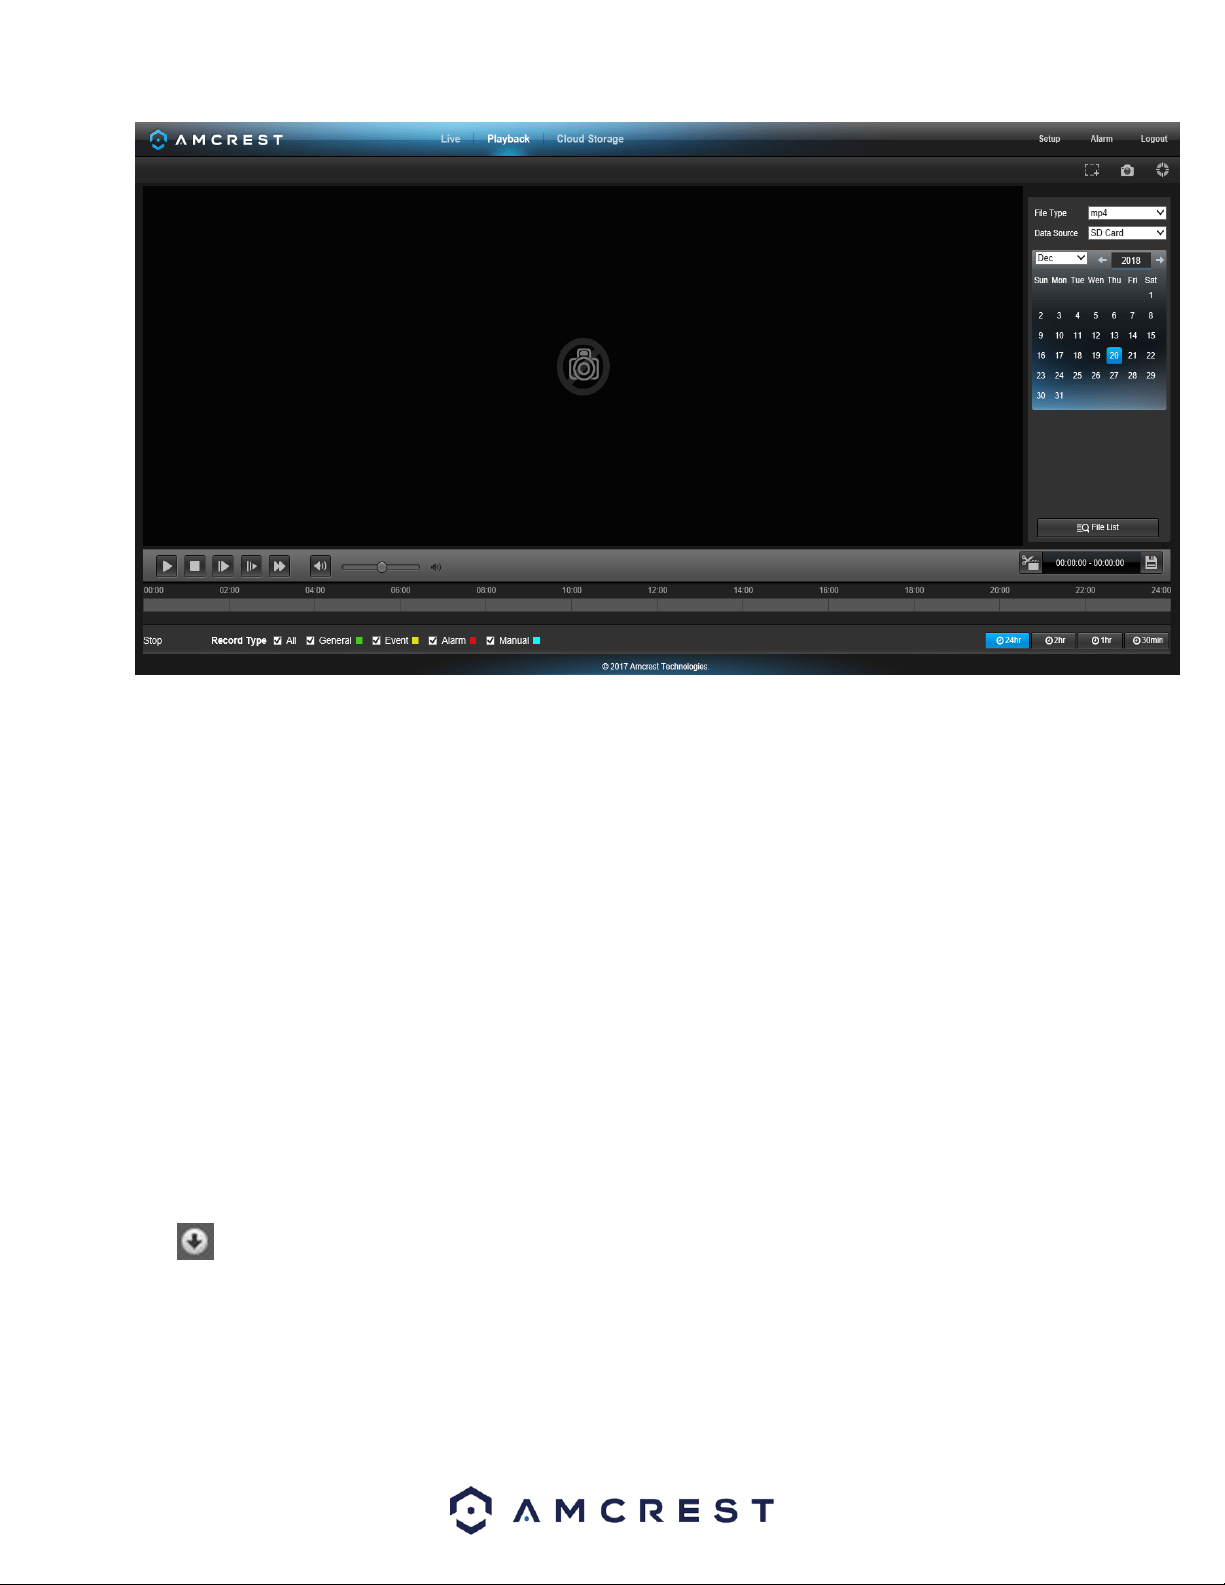
This is the interface for the playback menu. There are 7 main sections:
1. Quick Actions: This panel allows the user to zoom in on playback footage, take a snapshot of the playback footage, or
open the help menu.
2. File Menu: This panel allows the user to select a file type and data source.
3. Calendar: This panel allows the user to pick a date that they would like to playback video from. When a date has
recorded footage available, it’s green. The current date is blue, unless it has recorded footage, then it’s a lighter green.
4. File List: This button opens a file list of all recorded video for a specific date range. From here, the user can download
these videos to their PC.
5. Trim Panel: This panel allows the user to trim playback video for download. By specifying time stamps, the user can
trim down.
6. Recorded Video Panel: This panel allows the user to specify what type of video they would like to playback and it also
allows the user to select where to start playback from. The buttons on the bottom right allow the user to select a
zoom level.
7. Playback Bar: This panel allows the user to control playback. It also allows the user to control playback speed, and
playback volume.
Clicking the File List opens the following screen on the sidebar:
This allows the user to select files for download. Select the files by clicking the checkbox next to each file, and then
click to download the files to the PC.
Loading ...
Loading ...
Loading ...