Loading ...
Loading ...
Loading ...
109
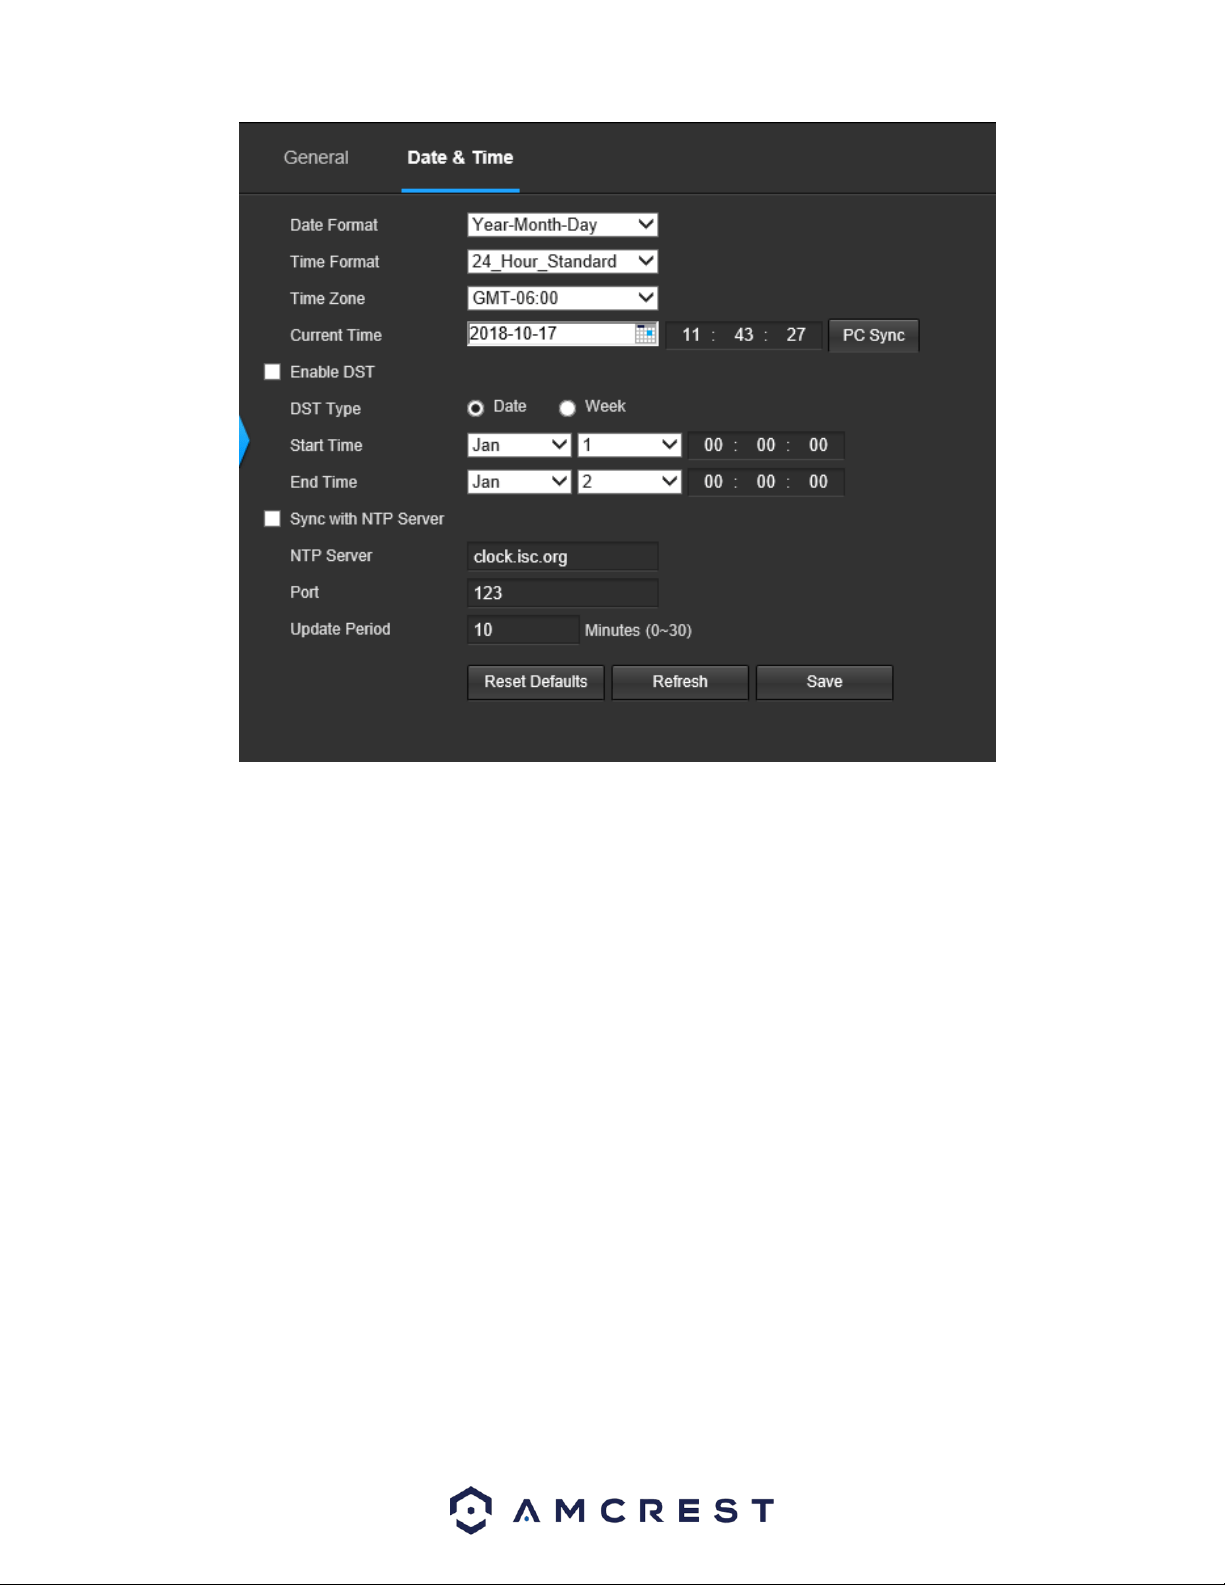
Below is an explanation of the fields on the Date & Time settings tab:
• Date Format: This dropdown box allows the user to change the date format used in the camera.
• Time Format: This dropdown box allows the user to change the time format used in the camera.
• Time Zone: This dropdown box allows the user to change the time zone used in the camera.
• Current Time: This field allows the user to enter in the date and time manually. Clicking the PC Sync button allows the
camera to sync with a Network Time Protocol (NTP) server.
• Enable DST: This checkbox allows the user to enable daylight savings time for the camera.
• DST Type: This radio button allows the user to select whether DST is based on the week, or a specific day.
• Start Time: This dropdown box and field allow the user to enter in the start time for DST.
• End Time: This dropdown box and field allow the user to enter in the end time for DST.
Synchronize with NTP: This checkbox allows the user to enable the camera’s synchronization with an NTP server.
• NTP Server: This field allows the user to enter in an NTP server.
• Port: This field allows the user to enter in the port number for the NTP server.
Update Period: This field allows the user to enter in the update period time. This number designates how frequently
the camera pings the NTP server to ensure it has the correct time. The range is from 0-30 minutes.
To reset to default settings, click the Reset Defaults button. To refresh the page, click the Refresh button. To save the
settings, click the Save button.
5.4.5.2. Manage Users
This menu allows the user to change the user accounts on the camera. By default, the camera only has the admin
account which has all rights/authorities. Additional accounts can be created on this screen. Below is a screenshot of
the account screen:
Loading ...
Loading ...
Loading ...