Loading ...
Loading ...
Loading ...
Fuses and bulbs
5. Unscrew the wing nut
5
››› Fig. 88 B.
6.
Remove the tail light from the bodywork by careful-
ly pulling backwards.
7.
Disassemble the tail light unit and place it on a
flat, clean surface.
To change the bulb
8.
Unlock the bulb holder locking tab (arrow)
››› Fig. 89 C and remove the bulb holder from the
tail light.
9.
Replace the faulty bulb by a new identical bulb
››› Fig. 89 D.
10.
Place the bulb holder in the tail light unit. The at-
tachment tabs (arrow) should audibly click into
place ››› Fig. 89 C.
Assembling the rear light units
11.
Carefully insert the tail light unit into the opening
in the bodywork.
12.
Support the tail light with one hand in the assem-
bly position and securely screw the wing nut with
the other
5
››› Fig. 88 B.
13.
Ensure that the tail light unit has been correctly
fitted and is firmly secured.
14.
Insert the connector
2
into the bulb holder and
press the lock
3
on the connector in the oppo-
site direction to the arrow ››› Fig. 88 B.
15. Insert the cover. The cover should lock into place.
16. Close the rear lid ››› page 99.
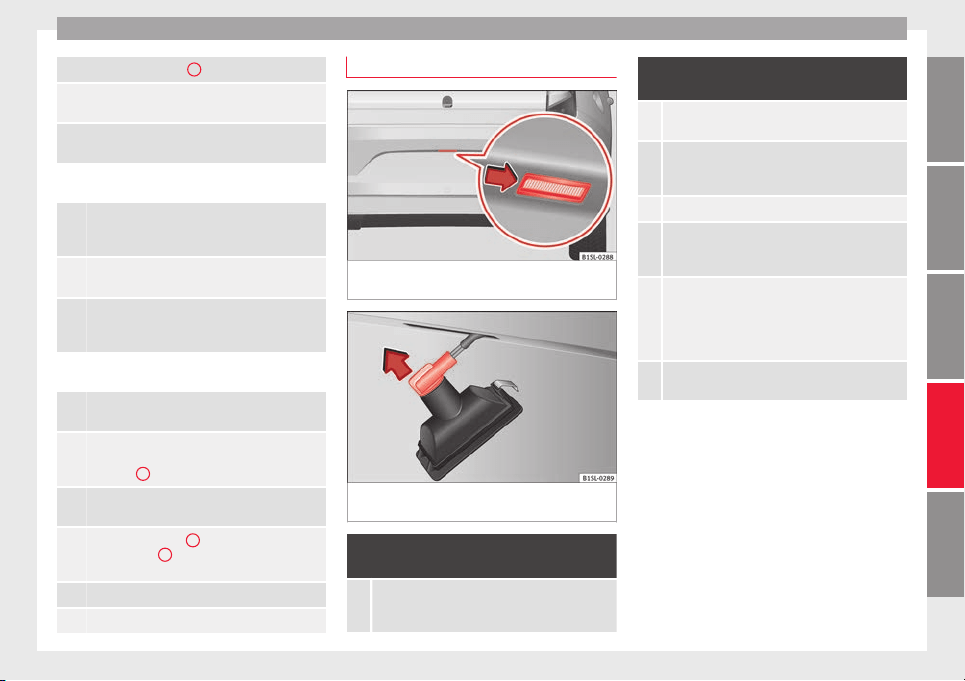
Changing the number plate light
Fig. 90 On the rear bumper: Remove the
number p
l
at
e light.
Fig. 91 Number plate light: Remove the bulb
ho
l
der
.
Complete operations only in the sequence giv-
en:
1.
With one hand, press on the number plate light
from left to right and remove it from the bumper
››› Fig. 90.
Complete operations only in the sequence giv-
en:
2.
Detach the number plate light carefully from the
bumper.
3.
Turn the bulb holder with the bulb anticlockwise
and remove it in the direction of the arrow
››› Fig. 91.
4. Replace the faulty bulb with a new identical bulb.
5.
Place the bulb holder in the number plate light and
press in the opposite direction to the arrow as far
as possible ››› Fig. 91.
6.
Insert the number plate light carefully into the left
edge of the opening on the bumper. During this
process, check that the assembly direction of the
number plate light is correct, i.e. the spring must
be on the right.
7.
Insert the number plate light into the bumper until
it audibly clicks into place.
83
Technical dataAdviceOperationEmergenciesSafety
Loading ...
Loading ...
Loading ...