Loading ...
Loading ...
Loading ...
15
Preparation/Basic “Quick Start Guide”
(ENG) DVQX1052
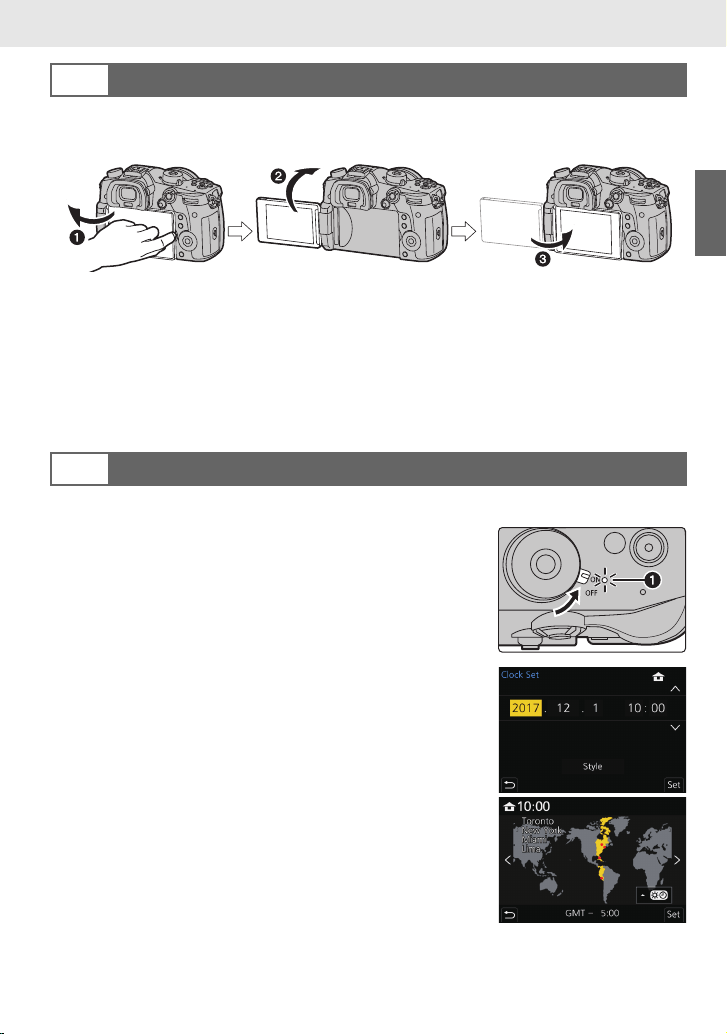
At the time when this camera is purchased, the monitor is stowed in the camera body.
Bring out the monitor as shown below.
1 Open the monitor. (Maximum 180o)
2 It can be rotated 180o forward.
3 Return the monitor to its original position.
• When rotating the monitor, be careful not to apply too much force. Doing so may cause
damage.
• When not using the monitor it is recommended that you close it with the screen facing inward to
prevent dirt and scratches.
• The clock is not set when the camera is shipped.
1 Turn the camera on.
• When the camera is turned on, the status indicator 1
lights up.
2 Press [MENU/SET].
3 Press 3/4 to select the language, and press [MENU/
SET].
4 Press [MENU/SET].
5 Press 2/1 to select the items (year, month, day,
hour, minute), and press 3/4 to set.
6 Press [MENU/SET] to set.
7 When [The clock setting has been completed.] is
displayed, press [MENU/SET].
8 When [Please set the home area] is displayed, press
[MENU/SET].
9 Press 2/1 to select the home area, and then press
[MENU/SET].
6
Opening the Monitor
7
Setting Date/Time (Clock Set)
DC-GH5LBodyP-DVQX1052_eng.book 15 ページ 2017年2月2日 木曜日 午後3時21分
Loading ...
Loading ...
Loading ...