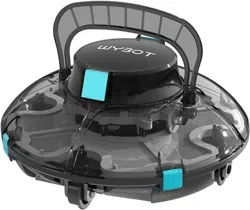
Osprey 200 SE
Robotic Pool Cleaner
User Manual
www.wybotpool.com
EUROPE
E-mail: [email protected]
Facebook: @WybotPool
WYBOTICS CO.,LTD
No.30, Zhongnan 4th Street West Zone, TEDA Tianjin, China
All trade names are registered trademarks of respective manufacturers listed.
NORTH AMERICA
E-mail: [email protected]
Facebook: @WybotPool
No.30,Zhongnan 4th Street West Zone,TEDA Tianjin,China
All trade names are registerred trademarks of respective manufacturers listed.

01
01
01
02
03
03
04
05
06
06
07
08
09
09
10
12
12
13
14
14
15
INTRODUCTION
SAFETY INSTRUCTIONS
Warning
Caution
SPECIFICATIONS
PACKAGE CONTENTS
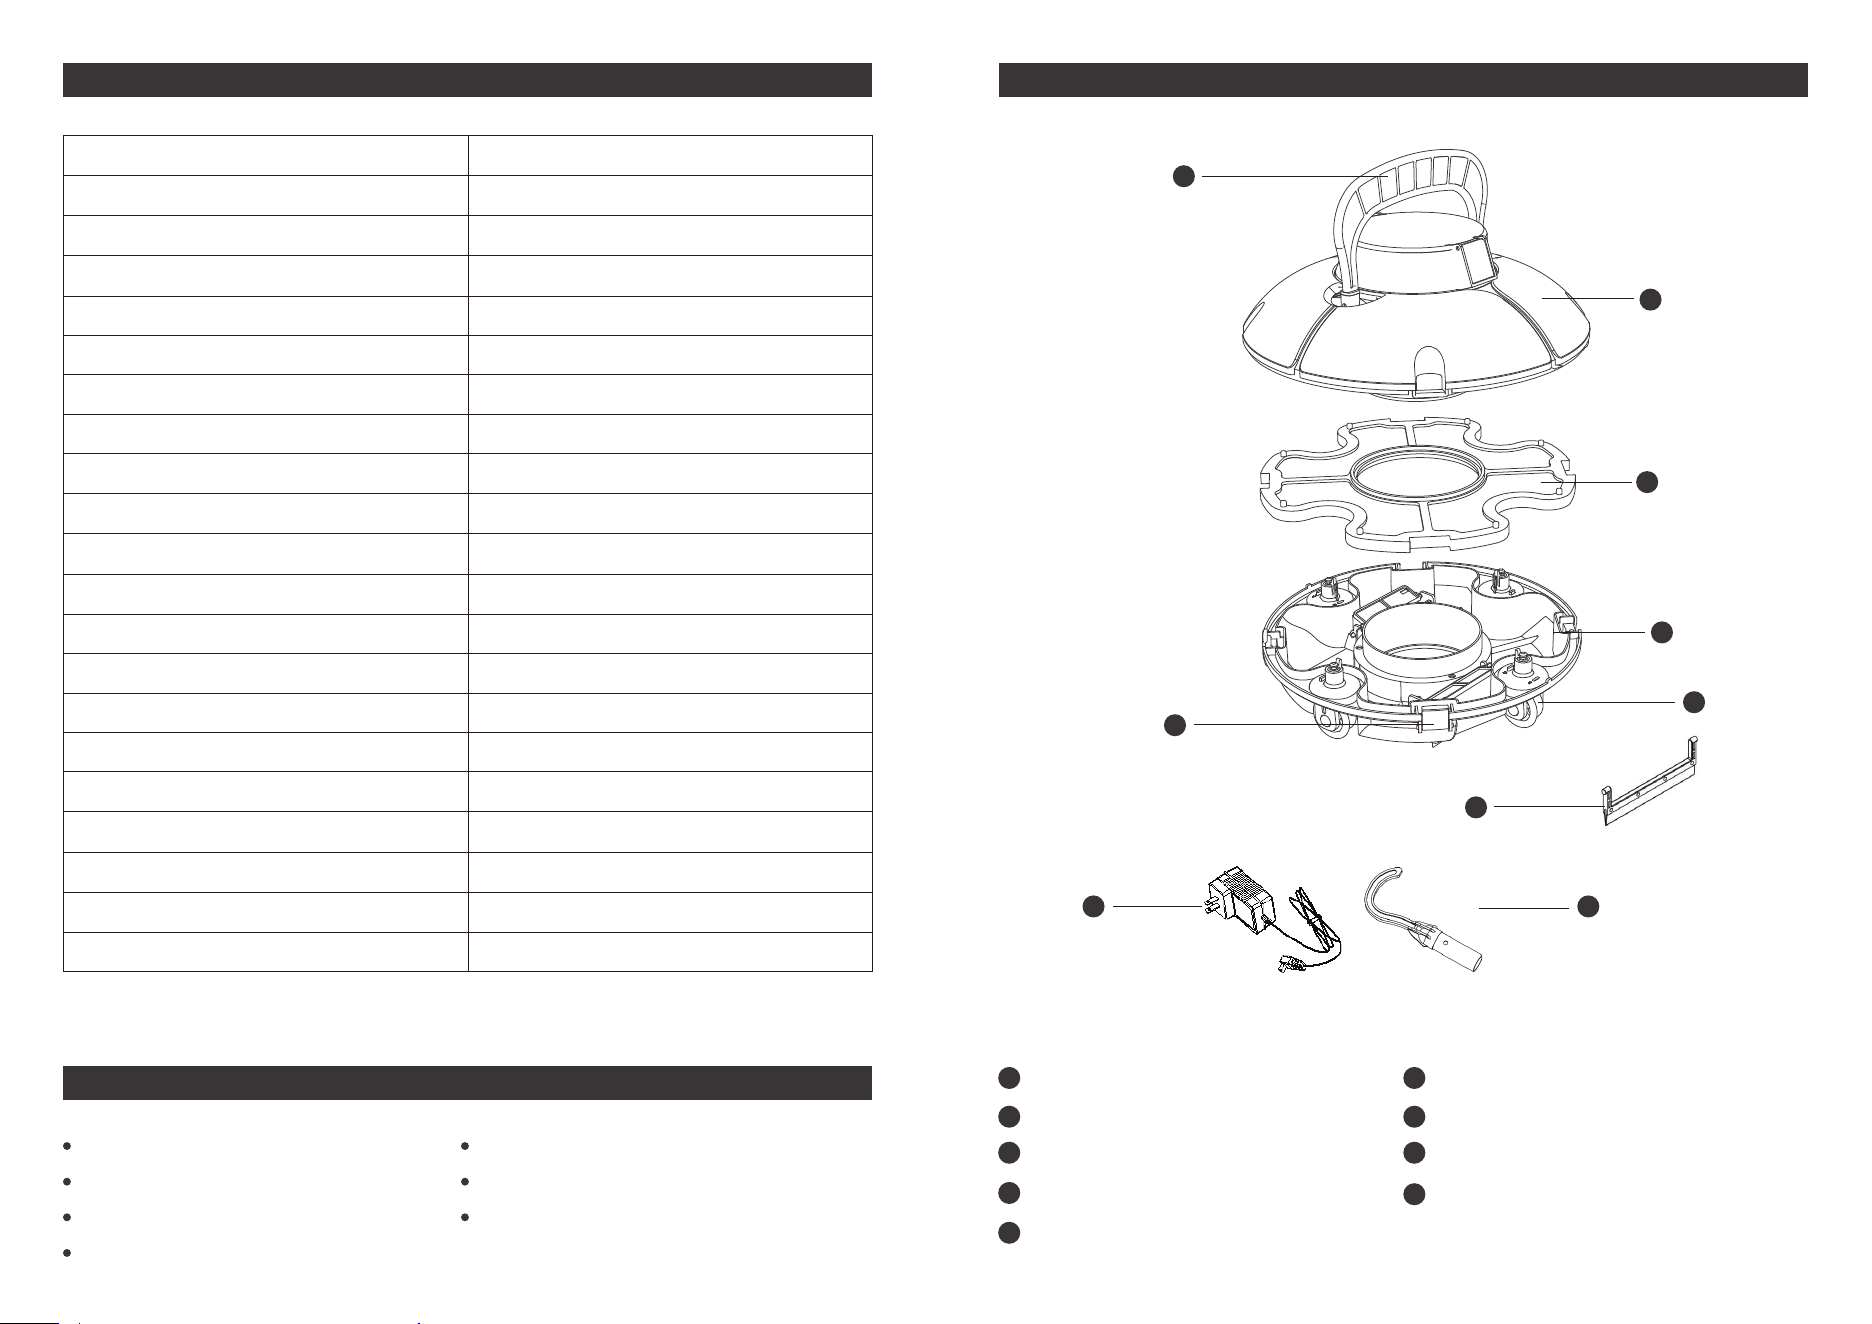
PRODUCT DIAGRAM
PREPARATION
Get Started
Charge your new Osprey 200 SE
Run your new Osprey 200 SE
Do a filter cleaning
How to adjust your cleaning path
Detach the adjustable wheels
Reset combination path
MAINTENANCE AND STORAGE
Caution
TROUBLE SHOOTING GUIDE
FAQ
WARRANTY
WYBOT CUSTOMER CARE
CONTENTS

01 02
8. Never allow children to ride on the cleaner or play with it as a toy.
9. Do not allow child to operate or maintain the device.
10. Do not enter the pool when the cleaner is working in it.
11. Never expose or charge the device in flammable environments.
12. Only licensed professionals can disassemble the sealing parts of the cleaner.
13. Do not operate the cleaner while pool filter is running.
Caution
Failure to operate the device as per the warnings can cause a damage to the device
or personal injury.
1. Charge the unit before first use.
2. Do not put your finger between movable parts, such as flipper hinge moving cavity.
You may be injured by a sudden movement.
3. Do not over charge the cleaner, which will reduce the battery life.
4. Charge the cleaner prior to being stored for a long time (over 6 months) to maintain
an optimal battery life.
5. Disassemble the flipper if you will not use the device for a long time. Improper storage
may snap the flipper.
6. Remember to wash and clean the filter basket after each use.
7. Store the cleaner in a cool and ventilated place, away from direct sunshine or any
heat source.
8. Use only the pool cleaner in the following water conditions:
Chlorine
pH
Temperature
NaCl
Max 4 PPM
7.0 - 7.8 PPM
41 - 95 ℉ (5 - 35 °C)
Maximum = 5000 PPM
INTRODUCTION
Thank you for choosing WYBOT products, your support means a lot to us. Continu-
ous providing the best solution to free you up from pool cleaning and enjoy your
family time is always our pursuit.
WYBOT Robotic Pool Cleaner is dedicated to serving you high efficiency, low power
consumption, easy operation and thorough pool cleaning work.
Its unique appearance and reliable functions as one-button activation, powerful
suction and scrubbing, fine filtration, smart navigation, remote control, and high
compatibility with various pool shapes and constructions materials assure you a
convenient, intelligent, and optimal pool cleaning.
Feel free to contact us by Email or visit our website with any questions. We are very
glad to hear your advice on our continuous improvement.
SAFETY INSTRUCTIONS
Read the manual carefully before you use the cleaner. Your safety is the most
important thing. Please read through and operate the device as per instruc-
tions, WYBOT Co., Ltd. is not held liable for any loss or injury caused by improper
use.
Warning
Failure to operate the device as per the warnings can result in serious injury, electro-
cution or death.
1. Use only the accessories recommended or sold by WYBOT Co., Ltd.
2. Dry the charging port after each cleaning. Moisture charging socket may cause a
electric shock.
3. Do not charge the cleaner when it is running (the indicator is on).
4. Use only the original and authorized power charger, Avoid charging any other
devices with this charger. Improper use may result in overheating or corrosive
liquid leakage from the battery.
5. Make sure the electrical outlet is protected by a ground fault circuit interrupter
(GFCI) and an earth leakage interrupter (ELI).
6. Do not use a cord-damaged charger to avoid any electrical shock.
7. Do not try to use extension cord to connect the charger.
03
04
Model
Rated working voltage
Power
Working cycle
Rated input voltage of charger
Rated input frequency of charger
Rated output voltage of adapter
Rated output current of charger
Battery capacity
Charging time
Max.cleaning surface
Filter capability
Filter density
Moving speed
IP Grade: IPX8
Pool water temperature
Charging environment temperature
Max. water depth
Product Size
Weight
Storage temperature
Osprey 200 SE
11.1V
30w
60mins
100-240v
50/60Hz
12.6V
1A
2600mAh
3-4h
538sq.ft(50㎡)
7.5m³/h
180um
appr. 16m/min
IPX8
10°C-35°C
5°C-35°C
2.5m
13(L)x13(W)x9.1(H)inches
330 (L) x 330 (W) x230 (H) mm
3.3kg
-4°F~113°F (-20°C~45°C), RH≤75%
SPECIFICATIONS
1 x Flipper & Handle
1 x Top cover
1 x Filter tray
1 x Chassis
2 x Adjustable wheels
4 x Fastening clip
2x scraper
1 xcharger
1 x Retrieving Hook
PRODUCT DIAGRAM
1
2
3
6
7
8
9
4
5
1
2
3
4
7
5
6
8
9
1 x Cleaner
1 x Charger
1 x Flipper
2 x Scrapers
1x Retrieving Hook
2x Screws
1 xUser manual
PACKAGE CONTENTS
06
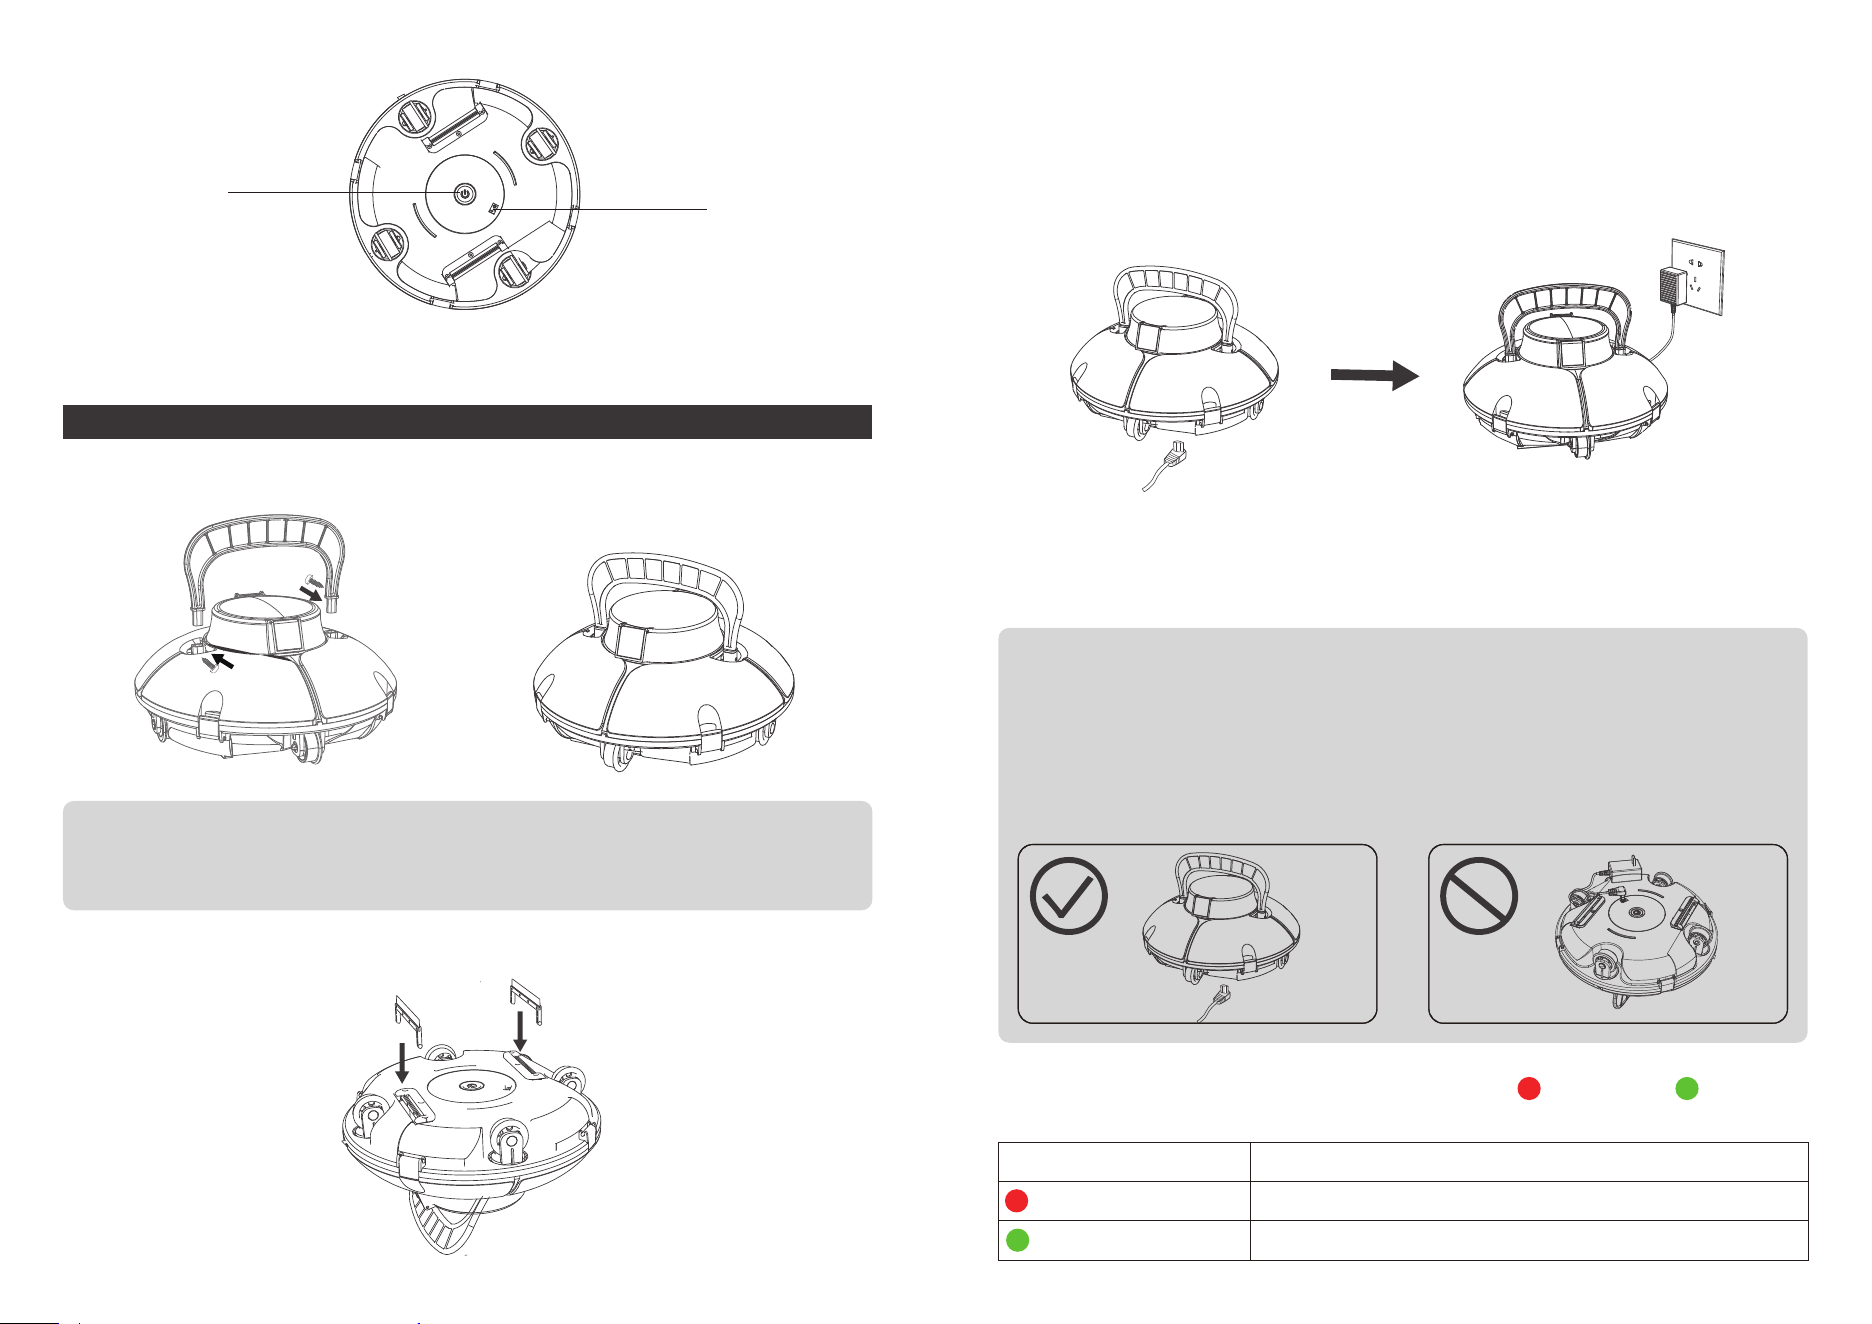
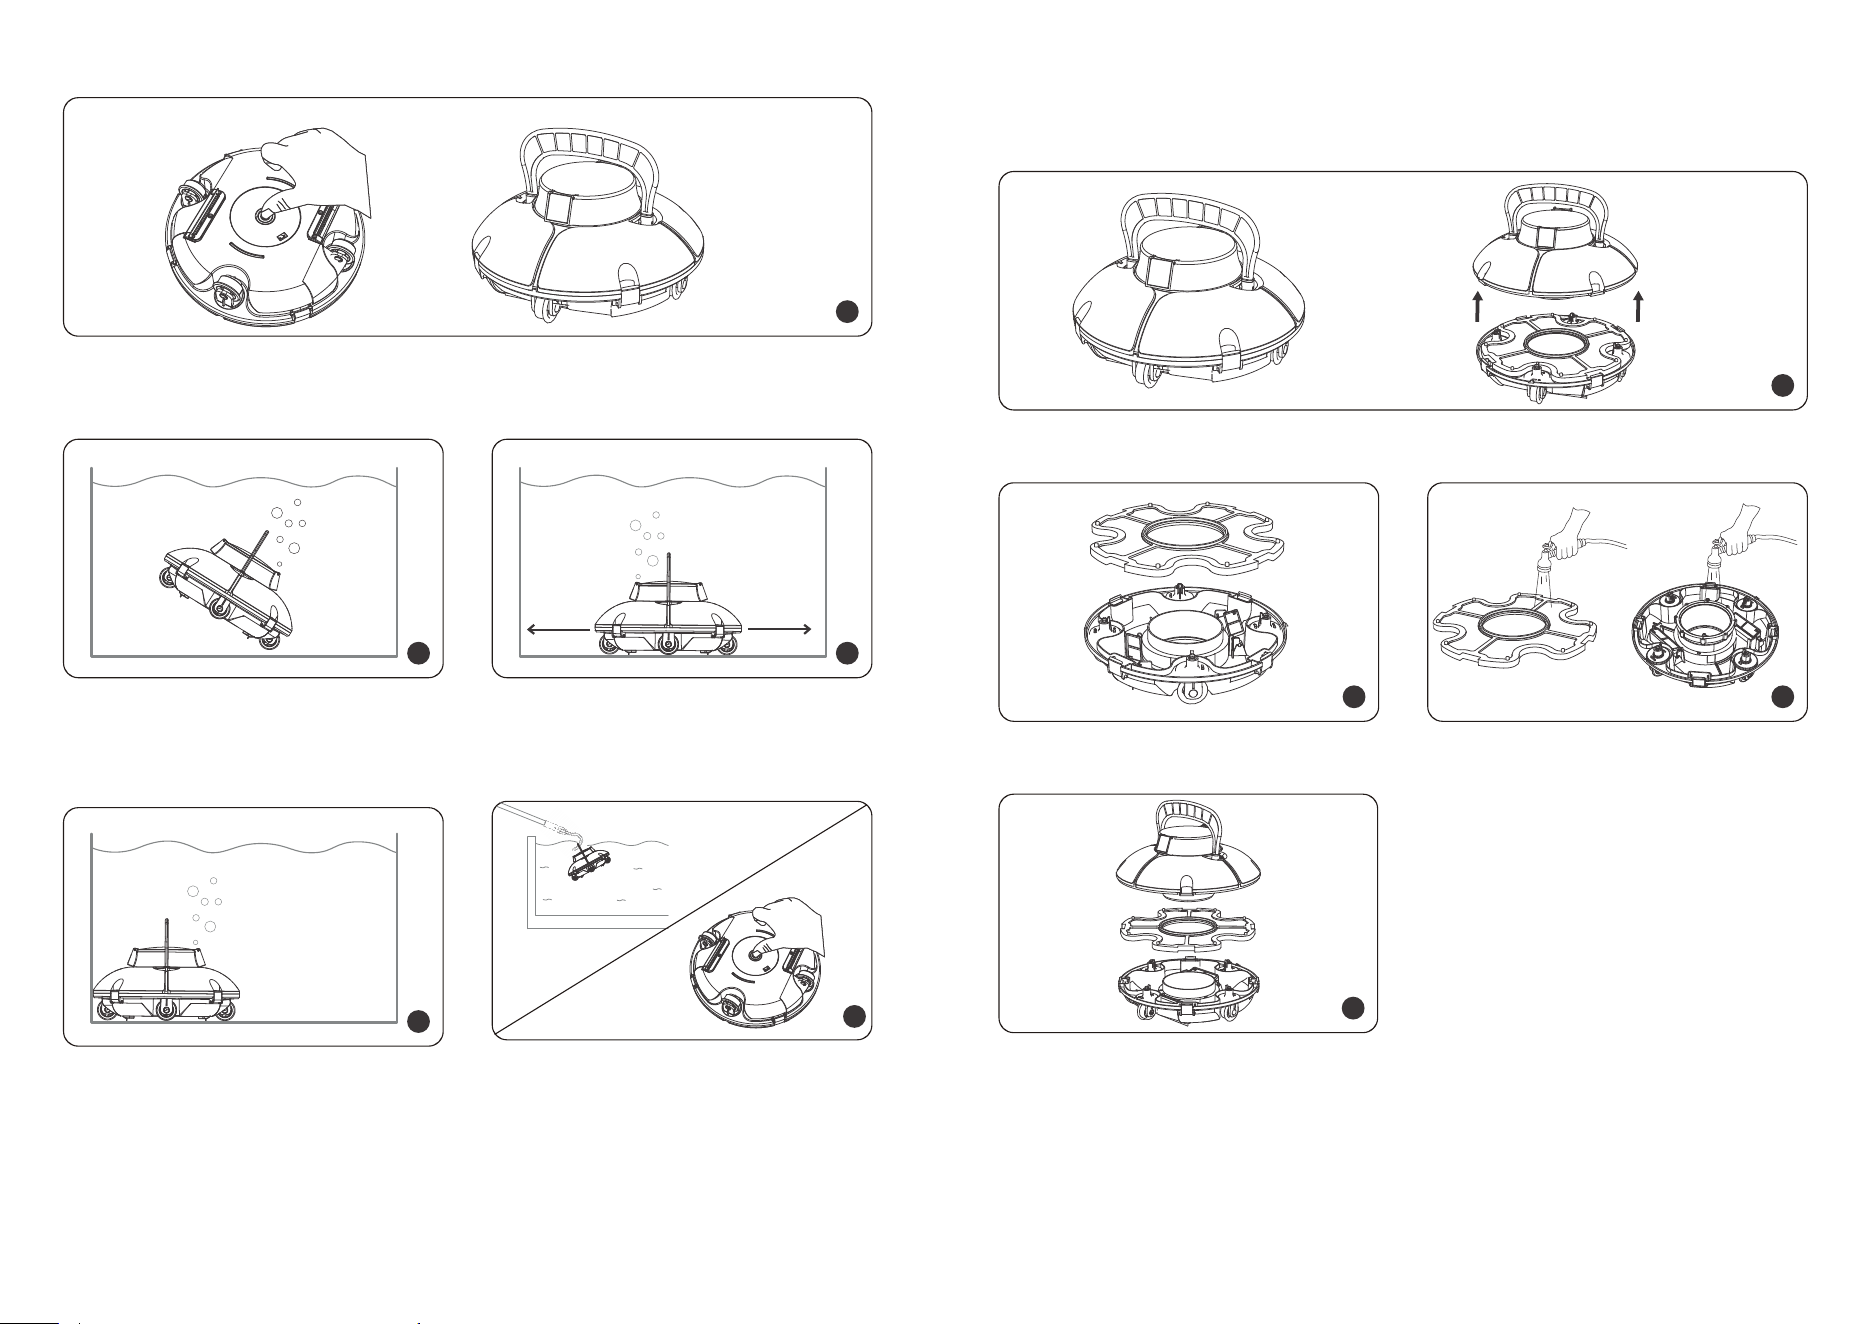
a. Screw tightly included flipper using two screws from either side.
b. Install included scrapers onto the bottom to enhance cleaning capability.
Get Started
The device has a lithium-ion rechargeable battery, and you need to charge the
battery before first use and when the battery is low. The charging port is on the
bottom of the device.
1. For your important safety, you need to double check the device is powered off
and charging port is dry before charging.
2. For reducing fire risk, keep your device and adaptor away from direct sunshine or
water when charging.
Note:
1. When charging ,you should ensure your device at least 3m (appr. 10ft) away
from the edge of the pool.
2. The temperature should be at between 32℉(0℃) and 95℉ (35℃ ) with RH
between 5% and 95% when charging.
If you have installed the flipper after first use, you should keep the bottom on
the floor after inserting the connector. Otherwise, the flipper may be broken.
05
PREPARATION
On/Off Button
Charging Port
Note:
You should insert these two screws in a different directions. One should be
inserted from left side, and the other from right side.
The adaptor has an indicator, it will display green light and red light to tell you
battery is full or not.
Color Indication
Charging in Progress
Battery is full
Charging
Charging Complete
Charge your new Osprey 200 SE
0807
Do a filter cleaning
The device will automatically move to
stop by the wall when finishing cleaning
or battery low.
Run your new Osprey 200 SE
2 3
4
Hold the handle and put it vertically into
the pool and fully submerge the device.
After 5 seconds of auto calibration, the
cleaner is ready to clean.
1
2
1
3
You need to clean the filter tray after each use. Before opening the top cover, you
should ensure the device is power off.
Take off the filter tray.
Unclip cover fasteners, and remove the top cover from the cleaner.
Reassemble the cleaner as below.
Rinse off all dirt and debris.
4
1
Need to relaunch
the cleaner!
bi~ ~bi~ ~
bi bi...bi bi
Turn on the device and put it into the pool within 3 minutes. The device will beep
continuously if it exceeds 3 minutes, then you should relaunch the device.
5
5
Insert the included hook into a pool pole
and lift the cleaner out of the pool.
Remember to power off the device.

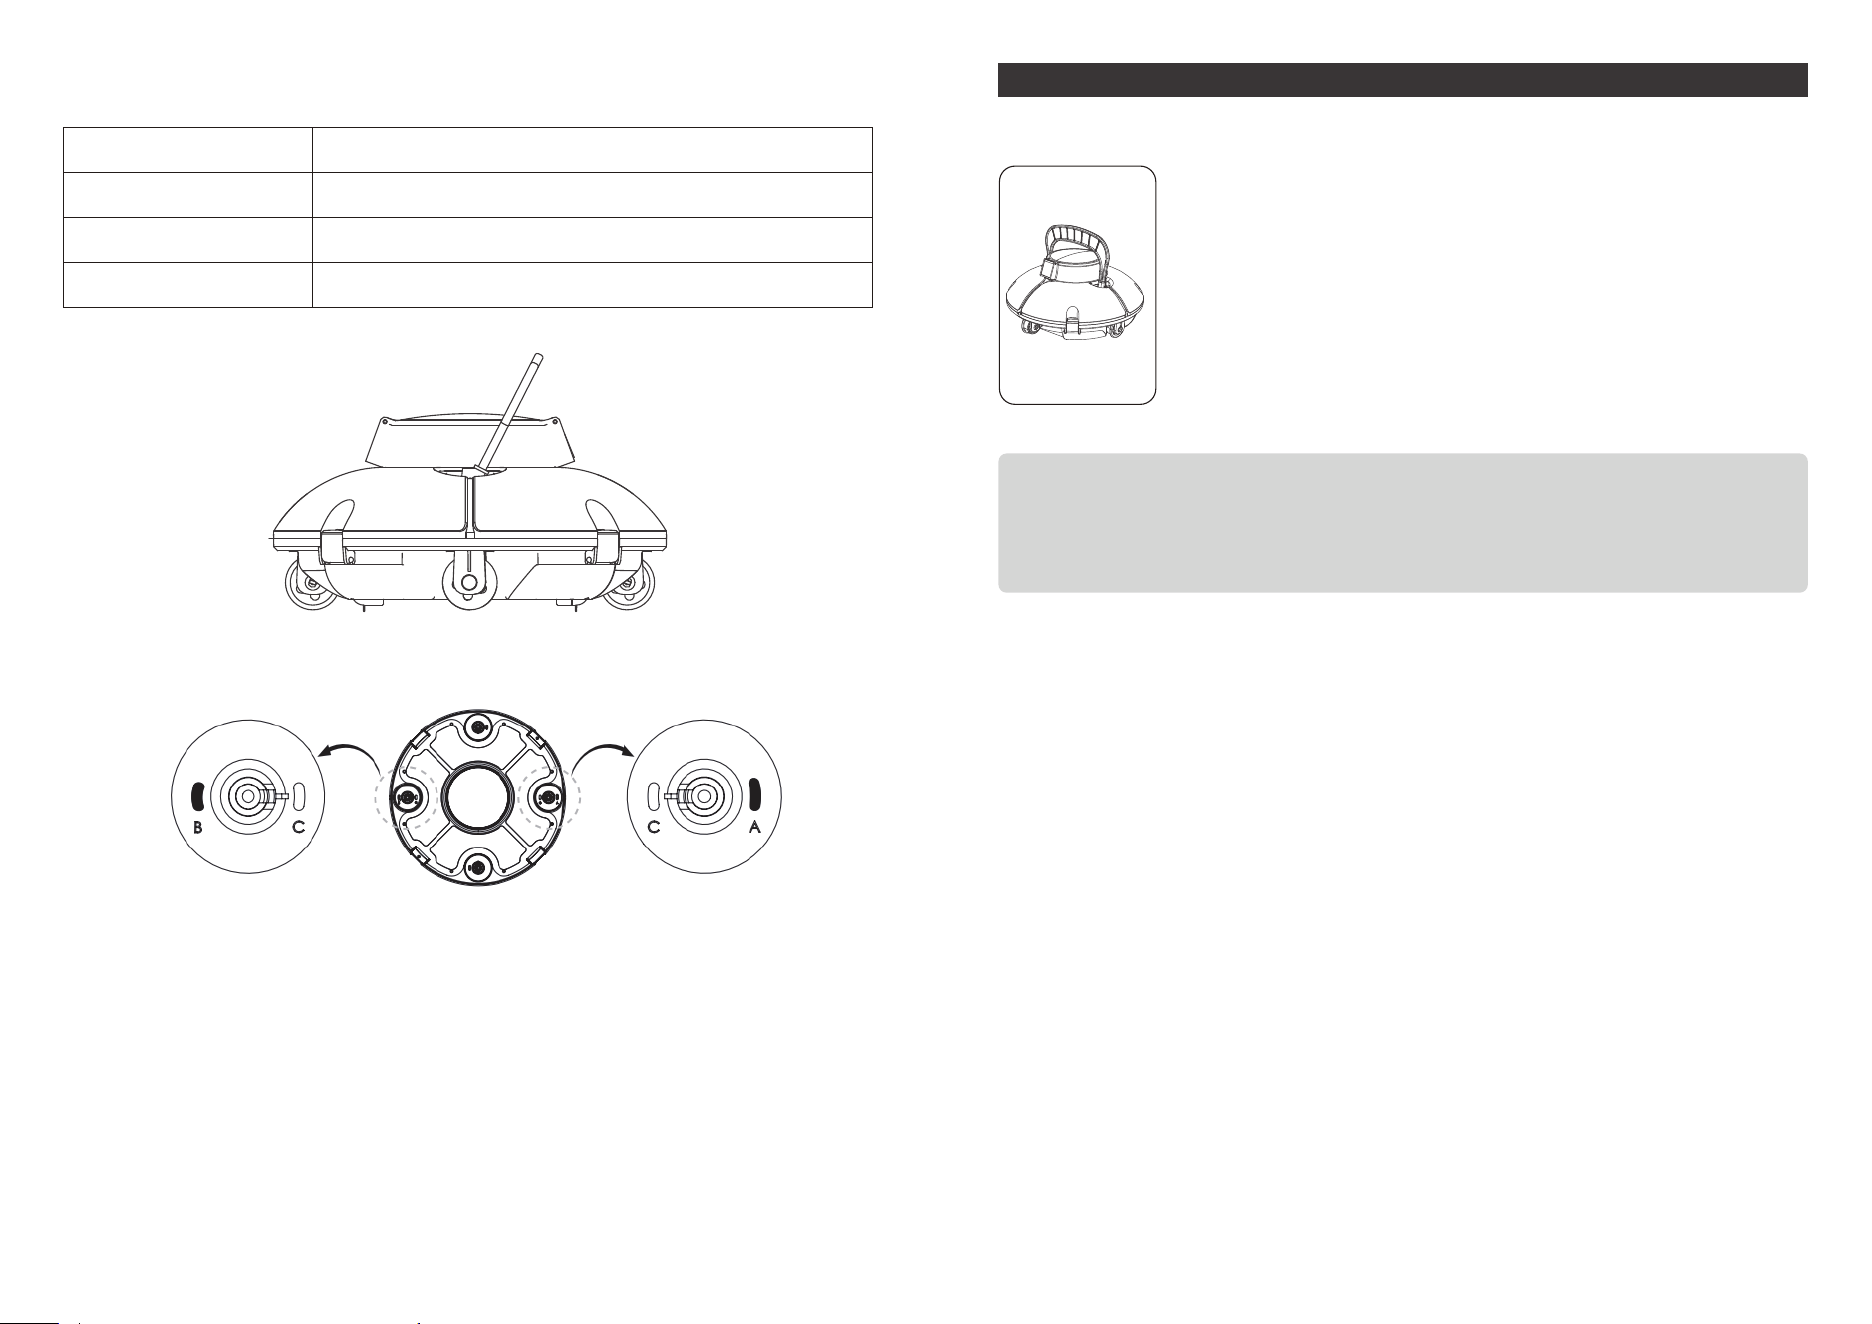
Detach the adjustable wheels
If your pool shape is irregular or you are not satisfied with default cleaning pattern,
you can change the direction of the adjusting wheels to have a better cleaning
work.
you can see two wheel kits where marking A, B, C, and D on front and rear side of
the chassis .
On the wheel stem, you can see a catch inserted in. You can hold that catch and
push to the inner side, and then the wheel kit can be removed.
Reset combination path
Insert the limiting lever on the wheel kit into holes marking A/B/C/D adjust your
cleaning path.
09 10
When fastening the top cover and chassis,
please focus more on the installation dire-
ction as shown in the left figure: you shall
ensure the arrow position marked on the
cover buckle be aligned with the hole posi-
tion, and insert pin on the top cover into
hole.
Note:
Please make sure the male pins on the top buckle places align with the holes
first. It may break easily if the pins of the top buckle don't go into the chassis
buckle holes when fastening top cover, and will affect cleaning.
How to adjust your cleaning path
Adjustable wheel
Adjustable wheel
Wheel stem
Limiting lever
catch
MAINTENANCE AND STORAGE
Caution
You should follow the steps to store your cleaner to maintain
good performance.
a) Ensure the device is power off
b) Dry out the cleaner and filter basket
c) Fully charge the battery
d) Store the cleaner in a cool and ventilated place, away from direct
sunshine, heat source, frost with an ambient temperature at
between 5℃/ 41℉ and 45℃ / 113℉.
e) Charge the cleaner every three months to ensure an optimal
battery life.
Note:
If your device do not work after a long-term low battery life or being off, please
contact after-sale team for help. For your safety, do not try to disassemble
it without authorization.
11 12
Below is the combination ways and their usage scenario of adjustable wheels,
you can refer it.
Combination
A – C
B – C
A – B
Use Scenario
Default (suitable to most pools)
Smaller rebounding angle comparing with “A – C”
For round shape pools
For example: combination B-A

1413
1. WYBOT pool cleaners in the market have been inspected and licensed to be sold
as per local laws.
2. The warranty duration for motor, battery and PCB is one (1) year from the purchas
ing date. Consumable parts, including filter basket, brush, wheels etc., are beyond
warranty.
3. The warranty apply only to original buyers, and not valid to resale and any other
kinds of transfer.
4. Any damages to the unit caused by improper use, unauthorized repair or disassem-
bly are not covered by WYBOT Co., Ltd.’s warranty.
5. The order number or record must be presented for any claim or repair within the
warranty period.
Due to the need for continuous products improvement, the products in the manual are
subject to the real products, and WYBOT Co., Ltd. reserves the right to update products.
If you encounter any problems during use, please contact after-sale team.For more
details, please contact WYBOT website www.wybotpool.com
WARRANTY
Adjust wheel position
(see4.3 Functions and
adjustments of wheels)
Adjust wheel position
(see4.3 Functions and
adjust-ments of wheels)
Shut down the system
Improper wheel angel
Special pool shape
Swimming poolwater circu-
lation system is on
The cleaner does not have
a full coverage for the floor
FAQ
Solution
Change a new charger
Change a new charger
Change a new driving kit
or machine
Change a new driving kit
or machine
Change a new universal
wheel
Change a new buckle/clasp
/clip
Change a new water inlet
flapper
Reasons
Charger or indicator light
defective
Charger or indicator light
defective
Internal driving kit defec-
tive
Stuck by something or
sensor defective
Hitting the pool wall or
improper use
Installation error or exce-
ssive force
Installation error or exce-
ssive force
Questions
No indicator light on
charger
Indicator light flashes
No beep sound after a
full charge
No reverse when rea-
ching a wall
Universal wheel broken
Buckle/clasp/clip broken
Water inlet flapper
broken
TROUBLE SHOOTING GUIDE
If the information listed in the troubleshooting guide can’t solve your problem,
please email us for help.
symptom Possible reason Solution
Possible reason
lnternal fault
The swing plate
isstuck
Recharge the battery
Contact after-sales service
Buzzer silent or impeller
not rotating after power on
Remove the cleaner from
the pool and try to man-
ually rotate the swing
plate or contact the after
-sales service.
Try to manually over com-
estuck condition
The swing plate cannot
stand when the cleaner
touching the wall
The buzzer still alarms or
the impeller does not rotate
after the cleaner is fully
immersed in the water.
Try to manually overcome-
stuck condition
Contact after-sales service
The water channel is stuck
The charger is damaged
The swing plate canstand
when the cleaner touching
thewall, but the cleaner
cannot reverse
Charger indicator does not
work

15
WYBOT CUSTOMER CARE
Wybot Customer Service:
E-mail: [email protected]
Tel: 1-866-777-6655
PLEASE CONTACT US BEFORE RETURNING THIS PRODUCT TO THE STORE.
EMAIL WYBOT CUSTOMER CARE FOR PROBLEMS AND QUESTIONS.
WE WILL RESPOND WITHIN 1 BUSINESS DAY.
We can only provide after sales service for products that are sold by WYBOT autho
rized retailers and distributors.If you have purchased your unit from a different
place, please contact your seller for return and warranty issues.
Document No. A2024WYHJ1102D01
