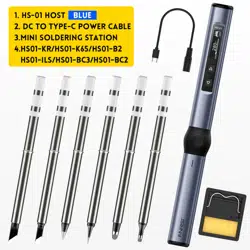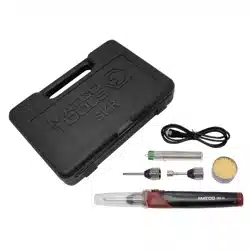
Precision Soldering iron kit
Please read this instruction manual carefully
before use and keep it for future reference.

1. Safety Warnings
2. Product Overview
3. Operation and Functions
4. Specifications
5. Troubleshooting
02
04
05
09
10
Contents
- 01 -

1. Safety Warnings
WARNING! Read all safety warnings and all instructions marked with the symbol.
Failure to comply with the following list of instructions may cause electric shock, fire
and/or serious injury.
Save all warnings and instructions for future reference.
The term "power tool" in the warning refers to a mains-operated (corded) power tool
or a battery-operated (Cordless) power tools.
●
●
●
●
●
●
●
●
●
●
●
●
●
●
●
●
●
Keep the work area clean and bright. Cluttered and dark venues can cause
accidents.
Do not operate power tools in explosive environments such as flammable liquids,
gases or dust. Sparks from power tools can ignite dust or gases.
Keep away from children and bystanders when operating power tools. Lack of
concentration can cause you to lose focus on your tools control.
Do not disassemble, open or chop tools.
Never expose tools to heat or flame. Avoid storage in direct sunlight.
Do not short-circuit the exposed terminals of the tool.
Do not subject the tool to mechanical impact.
Once the battery leaks, do not allow the leaked liquid to come into direct contact
with your skin or eyes.
If contact occurs, flush the affected area with plenty of water and seek medical
attention promptly.
Keep tools away from children.
Keep tools clean and dry.
If the tool becomes extremely dirty while charging, wipe it with a clean, dry cloth.
Tools should be charged before use.
Do not leave the tool charged for long periods of time when not in use.
The battery has the best performance when used at normal temperature (20℃±5℃).
Dispose of batteries correctly.
It is forbidden to touch the tip of the heating machine with your hands. If you get
burned, please seek medical advice in time.
- 02 -

WARNING! Read all safety warnings and all instructions marked with the symbol.
Failure to comply with the following list of instructions may cause electric shock, fire
and/or serious injury.
Save all warnings and instructions for future reference.
The term "power tool" in the warning refers to a mains-operated (corded) power tool
or a battery-operated (Cordless) power tools.
●
●
●
●
●
●
●
●
●
●
●
●
●
●
●
●
●
Keep the work area clean and bright. Cluttered and dark venues can cause
accidents.
Do not operate power tools in explosive environments such as flammable liquids,
gases or dust. Sparks from power tools can ignite dust or gases.
Keep away from children and bystanders when operating power tools. Lack of
concentration can cause you to lose focus on your tools control.
Do not disassemble, open or chop tools.
Never expose tools to heat or flame. Avoid storage in direct sunlight.
Do not short-circuit the exposed terminals of the tool.
Do not subject the tool to mechanical impact.
Once the battery leaks, do not allow the leaked liquid to come into direct contact
with your skin or eyes.
If contact occurs, flush the affected area with plenty of water and seek medical
attention promptly.
Keep tools away from children.
Keep tools clean and dry.
If the tool becomes extremely dirty while charging, wipe it with a clean, dry cloth.
Tools should be charged before use.
Do not leave the tool charged for long periods of time when not in use.
The battery has the best performance when used at normal temperature (20℃±5℃).
Dispose of batteries correctly.
It is forbidden to touch the tip of the heating machine with your hands. If you get
burned, please seek medical advice in time.
- 03 -
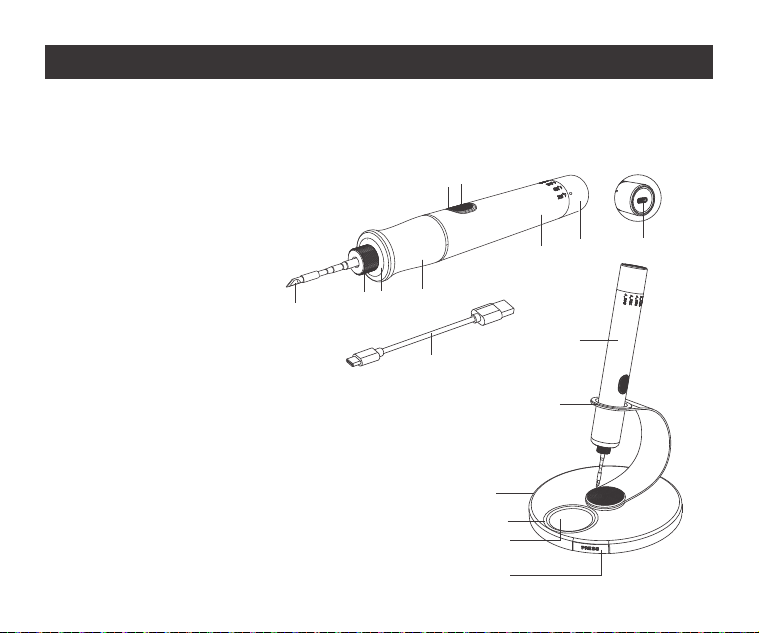
2. Product Overview
Please read this manual carefully before use and keep it in a safe place.
Thanks for using the portable soldering iron.
1.Soldering iron tip
2.Fastening nut
3.Led light
4.Anti-scalding rubber cover
5.Power switch
6.Work indicator light
7.Aluminum shell
8.Thermostat knob
9.Type-C charging port
10.Charging cable
11.Soldering iron
12.Swivel stand
13.Base
14.Sponge box
15.Sponge
16.Soldering iron tip storage box
1
2
3
4
5
6
7
8
11
12
13
14
15
16
9
10
- 04 -
3. Operation and Functions
Install the soldering iron tip
Turn on/off the soldering iron heating function
●
●
●
●
Smart sleep
●
●
●
6 levels of temperature adjustment
●
●
Assembling the bracket and base
●
●
Charging and battery tips
1.
2.
3.
4.
5.
6.
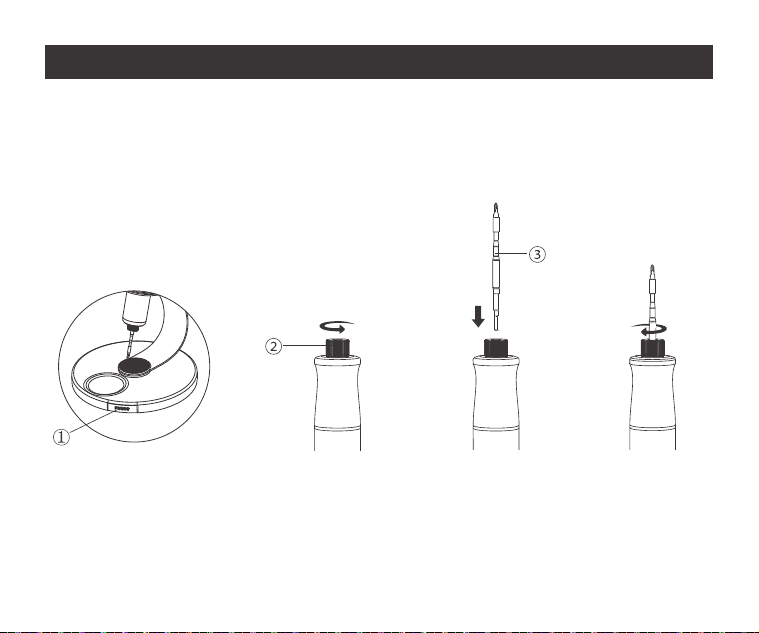
1. Press the storage drawer ① on the base and take out the soldering iron tip.
2. Loosen the nut ② .
3. Insert the soldering iron tip ③ into the nut.
4. Tighten the nut.
Lock the nutInsert the tipUnscrew the nutTake out the tip
Step 1 Step 2 Step 3 Step 4
- 05 -

Install the soldering iron tip
Turn on/off the soldering iron heating function
●
●
●
●
Smart sleep
●
●
●
Press and hold the button switch for 3 seconds: the front LED light lights up, the red
breathing light flashes, and the soldering iron starts heating function until the green
light is on, it can be used normally.
Press and hold the power switch again for 3 seconds, the front LED light and work
indicator light will turn off,the soldering iron heating function will be off.
If the soldering iron tip is not installed properly, resulting in poor contact, a green
light will appear when the heating function is turned on.
A quick flashing prompt indicates that you need to reinstall the soldering iron tip and
then turn on the heating function.
After the soldering iron turns on the heating function, if there is no vibration for 30
seconds, it will automatically enter the sleep state.
Pick up the soldering iron with your hand and it will heat automatically.
When the heating function is turned on but there is no vibration sensing for 15
minutes, it means that you may not be using the soldering iron, so it will automati-
cally shut down.
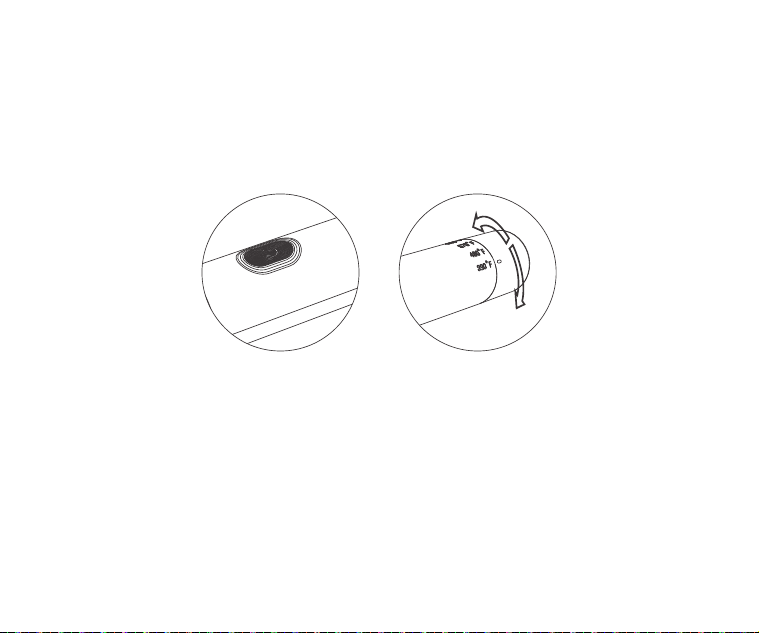
6 levels of temperature adjustment
●
●
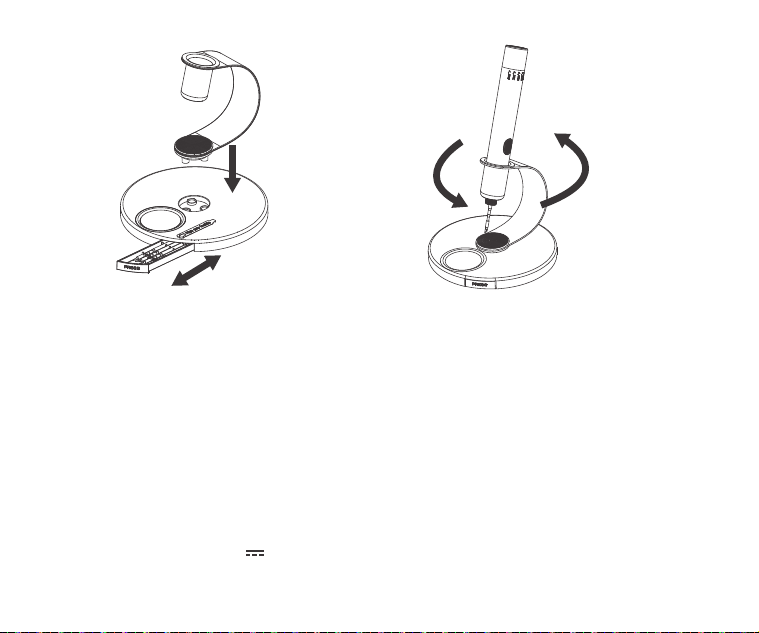
Assembling the bracket and base
●
●
Turn the temperature adjustment knob to the left or right, and align the mark on the
temperature adjustment knob to the desired gear.
When the red light is breathing, it means heating to the target temperature.The
green light is always on to indicate that the target temperature has been reached.
Align the three buckles on the rotating bracket with the buckle holes on the base
and press down at the same time to assemble. After assembly, the stand can be
rotated 360 degrees.
Open/close storage box.
Press the storage box with your hand and it will pop out; press the storage box
again and it will lock.
Charging and battery tips
1.
2.
3.
4.
5.
6.
- 06 -
Install the soldering iron tip
Turn on/off the soldering iron heating function
●
●
●
●
Smart sleep
●
●
●
Press and hold the button switch for 3 seconds: the front LED light lights up, the red
breathing light flashes, and the soldering iron starts heating function until the green
light is on, it can be used normally.
Press and hold the power switch again for 3 seconds, the front LED light and work
indicator light will turn off,the soldering iron heating function will be off.
If the soldering iron tip is not installed properly, resulting in poor contact, a green
light will appear when the heating function is turned on.
A quick flashing prompt indicates that you need to reinstall the soldering iron tip and
then turn on the heating function.
After the soldering iron turns on the heating function, if there is no vibration for 30
seconds, it will automatically enter the sleep state.
Pick up the soldering iron with your hand and it will heat automatically.
When the heating function is turned on but there is no vibration sensing for 15
minutes, it means that you may not be using the soldering iron, so it will automati-
cally shut down.
6 levels of temperature adjustment
●
●
Assembling the bracket and base
●
●
Turn the temperature adjustment knob to the left or right, and align the mark on the
temperature adjustment knob to the desired gear.
When the red light is breathing, it means heating to the target temperature.The
green light is always on to indicate that the target temperature has been reached.
Align the three buckles on the rotating bracket with the buckle holes on the base
and press down at the same time to assemble. After assembly, the stand can be
rotated 360 degrees.
Open/close storage box.
Press the storage box with your hand and it will pop out; press the storage box
again and it will lock.
Charging and battery tips
1.
2.
3.
4.
5.
6.
- 07 -
Install the soldering iron tip
Turn on/off the soldering iron heating function
●
●
●
●
Smart sleep
●
●
●
6 levels of temperature adjustment
●
●
Assembling the bracket and base
●
●
Charging and battery tips
1.
2.
3.
4.
5.
6.
The white breathing light flashes during charging.
The white light stays on when fully charged.
When the voltage is lower than 3.75V, the red light flashes quickly to prompt
charging.
When the voltage is lower than 3.4V, it will automatically shut down.
When the charger is connected to use the heating function, it will automatically
switch to the charger for power supply and heating.
Power adapter DC:5V 2A charging cable Type-C.
360°
- 08 -
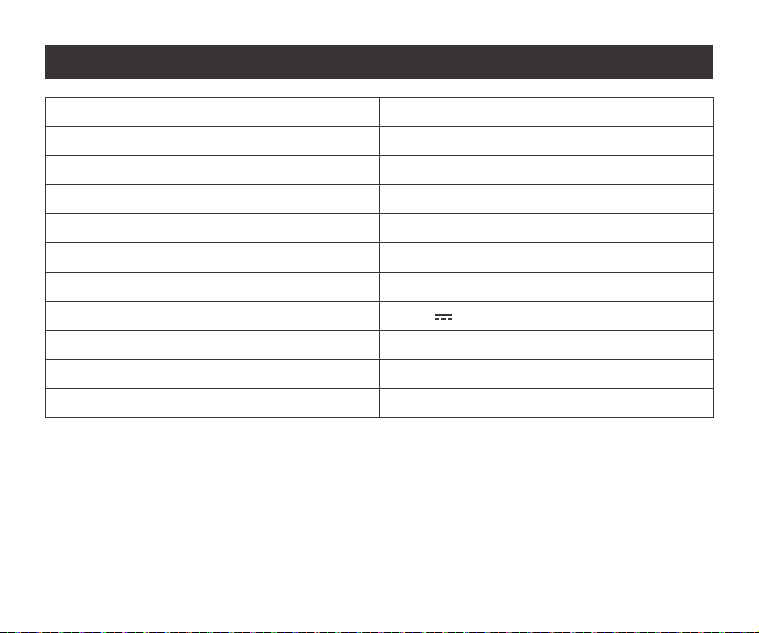
4. Specifications
Product Name
Product Model
Color
Soldering Iron Dimensions
Base Bracket Dimensions
AC Output Power
DC Output Power
Charging power
Rated Voltage
Lithium Battery
Charging time
Cordless precision soldering iron kit
NEX T1 Max
Deep grey
Φ24*180 mm
Φ146 x H116 mm
16W
12W
5V 2A
3.65V
2600mAh
1.5-2H
- 09 -
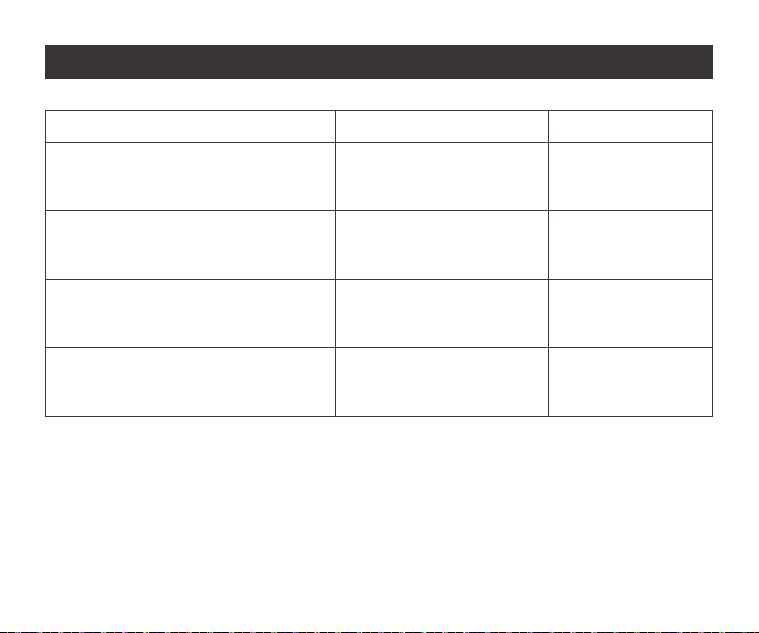
5. Troubleshooting
Fault Cause Solution
The soldering iron automatically
shuts down after being turned on
Automatically shuts down after
prolonged heating
Automatically switches to
charging when heating
The soldering iron cannot heat
(green light flashes quickly)
The soldering iron tip is
not installed properly
Reinstall the
soldering iron tip
Replace power/
charging cable
Need to charge
RestartDischarge high
temperature protection
Power/charging cable
mismatch
Low battery
- 10 -