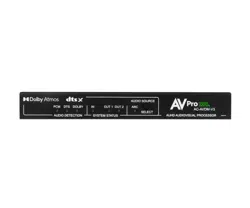
AC-AVDM-V3 User
Manual
18 Gbps (4K60 4:4:4 & HDR) Audio Down-mixer with Video
Downscaling
Dolby Atmos
®
and DTS:X
®
Support

Contents
Contents 2
Important Safety Instructions 3
Safety Classifications in this Document.................................................................................................................................. 3
Electrical Shock Prevention.......................................................................................................................................................3
Weight Injury Prevention...........................................................................................................................................................3
Introduction 4
Key Benefits.................................................................................................................................................................................4
Features....................................................................................................................................................................................... 5
Product Overview 5
Box Contents...............................................................................................................................................................................5
Technical Specifications.............................................................................................................................................................6
Front and Rear Panels............................................................................................................................................................... 7
Installation 8
Connecting the Devices.............................................................................................................................................................8
Dipswitch Settings......................................................................................................................................................................9
Audio Source Select Button Operation................................................................................................................................... 9
Front Panel Indicator Lights....................................................................................................................................................10
Audio Detection....................................................................................................................................................................10
System Status....................................................................................................................................................................... 10
Serial Communication............................................................................................................................................................. 11
Serial Commands................................................................................................................................................................. 11
Troubleshooting 12
Maintenance 12
Damage Requiring Service 12
Support 12
Warranty 13
The Basics..................................................................................................................................................................................13
Coverage Details.......................................................................................................................................................................13
Red Tape....................................................................................................................................................................................13
Obtaining an RMA.................................................................................................................................................................... 14
WWW.AVPROEDGE.COM • 2222 EAST 52
nd
STREET NORTH • SIOUX FALLS, SD 57104 •
+1-605-274-60552

Shipping.....................................................................................................................................................................................14
Limitation on Liability.............................................................................................................................................................. 14
Exclusive Remedy.....................................................................................................................................................................14
Important Safety Instructions
Before installing, configuring, and operating this device and other vendor equipment, AVPro Edge strongly
recommends that each dealer, integrator, installer, and all other necessary personnel access and read all the
required technical documentation, which can be located by visiting AVProEdge.com.
Read and understand all safety instructions, cautions, and warnings in this document and the labels on the
equipment.
Safety Classifications in this Document
● Note:
Provides special information to correctly install, configure, and operate the devices or
associated equipment.
● Tip:
Provides suggestions and considerations to correctly install, configure, and operate the
devices or associated equipment.
● Important:
Provides special information that is critical to correctly install, configure, and operate
the devices or associated equipment.
● Caution:
Provides special information to avoid situations that may cause damage to the devices
or associated equipment.
● Warning:
Provides special information to avoid situations that may cause physical danger to
installers or end-users.
Electrical Shock Prevention
● Electric Shock:
Provides special information that is critical to correctly install, configure, and operate
the devices or associated equipment.
● Electrical
Disconnect:
Provides special information to avoid situations that may cause damage to the devices
or associated equipment.
Weight Injury Prevention
● Weight Injury:
Installing some devices or associated equipment requires two installers to ensure safe
handling during installation. Failure to use two installers may result in injury.
WWW.AVPROEDGE.COM • 2222 EAST 52
nd
STREET NORTH • SIOUX FALLS, SD 57104 •
+1-605-274-60553
Introduction
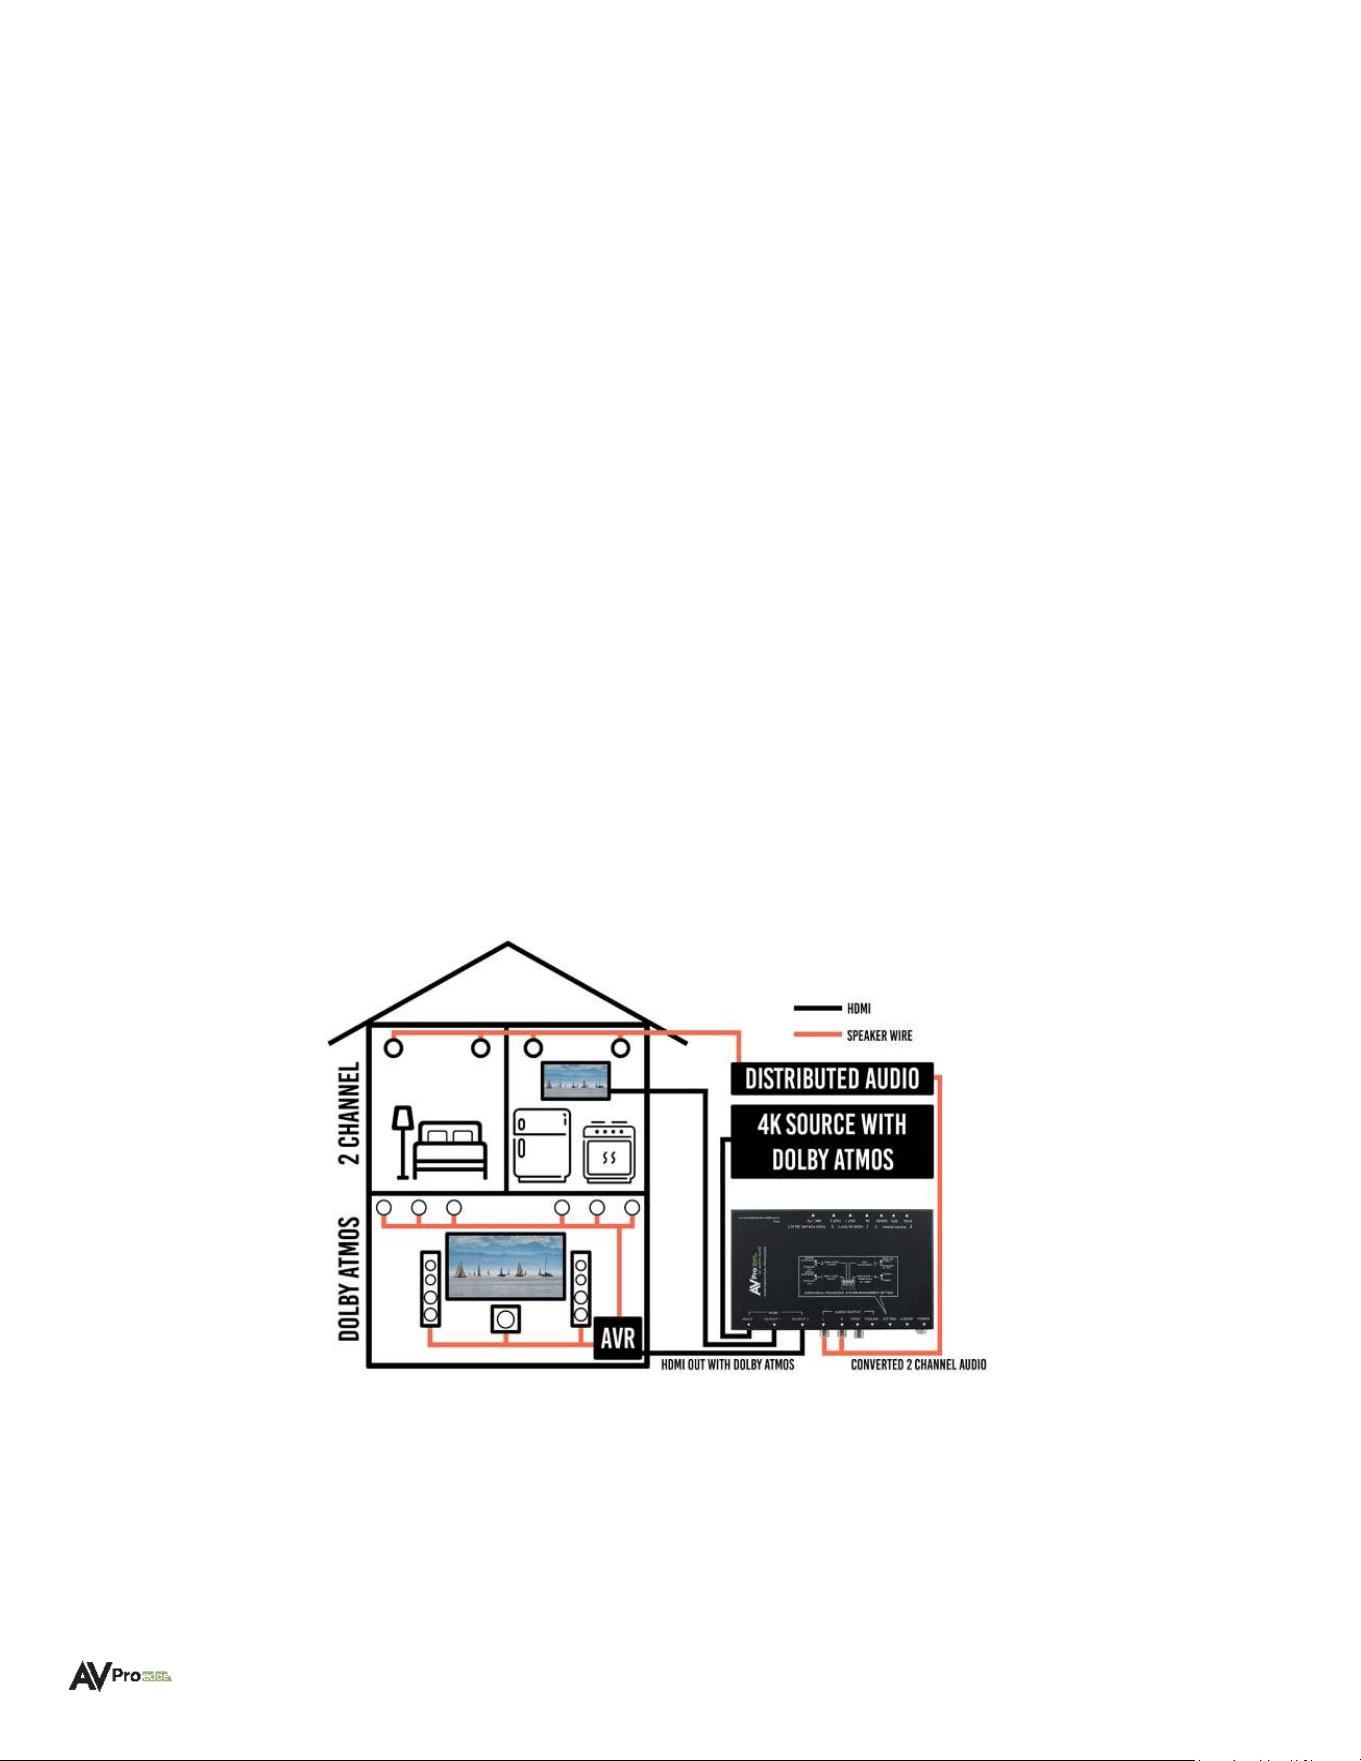
In the AVPro Edge AC-AVDM-V3, the multichannel bitstream of an HDMI signal is decoded, then combined to create
a downmixed secondary output for distribution by 2-channel audio systems.
Downmixing is necessary when a multichannel signal is required to be sent through as few as two speakers, with no
subtraction of the original content. For example, eight discrete channels of audio information can be “collapsed”
into two channels, creating a stereo signal for distribution.
The original purpose of downmixing was to enable playback of multichannel movie sound over television speakers.
Stereo downmixing for television is called Lo/Ro (Left only/Right only) and is often referred to as the ITU Downmix.
The downmix is created by combining Left, Center, and Left surround information together from an original 5.1
multichannel signal. 3D immersive soundtracks are downmixed in a different manner, however, no from the original
multichannel mix is discarded. As most bass information is non-directional, a degree of LFE content is steered into
the downmix, but not overly so that it would impact small speakers. Like the Left channels, the Right channels are
also combined, enabling the downmix to maintain stereo compatibility.
The AC-AVDM-V3 supports decoding of Dolby
®
and DTS
®
formats, outputting single-ended analog stereo audio,
digital (LPCM 2.0) over HDMI or S/PDIF (optical and coaxial).
The diagram below illustrates how content may be viewed in a home theater with Dolby Atmos® and enjoyed in
secondary zones by the AC-AVDM-V3 converting bitstream audio into 2 channels from the extracted analog ports.
Key Benefits
• Downscaling & Dual Output: The AC-AVDM-V3 built-in scaler can input 4K signals including HDR, then
downscale the output into 1080p, enabling retained use of legacy HDMI AVRs incapable of supporting
higher bandwidth video while passing the full video signal to the display from the HDMI 2 output.
WWW.AVPROEDGE.COM • 2222 EAST 52
nd
STREET NORTH • SIOUX FALLS, SD 57104 •
+1-605-274-60554
• Audio Downmixing: The AC-AVDM-V3 is perfect for downmixing/extracting audio from formats such as
LPCM 7.1CH, DTS
®
, DTS
®
ES, DTS:X
®
, AC3, Dolby Digital™, Dolby Digital Plus™, Dolby
®
TrueHD, and Dolby
Atmos
®
.
• EDID Management: Use the on-board 4K EDID or use EDID READ to copy a downstream EDID.
• ARC Management: With ARC (Audio Return Channel) management, audio returning on the ARC Channel
may be downmixed for use by a legacy AVR, a 2-channel system, or for distribution.
• Detection Indicators: Front panel LEDs illuminate to indicate signal type.
Features
• HDMI 2.0 (a/b)
• Up to 4K60 4:4:4 Support (with ICT)
• Supports static and dynamic HDR metadata, including HLG
• Dolby Vision™ Support
• 4K to 1080p Downscaling for mixed systems
• Supports PCM 2-Channel, LPCM 5.1 & 7.1, AC3, Dolby Digital™, Dolby Digital Plus™, Dolby
®
TrueHD,
Dolby Atmos
®
, DTS
®
, DTS-ES
®
, DTS:X
®
• Downmix available from analog RCA outputs, S/PDIF (coaxial and TOSLINK), or HDMI.
• EDID Management and EDID Copy
• ACR Support (HDMI)
• HDCP 2.2 (all earlier versions supported)
• CEC (ARC) Support
• 3D Support
• LED Status, Link, and ARC indicator lights
• Toggle Switches for simple EDID Management, Downmixing, and Scaling.
• Micro-USB ISP for field firmware updates
Product Overview
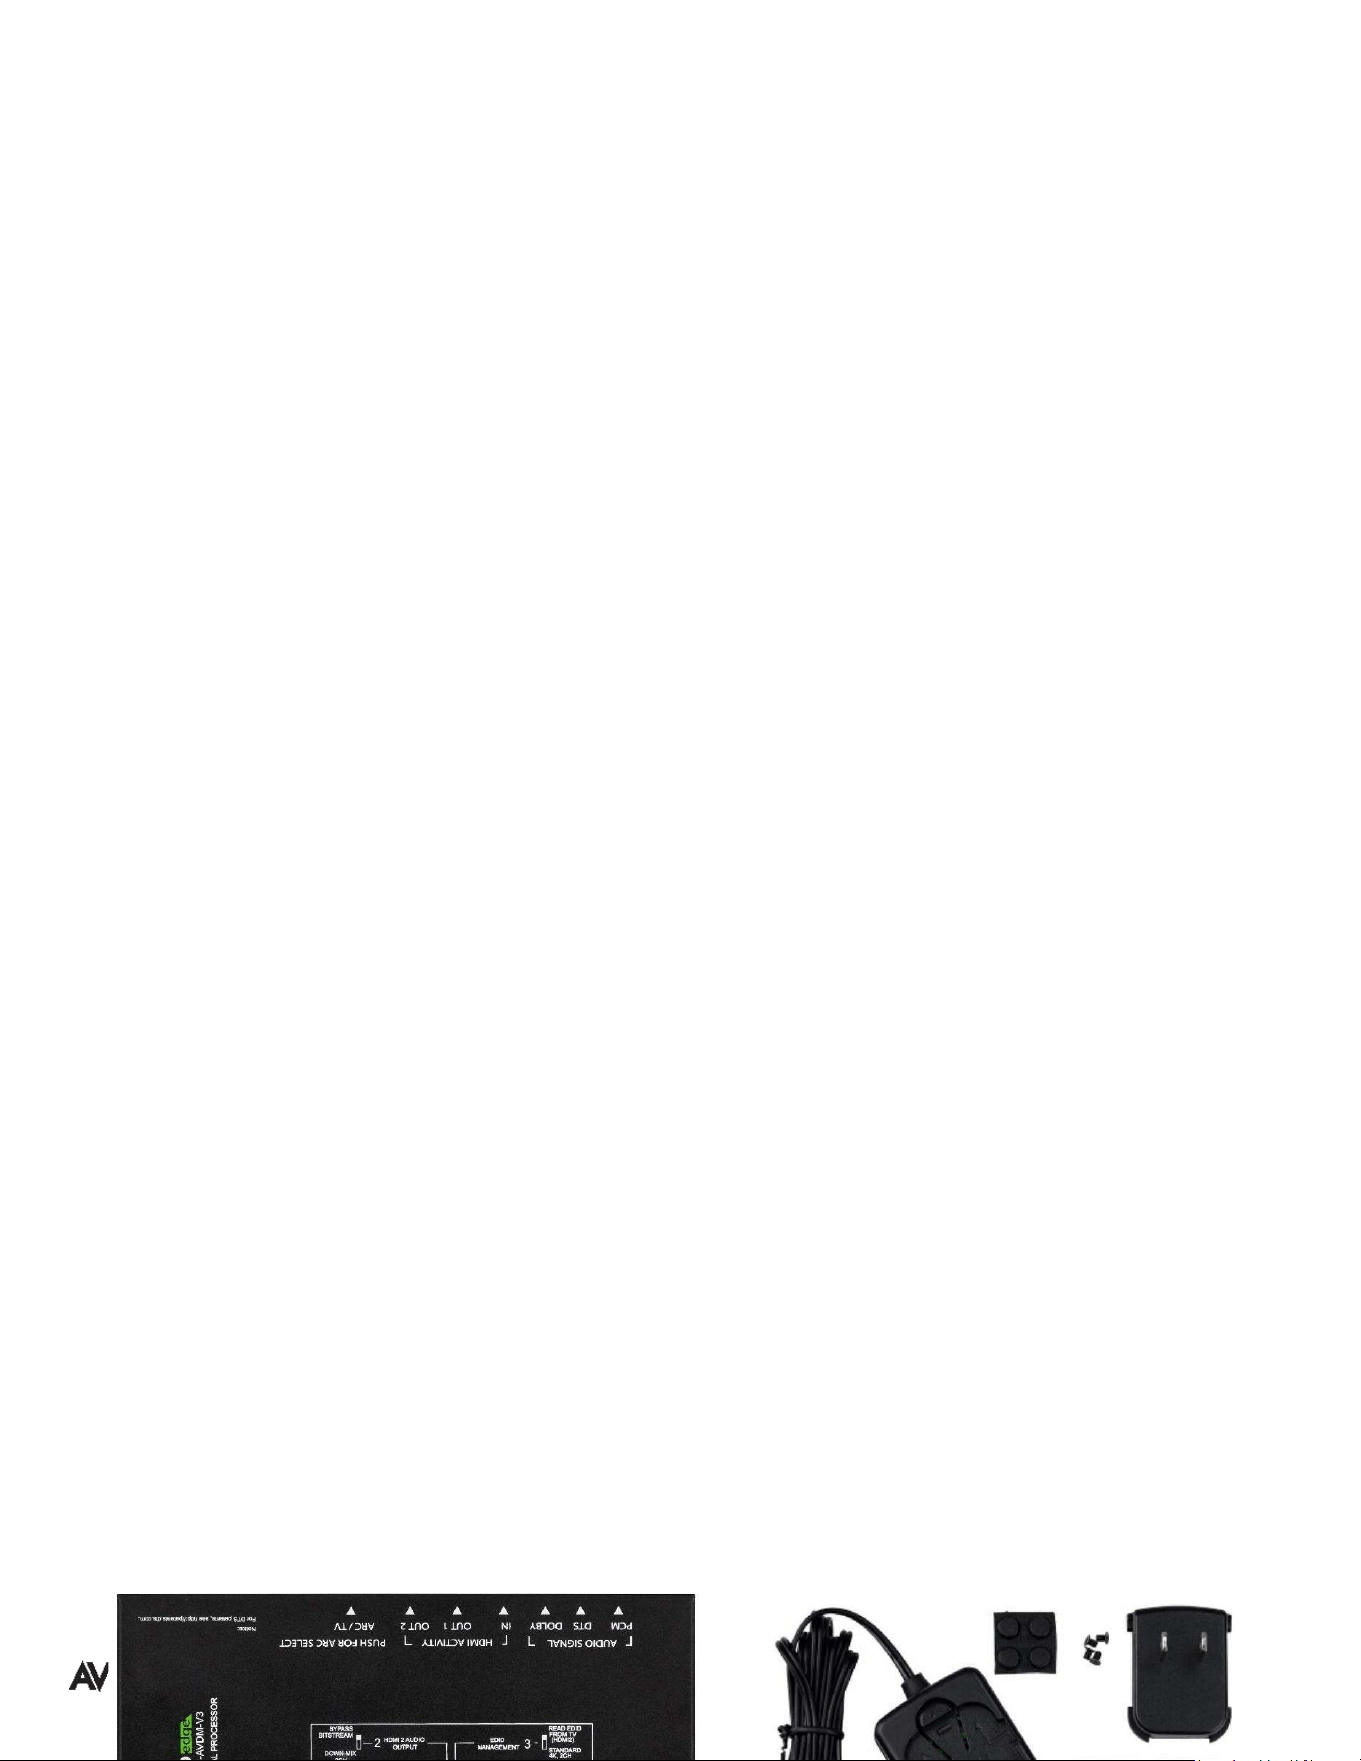
Box Contents
(1x) AC-AVDM-V3 (Unit)
(1x) 5V/2A Locking Barrel Power Supply
(1x) Type A Plug-in Outlet Attachment
(2x) Mounting Brackets
(4x) Mounting Screws
(4x) Rubber Feet
WWW.AVPROEDGE.COM • 2222 EAST 52
nd
STREET NORTH • SIOUX FALLS, SD 57104 •
+1-605-274-60555

Technical Specifications
Video
Video Resolutions
Up to 4K 60Hz 4:4:4
VESA Resolutions
Up to DCI 4K (4096 x 2160)
HDR Formats/Resolutions
4:2:0, 4:2:2, 4:4:4 (10- and 12-bit deep color)
HDR10, HDR10+, HLG, Dolby Vision™
Color Space
YUV (Component), RGB (CSC: Rec. 601, Rec. 709, BT2020, DCI,
P3 D6500)
Chroma Subsampling
4:4:4, 4:2:2, 4:2:0 Supported
Deep Color
Up to 16-bit (1080p, Up to 12-bit (4K)
Audio
Supported Audio Formats
(HDMI Pass-through)
PCM 2.0 Ch, LPCM 5.1 & 7.1, Dolby Digital™, DTS
®
5.1, Dolby
Digital Plus™, Dolby
®
TrueHD, DTS-HD
®
Master Audio™,
DTS:X
®
, Dolby Atmos
®
Supported Downmixed Audio Formats
(2-Ch, TOSLINK, S/PDIF, HDMI)
PCM 2.0 Ch, LPCM 5.1 & 7.1, Dolby Digital™, DTS
®
5.1, Dolby
Digital Plus™, Dolby
®
TrueHD, DTS-HD
®
Master Audio™,
DTS:X
®
, Dolby Atmos
®
Other
Bandwidth
18 Gbps
HDCP
HDCP 2.2 and earlier
Ports
HDMI (Tx & Rx)
Type A (1 input and 2 outputs)
Audio (Extracted Analog)
L/R Stereo Phono (single-ended)
Audio (Extracted S/PDIF Coaxial)
Phono RCA
Audio (Extracted TOSLINK)
Optical TOSLINK
USB
Micro-USB
Power
Locking Barrel Type Connector
Environmental
Operating Temperature
23°F (-5°C) to 125°F (51°C)
Storage Temperature
-4°F (-20°C) to 140°F (60°C)
Humidity Range
5% to 90% RH (no condensation)
Power
Power Consumption (Total)
6 Watts Maximum
Power Supply
Input: AC 100-240V ~ 50/60Hz
Output: DC 5V/2A
Dimensions
Mounting
Furniture Mount Support
Length x Width x Height
(Single Unit)
Millimeters: 192 x 92 x 12
Inches: 5.05 x 3.62 x 0.47
Length x Width x Height
(Packaged Unit)
Millimeters: 203 x 165 x 91
Inches: 8 x 6.5 x 3.6
Weight
(Single Unit)
0.3 lbs (0.136 kg)
Weight
(Packaged Unit)
1.01 lbs (0.46 kg)
Product Warranty
10 Years
*Specifications are subject to change without notice. Mass and dimensions are approximate.
WWW.AVPROEDGE.COM • 2222 EAST 52
nd
STREET NORTH • SIOUX FALLS, SD 57104 •
+1-605-274-60556
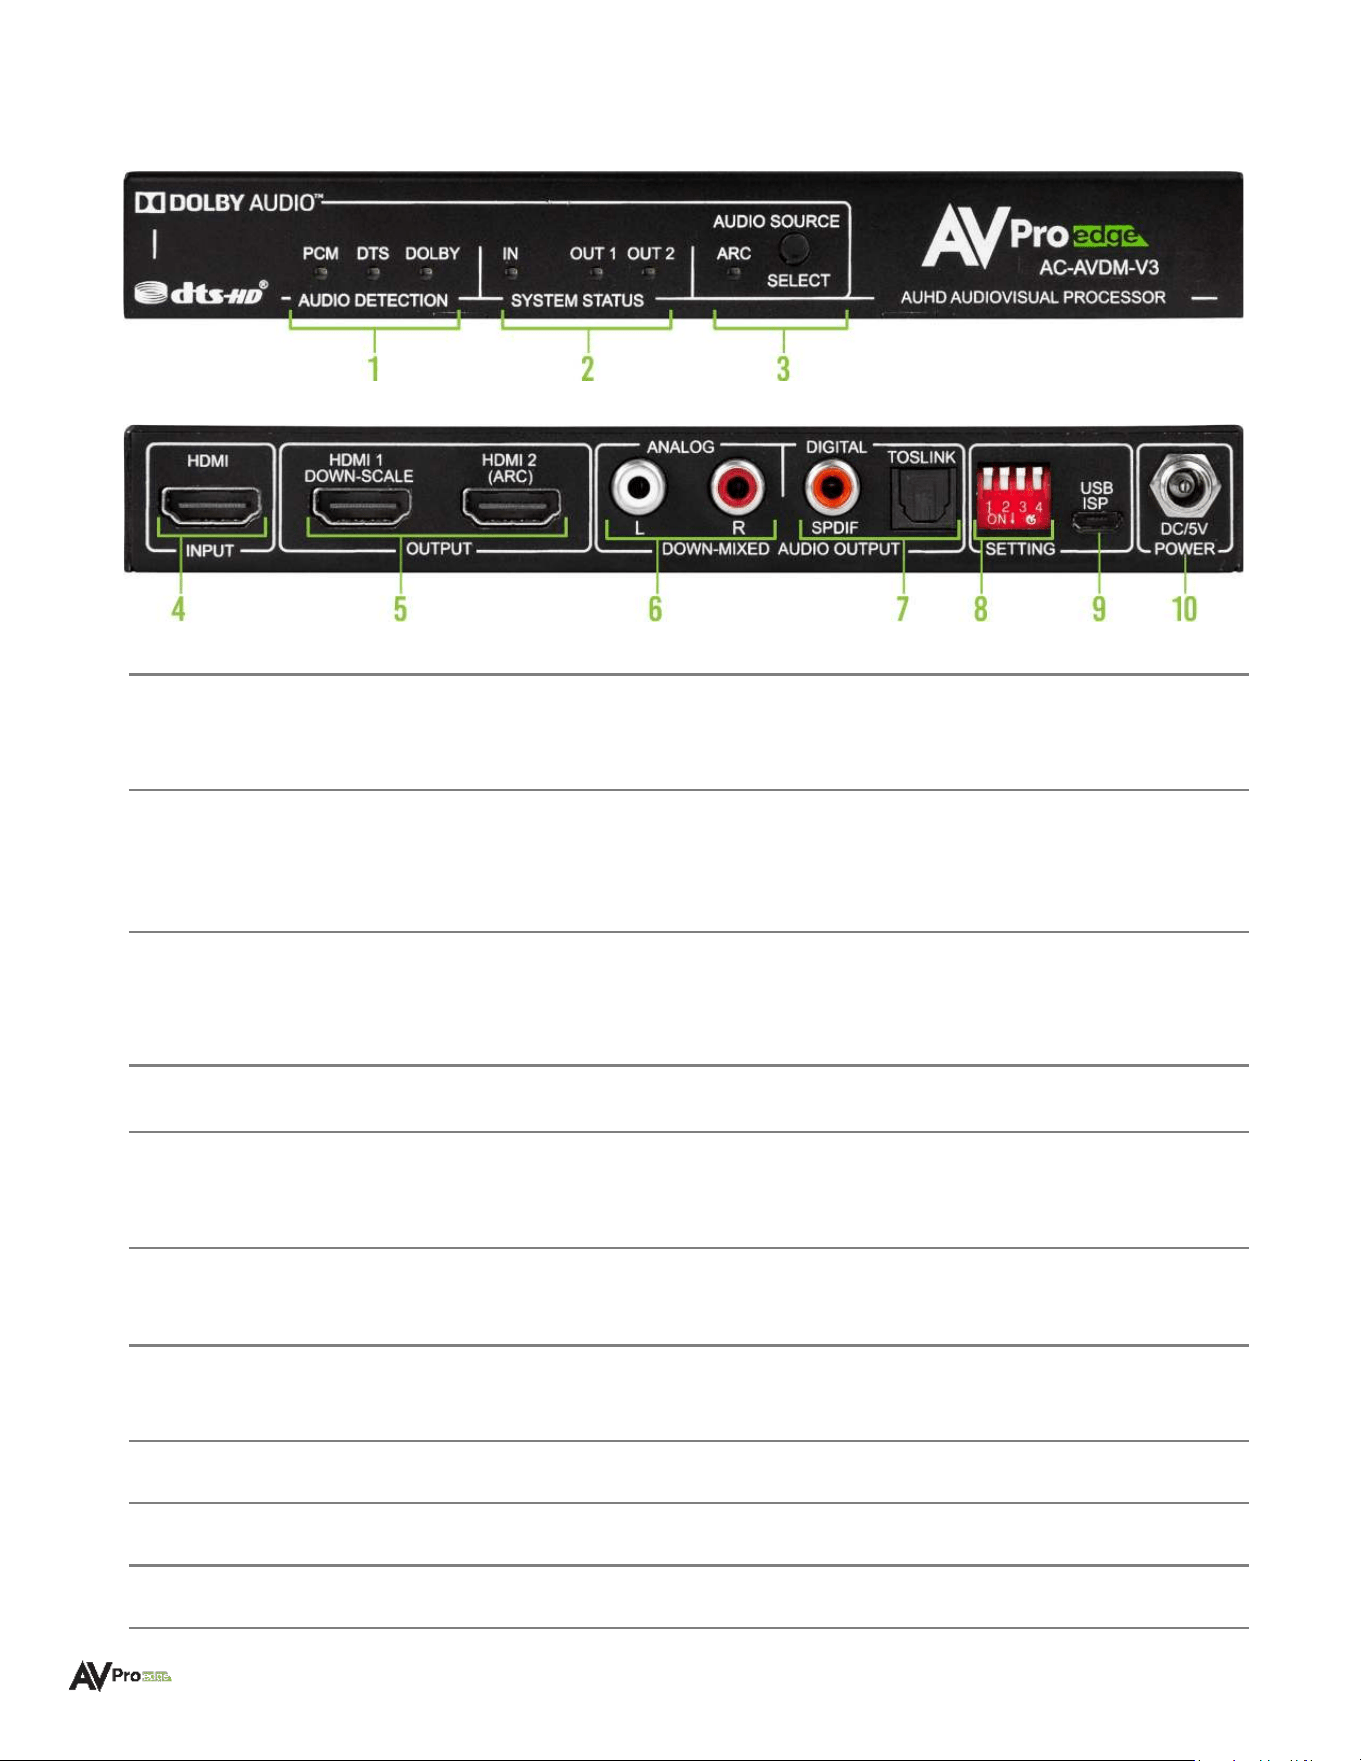
Front and Rear Panels
Front Panel
Rear Panel
1
Audio Detection
LEDs
● When illuminated each blue LED shows the incoming audio signal type:
PCM: indicates an active audio signal is being detected/decoded
DTS: indicates DTS bitstream audio is being detected/decoded
DOLBY: indicates Dolby
®
bitstream audio is being detected/decoded
2
System Status
LEDs
● When illuminated each blue LED shows the HDMI source device is
connected and which ports are active/connected:
IN: Indicates the source device is connected to the HDMI INPUT port
OUT 1: Indicates HDMI OUTPUT 1 is active/connected
OUT 2: Indicates HDMI OUTPUT 2 is active/connected
3
Audio Source
Select
Button & LED
● Button toggles Audio Extraction Mode (with adjacent blue LED):
LED On: Audio is extracted/decoded from the HDMI 2 (ARC) output port
LED Off: (Default) Audio is extracted from the HDMI INPUT source device
4
HDMI Input
● (1x) 19-pin HDMI Type A female connector port
● Source device input for HDMI connection
5
HDMI Outputs
● (2x) 19-pin HDMI Type A female connector ports
● Output device ports for HDMI connections:
HDMI 1: Selectable downscaling from 4K to 1080p output (no ARC)
HDMI 2: Selectable audio extraction via ARC (no downscaling)
6
Analog Audio
Output
● Left/Right Stereo extracted audio outputs (single-ended 2-channel)
● Output always mirrored with Digital Audio Outputs (Coaxial and TOSLINK)
7
Digital Audio
Output
● (1x) S/PDIF Coaxial RCA phono extracted audio port
● (1x) TOSLINK Optical extracted audio port
● Always mirrored with Analog Audio Outputs
8
Settings Switches
● (4x) Dipswitches to set downscaling, down-mixing, and ARC options
9
USB ISP
● Micro-USB connector port for servicing and serial communication
10
Dc/5V Power
● DC 5V/2A locking barrel power port
WWW.AVPROEDGE.COM • 2222 EAST 52
nd
STREET NORTH • SIOUX FALLS, SD 57104 •
+1-605-274-60557
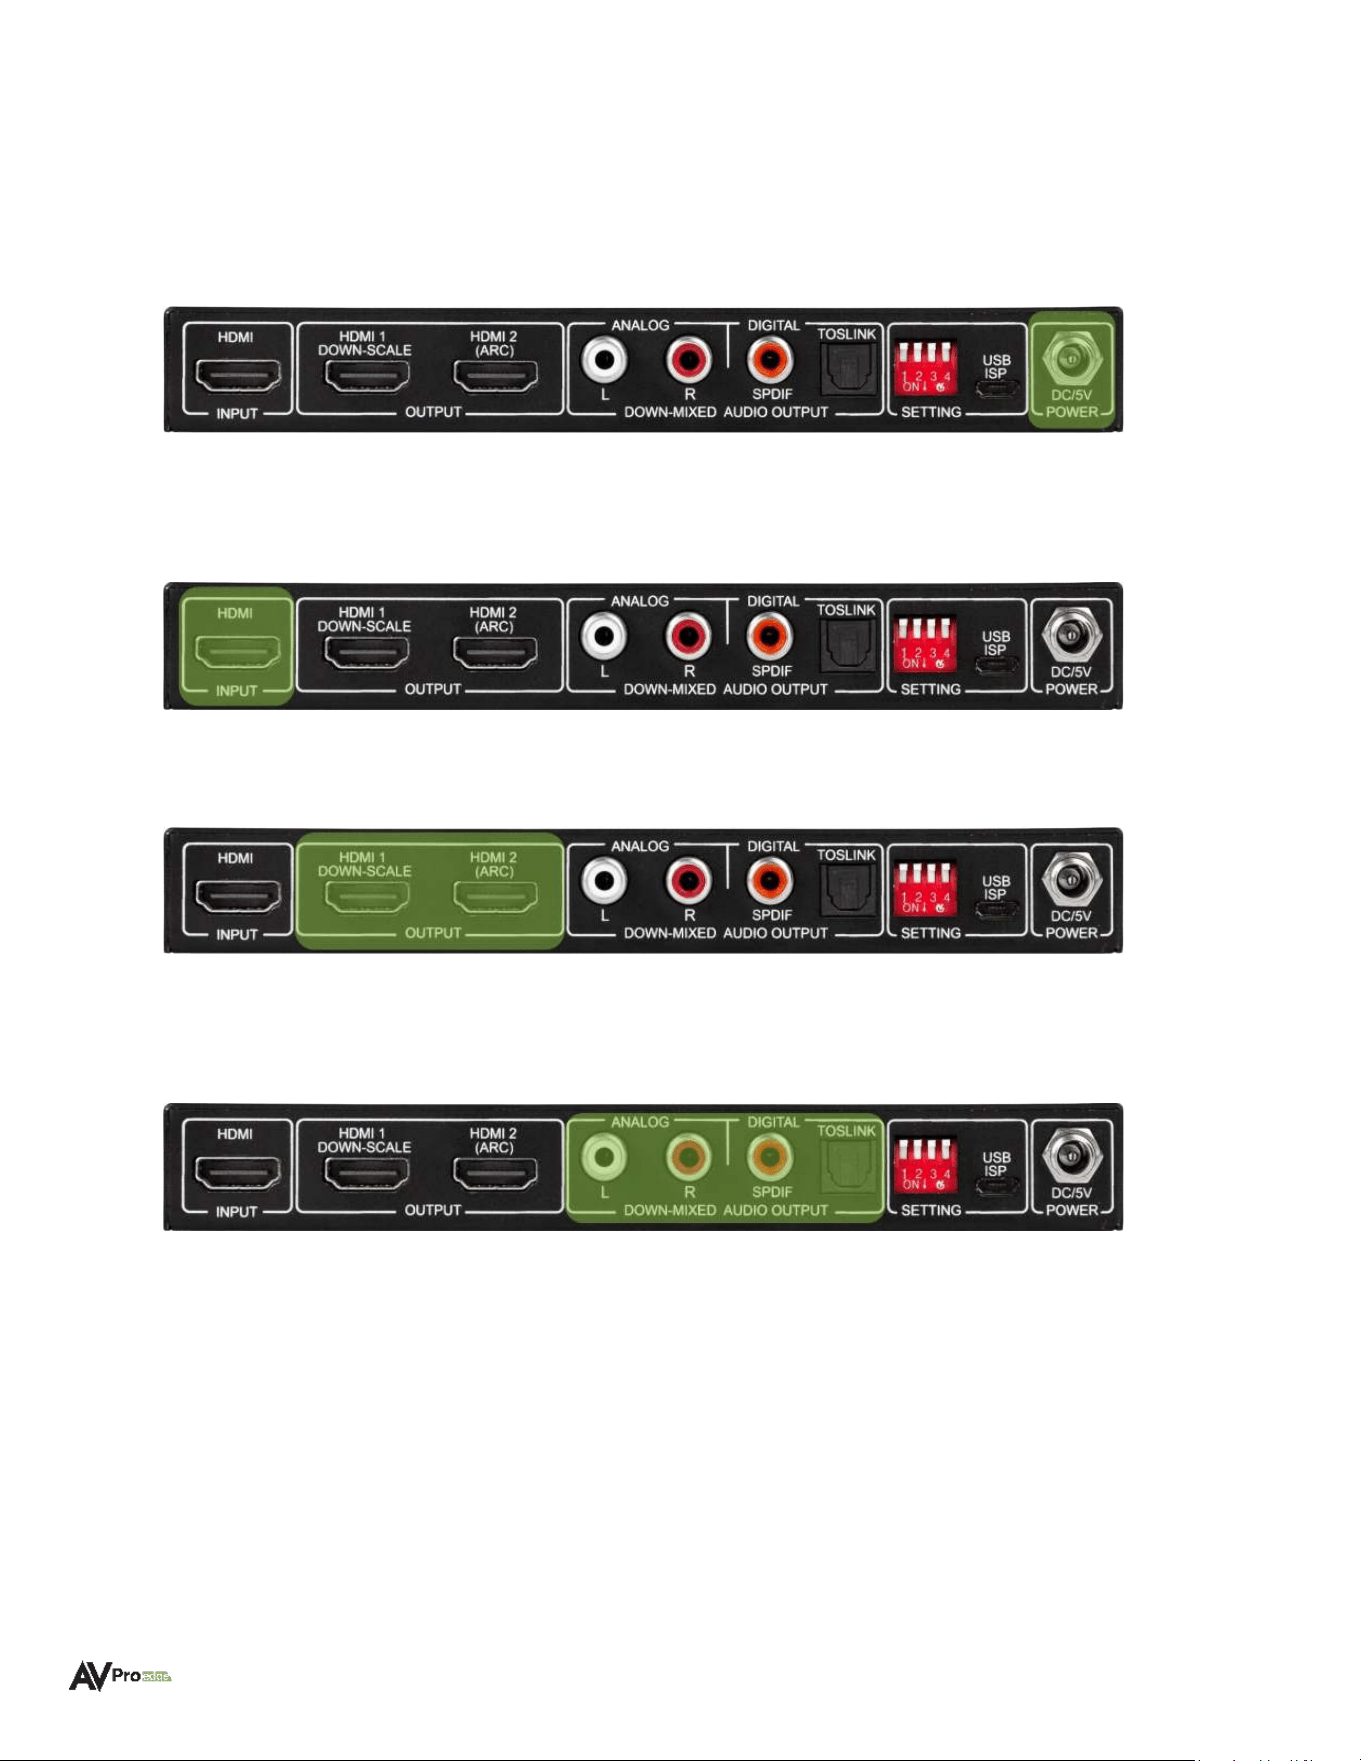
Installation
Connecting the Devices
1 Connect the provided 5V/2A power supply to the DC/5V POWER port on the AC-AVDM-V3. All front panel
LED indicators will flash once, indicating the AC-AVDM-V3 has powered on.
2 Power on the source device. Connect an HDMI cable to the HDMI INPUT port on the AC-AVDM-V3. The front
panel SYSTEM STATUS IN LED will illuminate solid blue, indicating an active source is connected.
3 Connect the HDMI output device(s) to the HDMI OUTPUT port(s) with an HDMI cable.
4 Connect the distributed audio device(s) to the DOWNMIXED ANALOG or DIGITAL AUDIO OUTPUT ports
using RCA, digital coaxial, or optical cables (depending on application).
5 Depending on the application, use the SETTINGS DIPSWITCHES on the rear panel or the AUDIO SOURCE
SELECT button on the front panel to adjust downscaling, downmixing, and ARC options.
WWW.AVPROEDGE.COM • 2222 EAST 52
nd
STREET NORTH • SIOUX FALLS, SD 57104 •
+1-605-274-60558
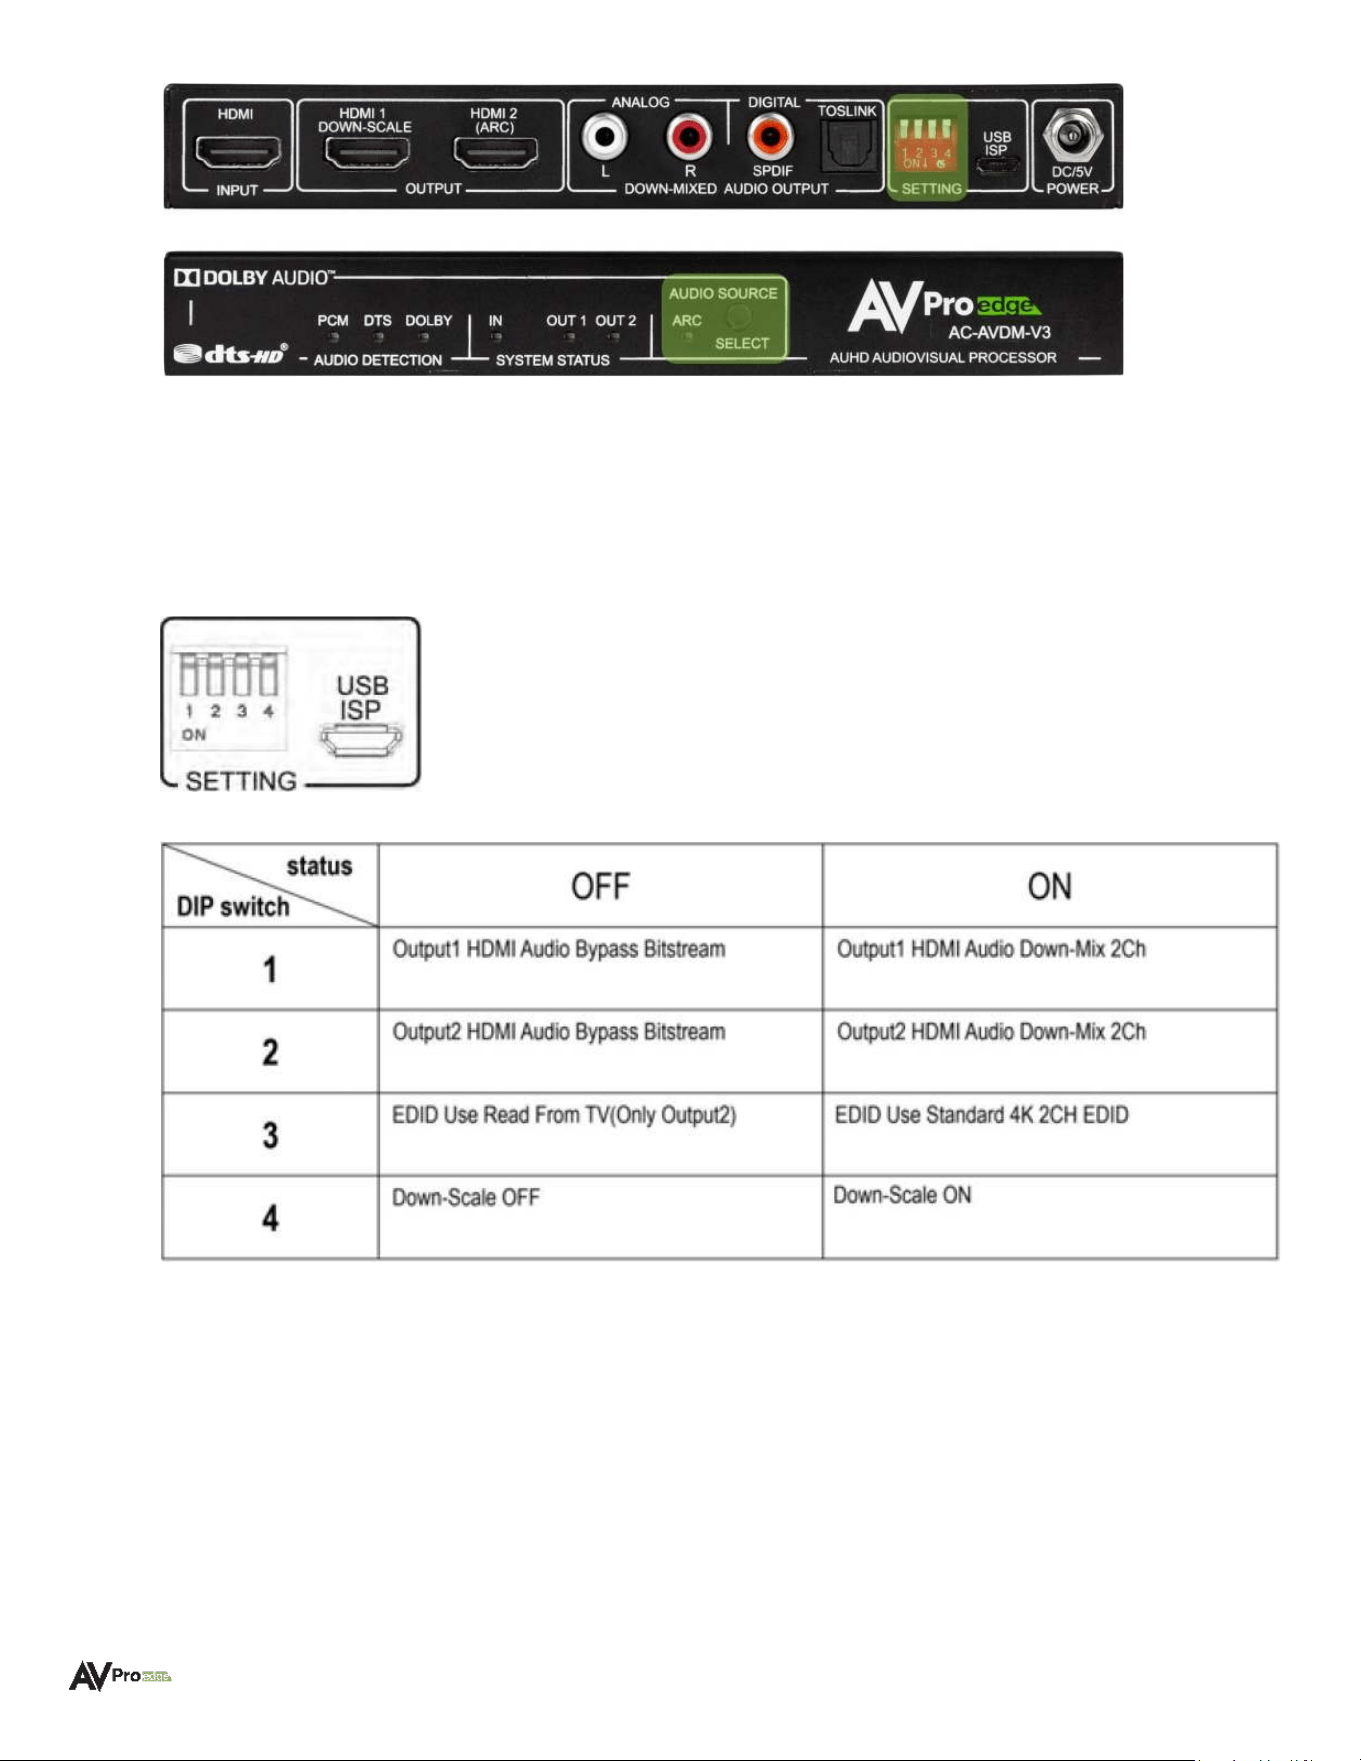
Dipswitch Settings
Each dipswitch located on the AC-AVDM-V3 front panel corresponds to one control setting.
Dipswitch UP position = OFF
Dipswitch DOWN position = ON
Audio Source Select Button Operation
The AUDIO SOURCE SELECT button, located on the front panel, controls the extracted audio modes as indicated
by the solid blue adjacent LED:
Short (quick) Press:
LED is ON = Audio is extracted/decoded from the ARC (Audio Return Channel) HDMI OUT 2 port
LED is OFF = Audio is extracted from the input source device on the HDMI INPUT port (default mode)
Long (3 seconds) Press:
WWW.AVPROEDGE.COM • 2222 EAST 52
nd
STREET NORTH • SIOUX FALLS, SD 57104 •
+1-605-274-60559

Press and hold for 3 seconds to toggle on Dolby® DRC (Dynamic Range Compression). The ARC LED will
blink once to indicate the DRC mode is enabled and remains in this mode after power cycling. To disable
DRC mode, press and hold the button for 3 seconds.
Front Panel Indicator Lights
Audio Detection
Each blue LED indicates the incoming audio signal type and format, based on the AUDIO SOURCE setting
located on the front panel:
PCM: Indicates an active audio signal is being detected/decoded
DTS: Indicates DTS® bitstream audio is being detected/decoded
DOLBY: Indicates Dolby
®
bitstream audio is being detected/decoded
System Status
Each blue LED indicates the HDMI source device is connected and which port/s are active/connected:
IN: Indicates the source device is connected to the HDMI INPUT port
OUT 1: Indicates HDMI OUTPUT 1 is active/connected
OUT 2: Indicates HDMI OUTPUT 2 is active/connected
If the LEDs are flashing or not illuminating, and there is no image on the display, verify the following:
o Bypass the AC-AVDM-V3 and plug the source directly into the display to confirm both are functioning
properly.
o Try a different HDMI cable (2 meters or longer). HDMI.ORG stipulates that 2-meter or longer cables
be used to connect any two HDMI devices. This is to ensure HDCP handshaking is given the
necessary time to complete its sequence (cable length factors into this timing process; shorter
cables may hamper full data exchange). HDCP handshaking is repeated every 2-3 seconds during
operation.
o Use DIPSWITCH 3 to read the EDID from the display.
WWW.AVPROEDGE.COM • 2222 EAST 52
nd
STREET NORTH • SIOUX FALLS, SD 57104 •
+1-605-274-605510
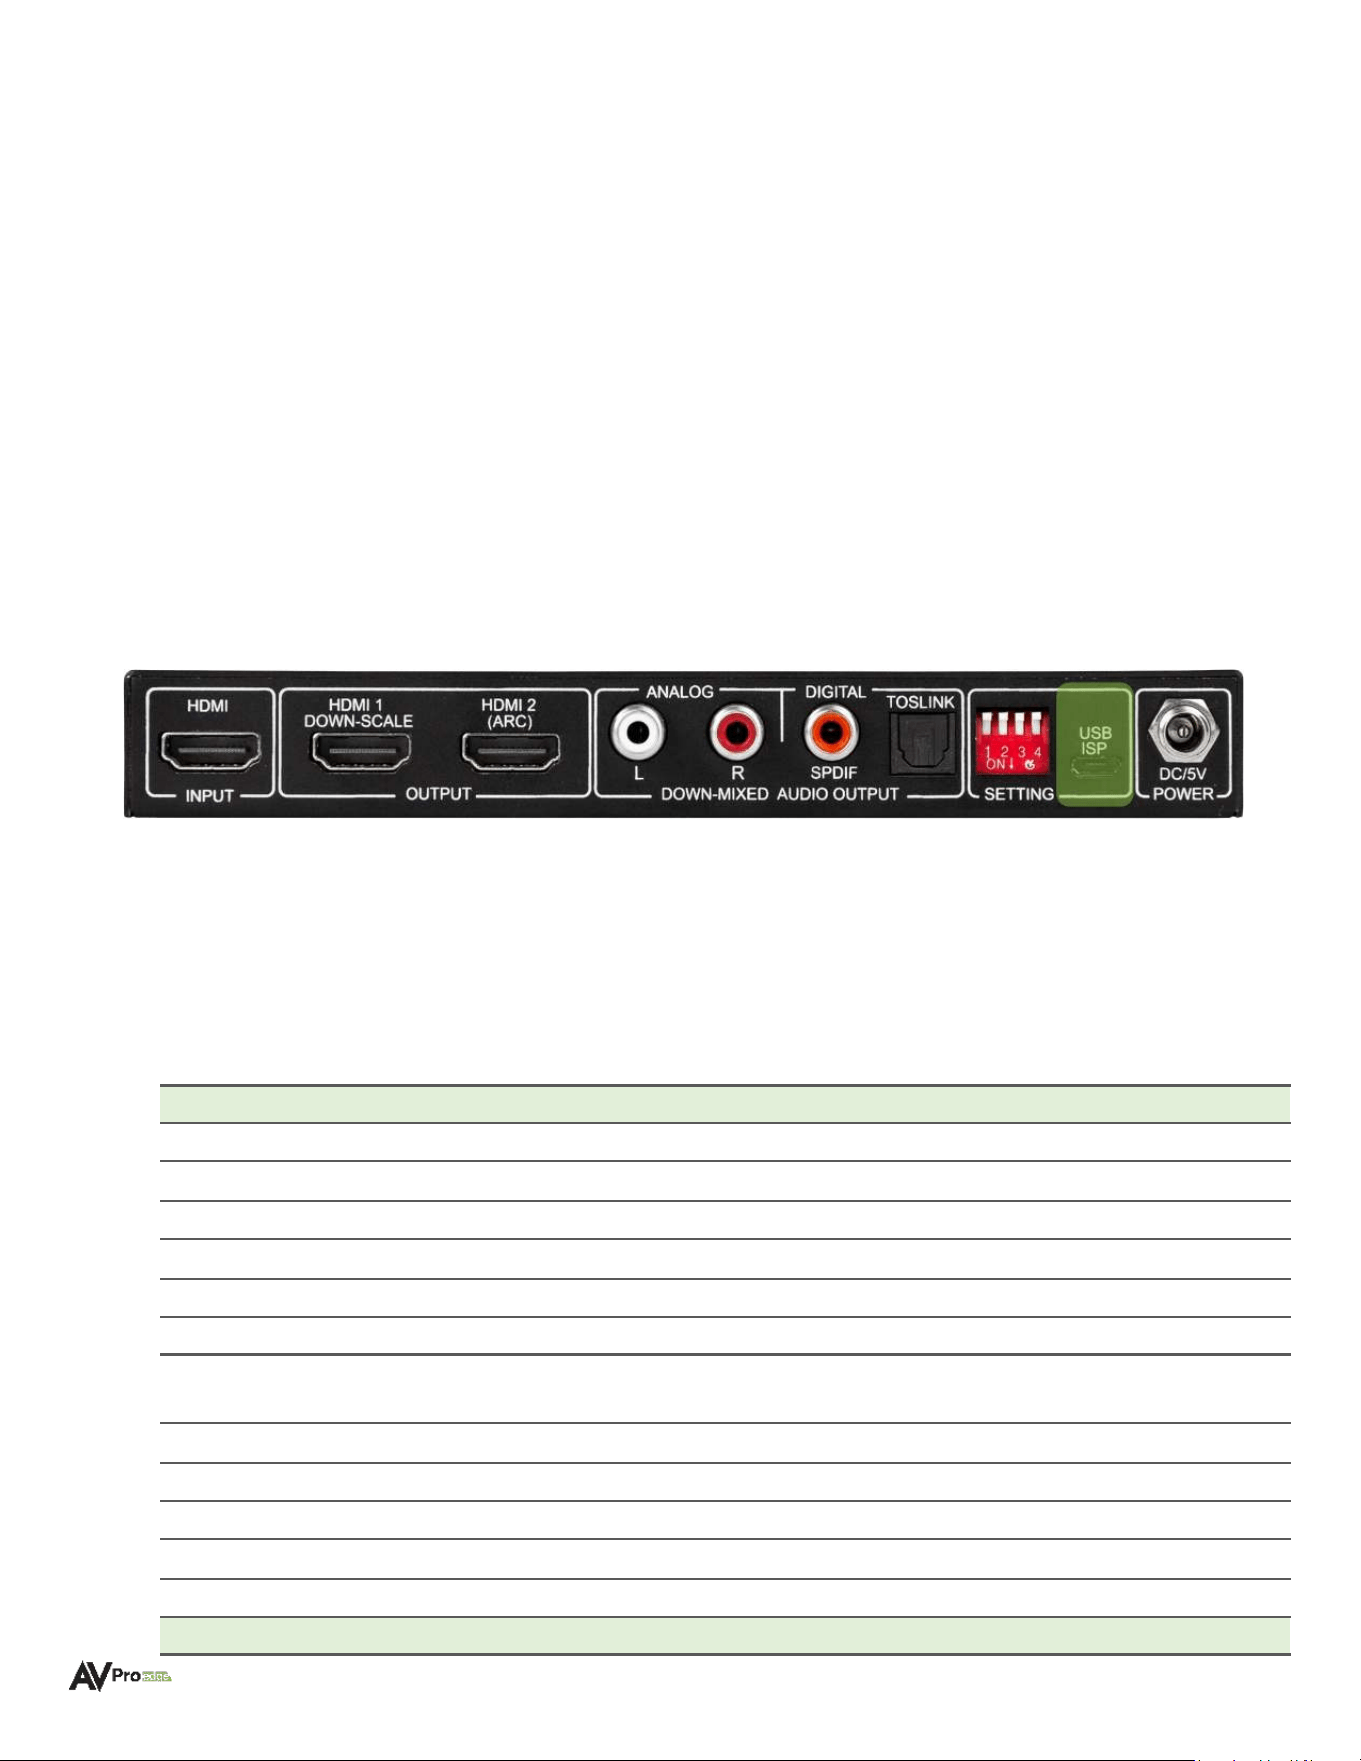
Serial Communication
For communication with the AC-AVDM-V3, connect a micro-USB data cable to the USB ISP port located on the
rear panel. The Serial-to-USB is internal and the required drivers (universal CH340 driver) will automatically
install once plugged in.
Set the Serial Communication protocols to:
Baud Rate: 57600
Bit Number: 8
Checksum/Flow Control/Parity: None
Stop Bits: 1
Serial Commands
Command
Action
H
Help
STA
Show global system status
SET RST
Reset to factory defaults
SET RBT
System reset to reboot
SET LAN RBT
Set LAN MCU reset to reboot
SET ADDR xx
Set System Address to xx {xx=[00-99](00=single)}
SET BAUDR x
Set System Baudrate to x {x=[0~5]
(0=9600, 1=14400, 2=19200, 3=38400, 4=57600, 5=115200)}
SET ARC ON/OFF
Set Audio Return Channel ON/OFF
GET ADDR
Get System Address
GET INx SIG STA
Get Input x Signal Status {x=[0~1](0=ALL)}
GET INx AUD FMT INF
Get Input x Audio Information {x=[0~1](0=ALL)}
GET BAUDR
Get System Baudrate
Output Setup Commands
(Note:output number(x)=HDMI(x),x=1-2)
WWW.AVPROEDGE.COM • 2222 EAST 52
nd
STREET NORTH • SIOUX FALLS, SD 57104 •
+1-605-274-6055
11

SET OUTx EXA EN/DIS
Set Ex-Audio Output Enable/Disable {x=[0](0=all)}
SET OUTx STREAM ON/OFF
Set Output x Stream ON/OFF {x=[0~2](0=ALL)}
GET OUTx EXA
Get Ex-Audio Output Enable/Disable Status {x=[0](0=all)}
GET OUTx EDID DATA
Get Output x EDID DATA{x=[1~2]}
GET OUTx STREAM
Get Output x Stream ON/OFF Status{x=[0~2](0=ALL)}
Ex-Audio Commands
(Note:output number(x)={x=[0](0=ALL)}
SET OUTx EAUD VVy
Set Outputx Ex-Audio Volume Value y {x=[0](0=All),y=[0-207]}
[0: 0dB (Default)] [1: -0.5 dB] [2: -1 dB] [3: -1.5 dB] [...] [207: -103.5 dB]
SET OUTx EXMX MODEy
SET Output x Ex-Audio Matrix Mode y{x=[0](All output),y=Matrix
Mode[0-7],Mode:[0-Matrix Mode Close],[1-STD FX,Default Mode],[2-Low
Center+],
[3-Mid Center+],[4-High Center+],[5-Middle FX],[6-Full FX],[7-Voice FX]}
GET OUTx EAUD VV
Get Outputx Ex-Audio Volume Value {x=[0]{0=All}}
GET OUTx EXMX MODE
GET Output x Ex-Audio Matrix Mode Status{x=[0](All output)}
Troubleshooting
• Verify Power – Confirm the power supply is properly connected and is outputting 5V.
• Verify Connections – Confirm all cables are properly connected and/or terminated where applicable.
• Verify Source Device – Confirm the source device is powered on and all mute settings are disabled.
Maintenance
To ensure the reliable operation of this device as well as protect the safety of any person using or handling this
device when powered on, observe the following instructions:
• Use the provided power supply. If an alternative power supply is required, check the voltage and polarity to
ensure it has sufficient power to supply the connected device.
• Do not operate this device beyond the specified temperature and humidity range given in the above
specifications.
• Ensure there is adequate ventilation to allow the device to operate efficiently.
• Repair of the equipment should only be carried out by qualified professionals as the device contains
sensitive components that may be damaged from unorthodox procedures.
• Only use this device in a dry environment. Never allow liquids or harmful chemicals to come into contact
with this device.
• Clean this unit with a soft, dry cloth. Never use alcohol, paint thinner, or benzene to clean the device.
Damage Requiring Service
This device should be serviced by qualified personnel when:
• The DC power supply cord or AC adapter has been damaged
• Objects or liquids have breached the device's interior
• The device has been exposed to rain or moisture
• The device does not operate normally or exhibits a marked change in performance
WWW.AVPROEDGE.COM • 2222 EAST 52
nd
STREET NORTH • SIOUX FALLS, SD 57104 •
+1-605-274-6055
12

• The device has been dropped or the housing is damaged
Support
Should you experience any problems using this product, first refer to the Troubleshooting section of this manual
before contacting AVPro Technical Support. When calling in, the following information should be provided:
• Product name
• Model number
• Serial number
• Place of purchase
• Details of the issue and any conditions under which the issue is occurring
Warranty
The Basics
AVPro Edge warranties products it manufactures and sells when purchased directly from AVPro Edge or an
authorized AVPro Edge reseller. Products are guaranteed to be free from manufacturing defects and in sound
physical and electronic condition when shipped by AVPro Edge.
AVPro Edge has developed a warranty everyone can get behind. We wanted to remove all warranty “red tape” to
make it simple. Our 10-Year, NO BS Warranty is based on these 3 fundamentals:
• If you are experiencing trouble, please call us. Our Tech Support specialists will make every
troubleshooting attempt at a remedy while you are on the phone.
• If it is determined the product has experienced an uncorrectable failure, we will provide an advanced
replacement free of shipping charges, including no-charge return shipping for the unit on site.
• We are confident that you know what you are doing and will never make you go through unnecessary
troubleshooting steps with one of our products.
Coverage Details
AVPro Edge will replace or repair (at the customer’s choosing) any defective product. If the failed unit is out of
stock or on backorder, replacement with a comparable product of equal value or feature set, if available, may
be a viable solution. In rare circumstances, it may be determined repair is the only available option.
Warranty starts upon receipt of the product (determined by confirmed delivery via tracking). Should tracking
information be unavailable for any reason, the warranty will have a start date coinciding with a thirty-day
interval after receipt of the order (ARO).
Red Tape
AVPro Edge is not responsible to provide a warranty for untraceable purchases, or those made outside of
authorized distribution channels.
If AVPro Edge determines a product has been modified or internally tampered with (as identified by a warranty
seal violation and/or physical examination) or has an altered serial number, the warranty will be declared void.
WWW.AVPROEDGE.COM • 2222 EAST 52
nd
STREET NORTH • SIOUX FALLS, SD 57104 •
+1-605-274-6055
13

Additionally, physical misuse or damage incurred beyond normal installation standards and practices may
violate the warranty. Warranties may also be prorated as a mutual means of reconciliation, after examination by
an AVPro Edge representative.
Damage caused by “acts of God” (including, but not limited exclusively to): Natural disasters, power surges,
electrical storms, earthquakes, tornadoes, sinkholes, typhoons, tidal waves, hurricanes, or other uncontrolled
and unforeseen events related to unnatural weather conditions) are not covered.
Damage caused by incorrect installation will not be covered. Abnormal over- or under-voltage, inadequate
cooling, improper cabling, lack of appropriate protection, and static discharge are many examples of improper
installation, but warranty exclusions are not solely limited to these examples.
Warranty service for products installed or sold by an authorized AVPro Edge third-party reseller will be provided
by that authorized AVPro Edge reseller. Accessories (items included in the original purchase, such as IR cables,
RS-232 cables, power supplies, etc.) are not included in the warranty unless identified as the point of failure or
the cause of performance that differs from that intended by design.
We will make acceptable efforts to source and supply replacements for defective accessories at a discounted
rate as needed.
Obtaining an RMA
Dealers, resellers, and installers can request an RMA (Returned Merchandise Authorization) from an AVPro Edge
Technical Support rep or Sales Engineer. Or you may email
[email protected] or fill out the general
contact form at
www.avproedge.com/contact.
End users may not request an RMA directly from AVPro Edge and will be referred back to the dealer, reseller, or
installer.
Shipping
For the USA (not including Alaska and Hawaii), shipping is covered for advance replacements using FedEx
Ground (some Express exceptions may apply). Defective product return shipping is covered by AVPro Edge,
using a return label issued via email. Items must be returned within 30 days from receipt of the replacement
product. At 40 days, the customer account will be billed. Other return shipping methods will not be covered.
For international (and Alaska and Hawaii) return shipping costs will be the responsibility of the returnee. Once
the unit is scanned for return shipping AVPro Edge will ship the new replacement unit.
Limitation on Liability
The maximum liability of AVPro Global Holdings LLC under this limited warranty shall not exceed the actual
purchase price paid for the product. AVPro Global Holdings LLC is not responsible for direct, special, incidental,
or consequential damages resulting from any breach of warranty or condition, or under any other legal theory
to the maximum extent permitted by law. Taxes, Duties, VAT, and other freight forwarding service charges are
not covered or paid for by this warranty.
Obsolescence or incompatibility with newly invented technologies (after the manufacture of the product) is not
covered by this warranty. Obsolescence is defined as:
“Peripherals are rendered obsolete when current technology does not support product repair or
re-manufacture. Obsolete products cannot be re-manufactured because advanced technologies supersede
original product manufacturer capabilities. Because of performance, price, and functionality issues, product
re-development is not an option.”
WWW.AVPROEDGE.COM • 2222 EAST 52
nd
STREET NORTH • SIOUX FALLS, SD 57104 •
+1-605-274-6055
14

Discontinued or out-of-production items will be credited at fair market value towards a current product of equal
or comparable capabilities and cost. Fair market value is determined by AVPro Edge.
Exclusive Remedy
To the maximum extent permitted by law, this limited warranty and the remedies set forth above are exclusive
and instead of all other warranties, remedies, and conditions, whether oral or written, express or implied. To
the maximum extent permitted by law, AVPro Global Holdings LLC specifically disclaims any implied warranties,
including, without limitation, warranties of merchantability and fitness for a particular purpose. If AVPro Global
Holdings LLC cannot lawfully disclaim or exclude implied warranties under applicable law, then all implied
warranties covering this product, including warranties of merchantability and fitness for a particular purpose,
shall apply to this product as provided under applicable law.
This warranty supersedes all other warranties, remedies, and conditions, whether oral or written, express or
implied.
Trademark Acknowledgements and License Notices
Dolby, Dolby Atmos, and the double-D symbol are registered trademarks of Dolby Laboratories Licensing
Corporation. Manufactured under license from Dolby Laboratories. Confidential unpublished works.
Copyright © 2012-2021 Dolby Laboratories. All rights reserved.
For DTS patents, see http://patents.dts.com. Manufactured under license from DTS, Inc. or DTS Licensing
Limited. DTS, DTS:X, and the DTS:X logo are registered trademarks or trademarks of DTS, Inc. in the United
States and other countries. © 2021 DTS, Inc. ALL RIGHTS RESERVED.
WWW.AVPROEDGE.COM • 2222 EAST 52
nd
STREET NORTH • SIOUX FALLS, SD 57104 •
+1-605-274-6055
15

WWW.AVPROEDGE.COM • 2222 EAST 52
nd
STREET NORTH • SIOUX FALLS, SD 57104 •
+1-605-274-6055
16
