
FormNo.3431-497RevA
SnowCabKit
PowerMax
®
HDCommercialSnowthrower
ModelNo.139-1640
InstallationInstructions
Installation
1
InstallingtheFrame
Partsneededforthisprocedure:
1
Leftmountingbracket
1Rightmountingbracket
2Frontpost
1
Horizontalframe
1
Rearframe
1
Topframe
4Ubracket
4
Bolt(1/4x5/8inch)
2
Bolt(1/4x3/4inch)
2
Bolt(1/4x1inch)
2
Bolt(1/4x4inches)
2
Bolt(1/4x4-1/2inches)
4Largewasher
12
Smallwasher
12Locknut
6Roundplasticcap
2
Squareplasticcap
Procedure
1.Removethesnow-cleanouttoolfromthe
machine.
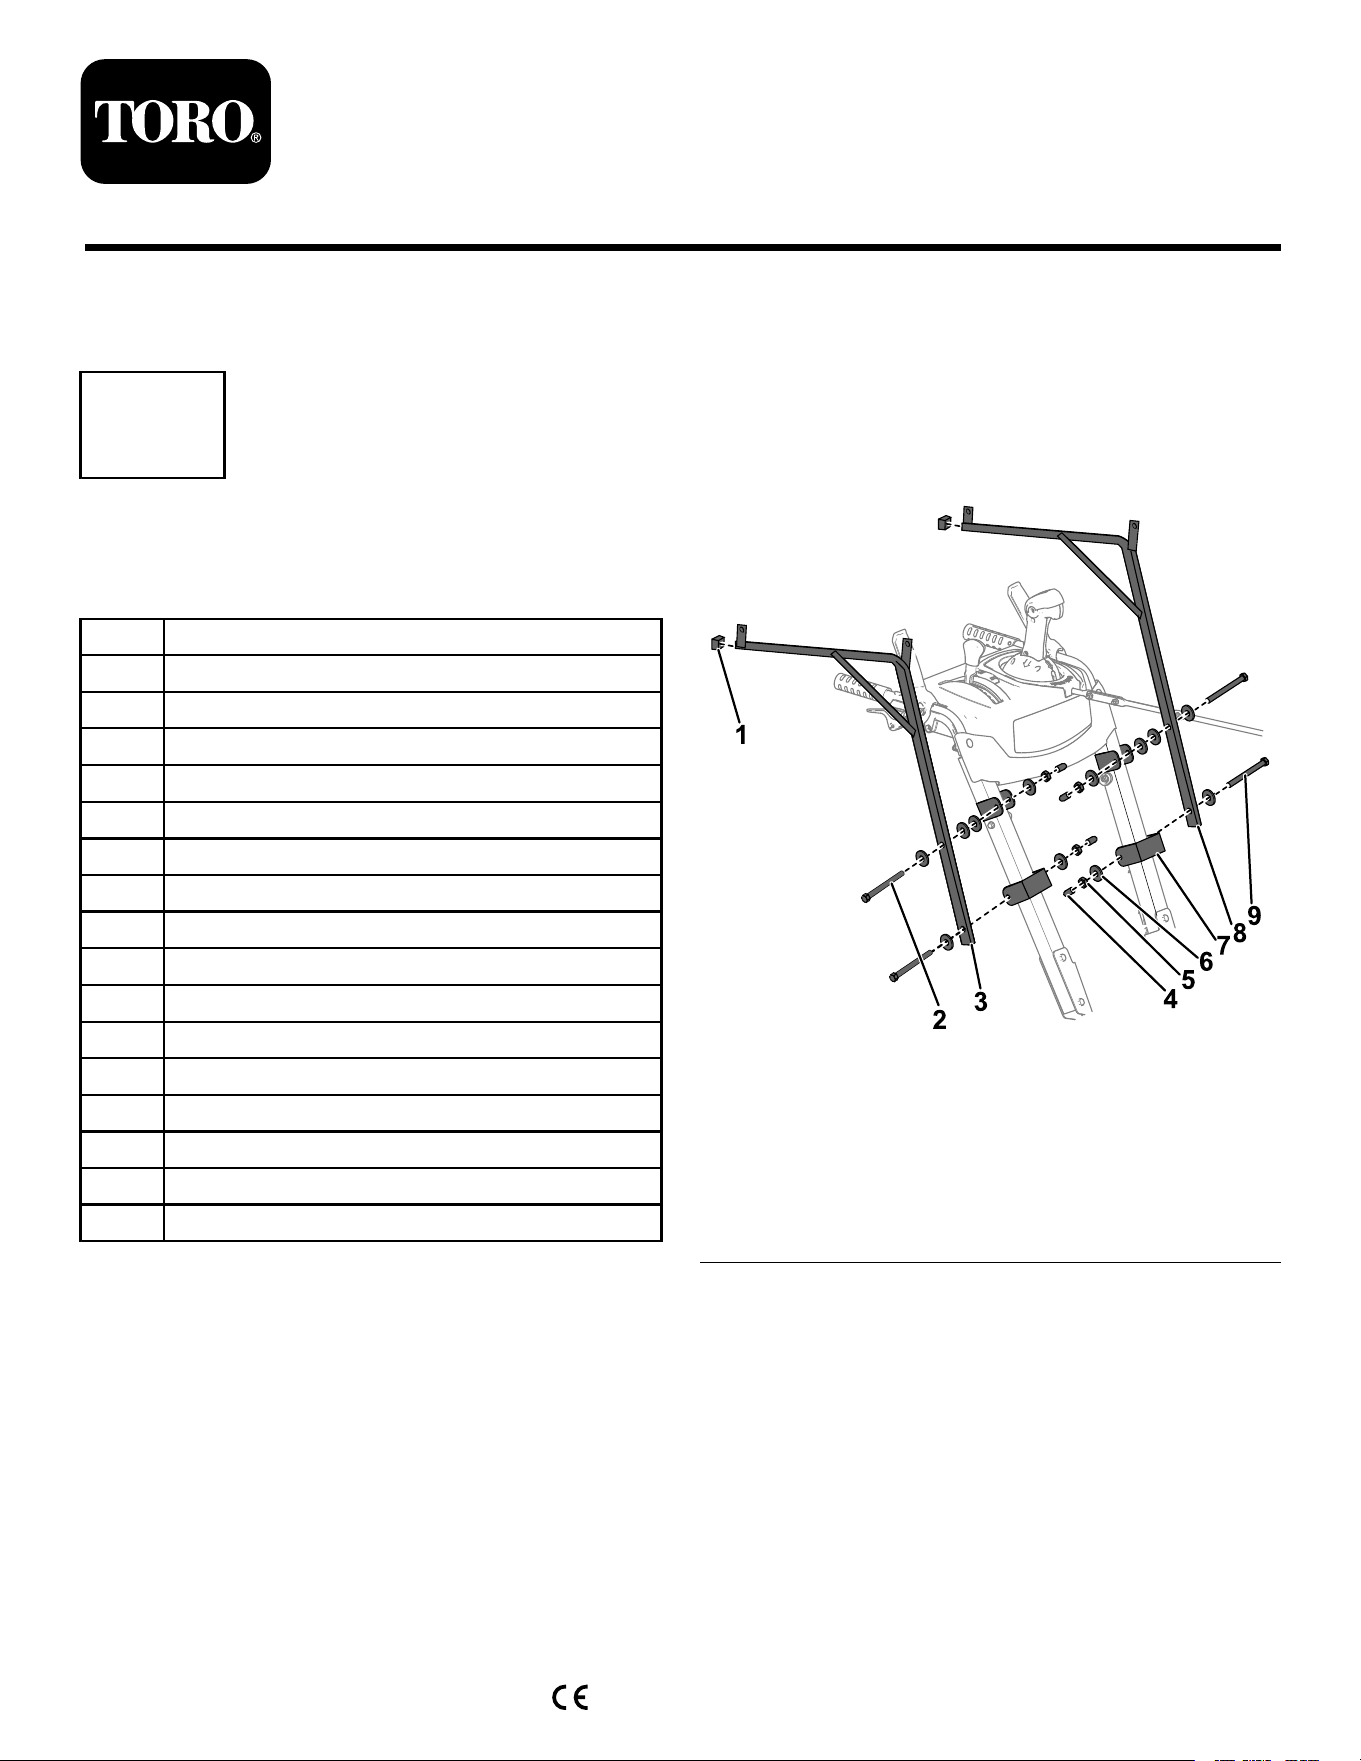
2.Installtherightandleftmountingbracketsonto
theframeasshowninFigure1.
g287902
Figure1
1.Squareplasticcap(2)6.Smallwasher(12)
2.Bolt,1/4x4-1/2inches(2)7.U-bracket(4)
3.Rightmountingbracket
8.Leftmountingbracket
4.Roundplasticcap(4)9.Bolt,1/4x4inches(2)
5.Locknut(4)
©2019—TheToro®Company
8111LyndaleAvenueSouth
Bloomington,MN55420
Registeratwww.Toro.com.
OriginalInstructions(EN)
PrintedintheUSA
AllRightsReserved
*3431-497*A

3.Installthefrontpostsandhorizontalframeonto
theleftandrightmountingbracketsasshown
inFigure2.
g288014
Figure2
1.Horizontalframe3.Bolt,1/4x3/4inch(2)
2.Locknut(2)4.Frontpost(2)
4.Installtherearframeontothemountingbrackets
asshowninFigure3.
g288038
Figure3
1.Bolt,1/4x1inch(2)4.Locknut(2)
2.Largewasher(4)5.Roundplasticcap(2)
3.Rearframe
5.Installthetopframeontothefrontpostsand
rearframeasshowninFigure4.
g288051
Figure4
1.Bolt,1/4x5/8inch(4)3.T opframe
2.Locknut(4)
6.Ensurethattheanglebetweenhorizontalframe
andtherearframeisabout100°(Figure5).
2
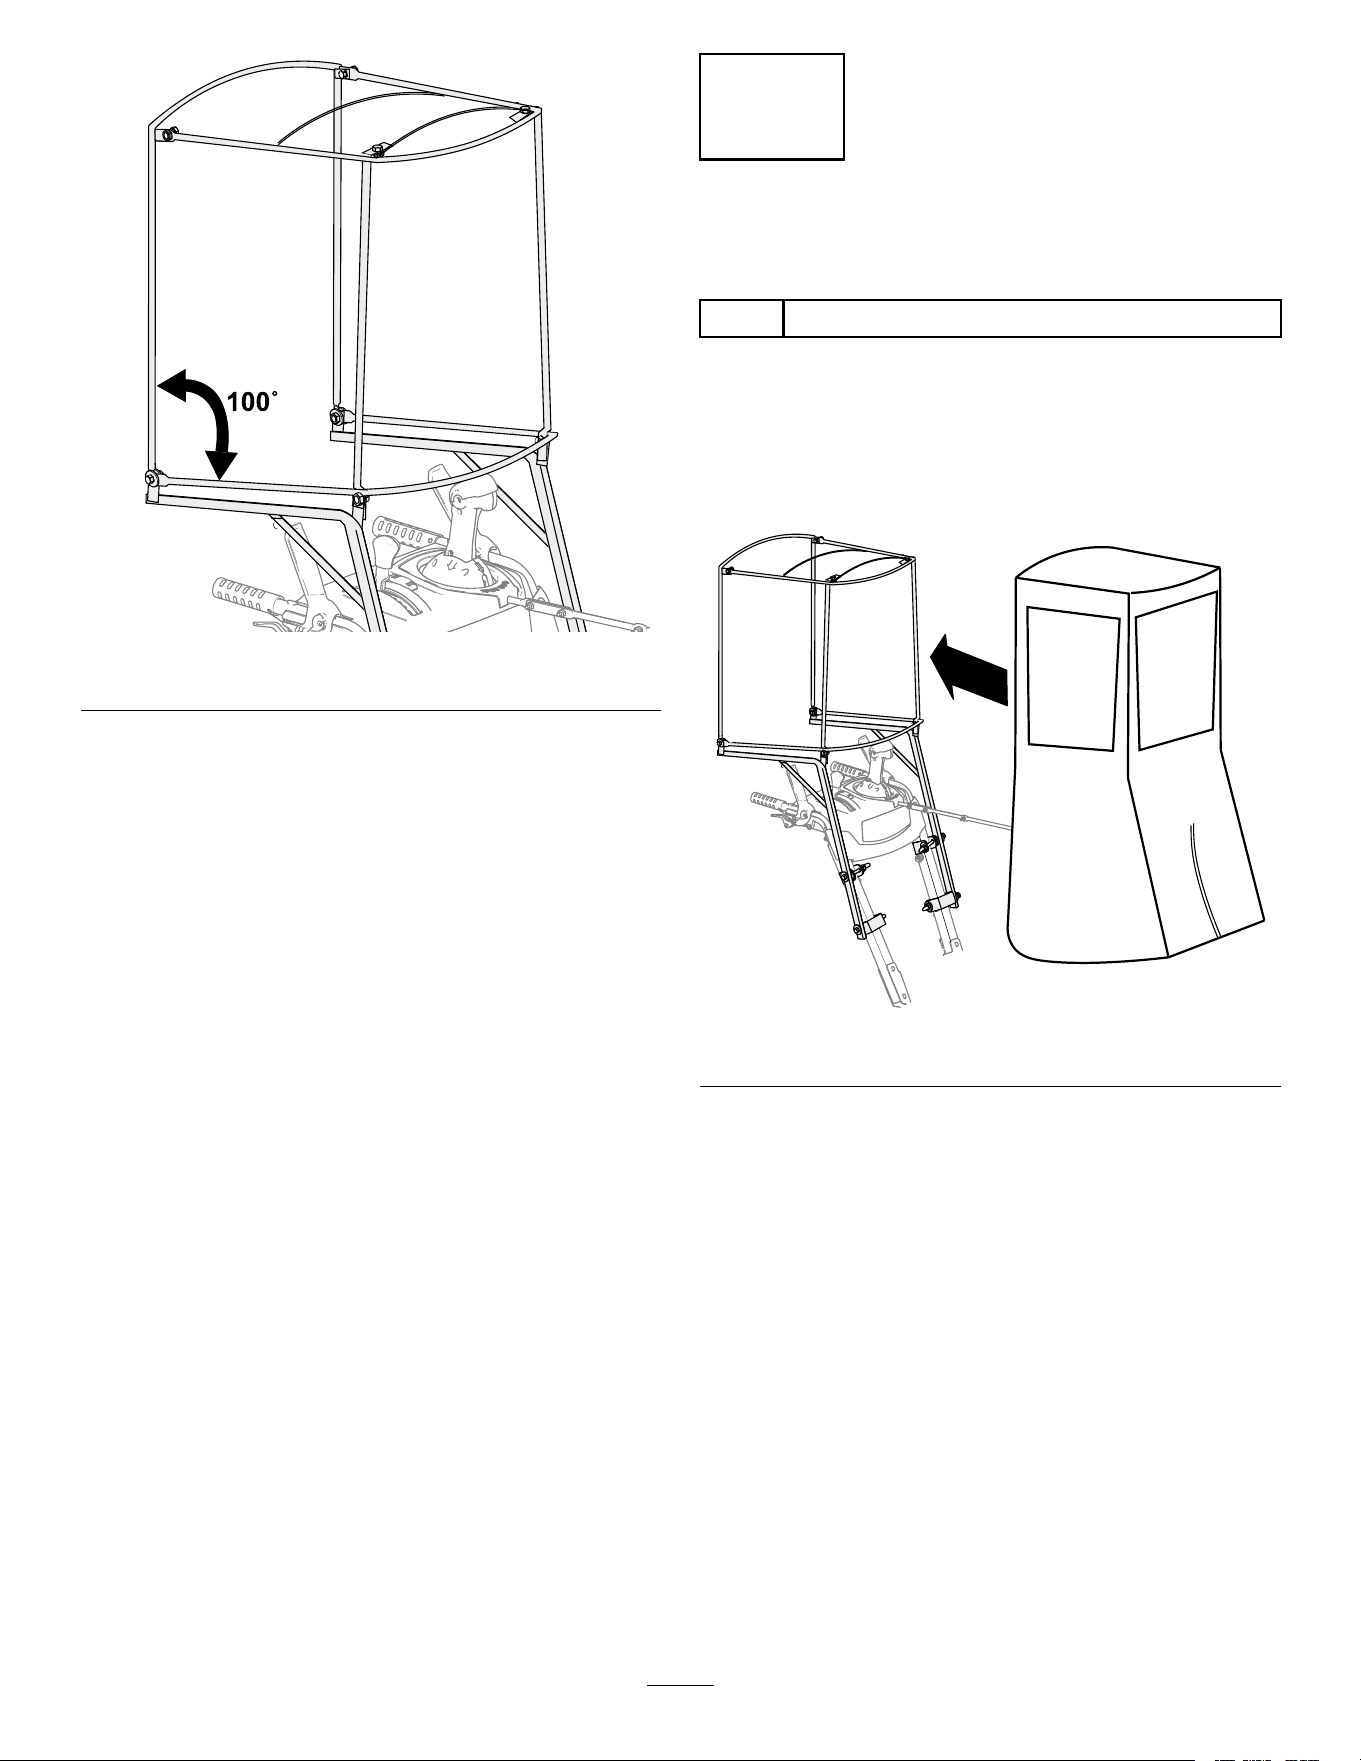
g288052
Figure5
7.Tightenallbolts.
8.Installthesnow-cleanouttoolontothemachine.
2
InstallingtheCover
Partsneededforthisprocedure:
1
Cover
Procedure
Unfoldandinstallthecoverovertheframe.Secureit
totheframeusingtheVelcro®brandhook-and-loop
fastenertabs.
g288053
Figure6
3