Loading ...
Loading ...
Loading ...
en-us Operation
18
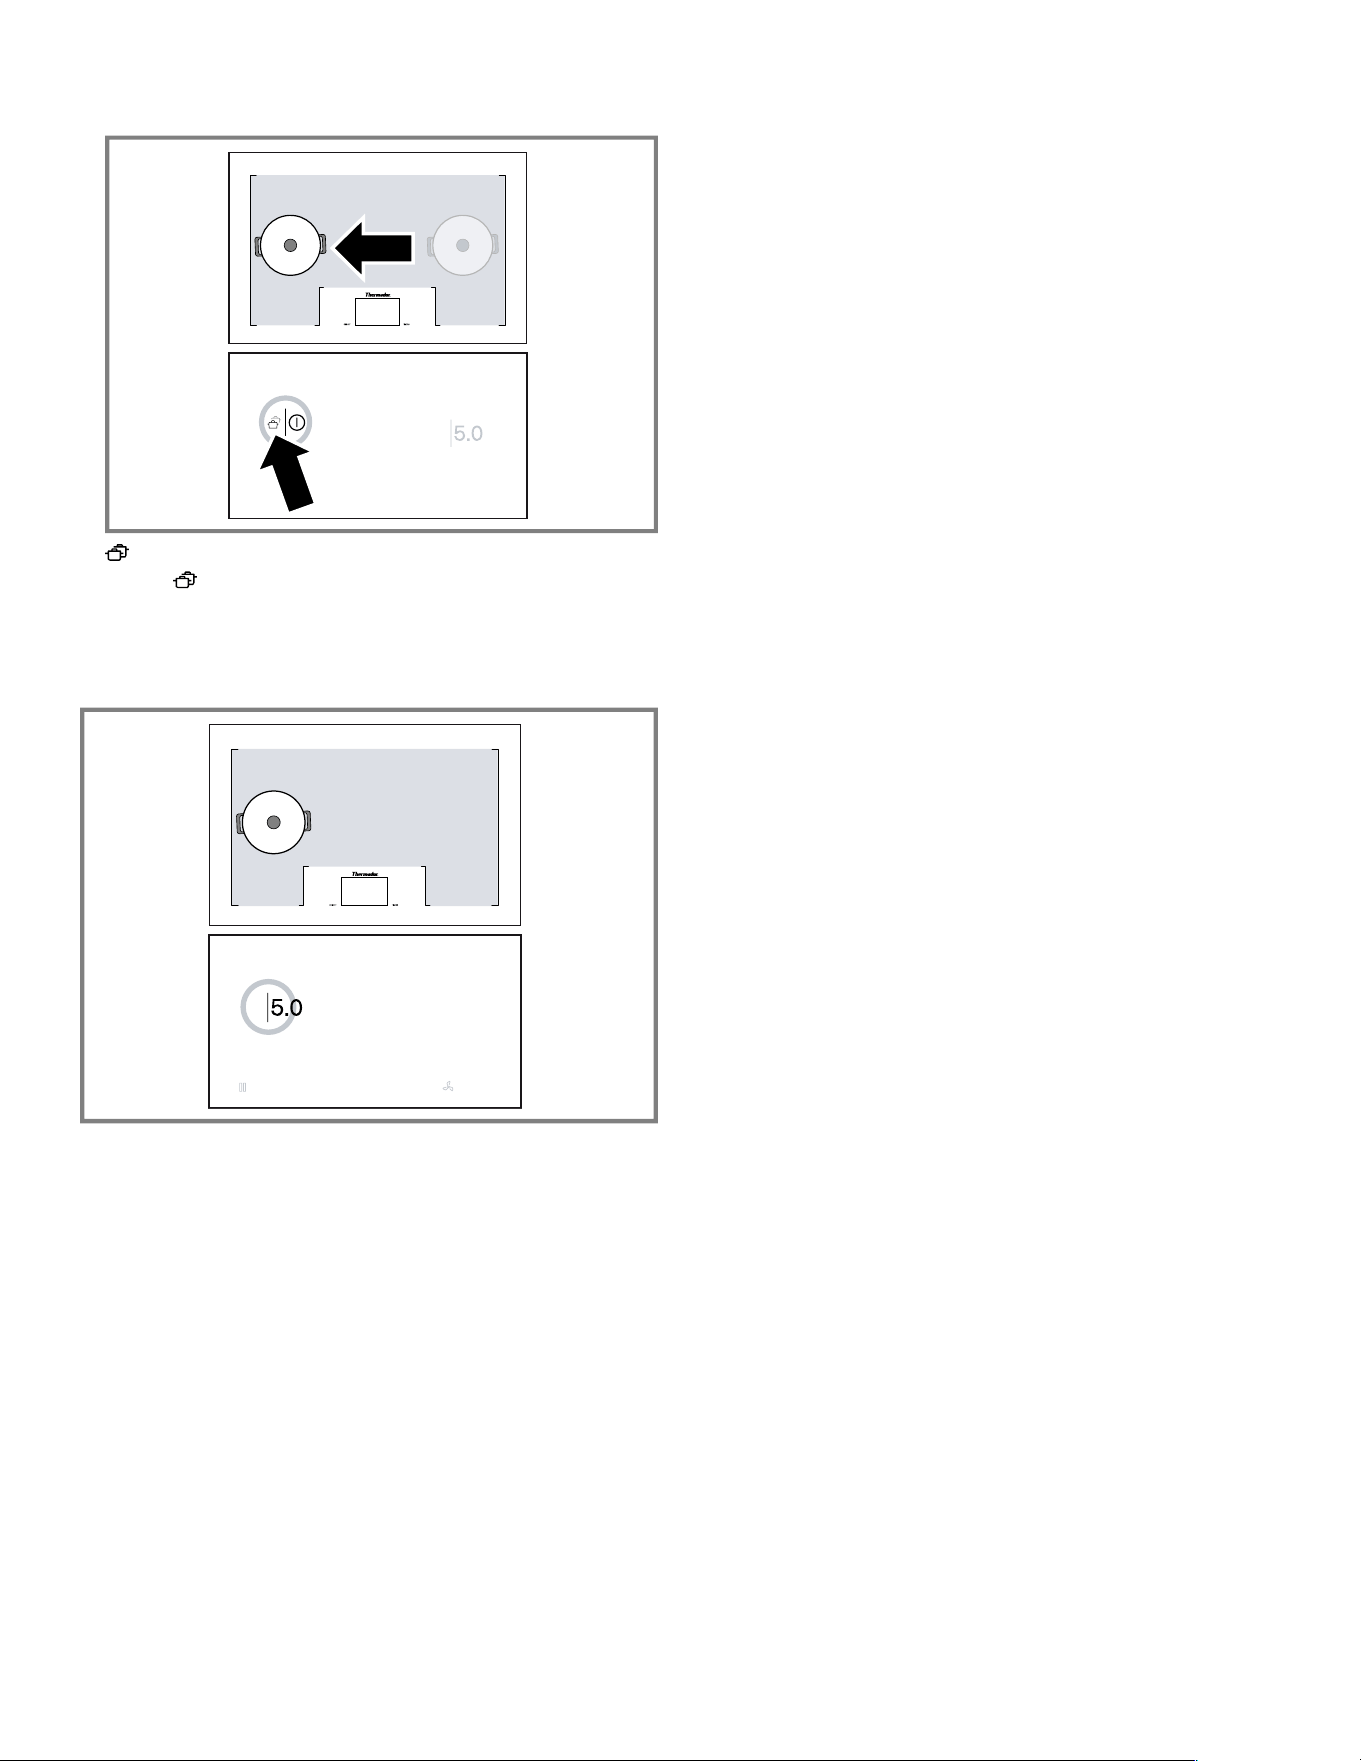
2. Lift the cookware from the active cooking zone and set
it down on the new cooking zone.
a lights up on the new cooking zone display.
3. Touch on the new cooking zone to confirm the trans-
fer of settings.
4. Select the new cooking zone to confirm the settings.
a The settings are transferred. The original cooking zone
switches off.
6.11 Cooking sensor mode
The cooking sensor processes make cooking easy and
produce exceptional results.
How it works:
¡ A wireless cooking sensor is required to use this mode.
→
"Wireless cooking sensor", Page23
. The wireless
cooking sensor forwards information about the tempera-
ture of the cookware to the control panel.
¡ The wireless cooking sensor measures the temperature
of the cookware continuously. The power level is con-
trolled and the right temperature is maintained at all
times. This prevents overheating and ensures perfect
results.
¡ Add your food once the selected temperature has been
reached. The temperature is maintained automatically.
You do not have to change the power level.
¡ The Cooking Sensor mode is available over the entire
cooking surface.
¡ You can use up to three cooking sensors at the same
time.
Advantages when using the cooking sensor function
¡ The cooking zone only heats up in order to maintain the
temperature. This saves energy. Oil or fat will not over-
heat.
¡ The temperature is continuously monitored. This pre-
vents the food from spilling over and you do not need to
change the temperature level.
¡ The cooking sensor mode informs you when the water
or oil has reached the optimal temperature for adding
the food; in some cases the food should be added at
the beginning, refer to the cooking chart.
General notes for using the cooking sensor function
¡ Use cookware with a thick, flat base. Do not use cook-
ware with a thin or domed base.
¡ Fill the cookware so that the contents reach high
enough to cover the cooking sensor's silicone patch.
¡ If you are frying with little oil using a frying pan, always
use the frying sensor function.
¡ Position the cookware in such a way that the wireless
cooking sensor is pointing towards the outer side of the
cooktop.
¡ Do not remove the wireless cooking sensor from the
cookware during cooking.
¡ Remove the wireless sensor from the cookware after
cooking. Take care as you do so because the wireless
cooking sensor can become very hot.
¡ Always cook with the lid on, except when you use the
function for frying with a large amount of oil in the
saucepan, 340°F (170°C).
¡ If no signal sounds, ensure that there is a lid on the con-
tainer. For optimum operation of the cooking sensor, we
recommend always using a lid, except when you use
the function for deep-fat frying with a large amount of oil
in a pot.
¡ Never leave oil unattended when it is being heated. Use
oil that is suitable for deep-fat frying. Do not mix differ-
ent cooking fats and oils, such as oil and lard. These
mixtures may foam up when they become hot.
¡ If you are not satisfied with the cooking result use more
water the next time, for example when boiling potatoes.
Use the recommended temperature level.
Suitable cookware for the cooking sensor function
¡
Use cookware that is tall enough that, when the re-
quired volume of water is added, the water level is
higher than the silicone patch for the wireless cooking
sensor.
¡ Any cookware that is suitable for induction cooking can
be used for the cooking sensor. Refer to the information
on induction cooking. →
Page8
Types of cooking processes with the cooking sensor function
You can use the cooking sensor function to select the best
type of cooking for each kind of food.
The table shows the various function settings that are
available when using the cooking sensor function.
If there is no wireless cooking sensor included with your
cooktop, you can purchase it from specialist retailer, Cus-
tomer Service, or our official website.
Loading ...
Loading ...
Loading ...