Loading ...
Loading ...
Loading ...
THE 2-POINT EMBROIDERY POSITIONING FUNCTION
61
BASIC EMBROIDERY
2
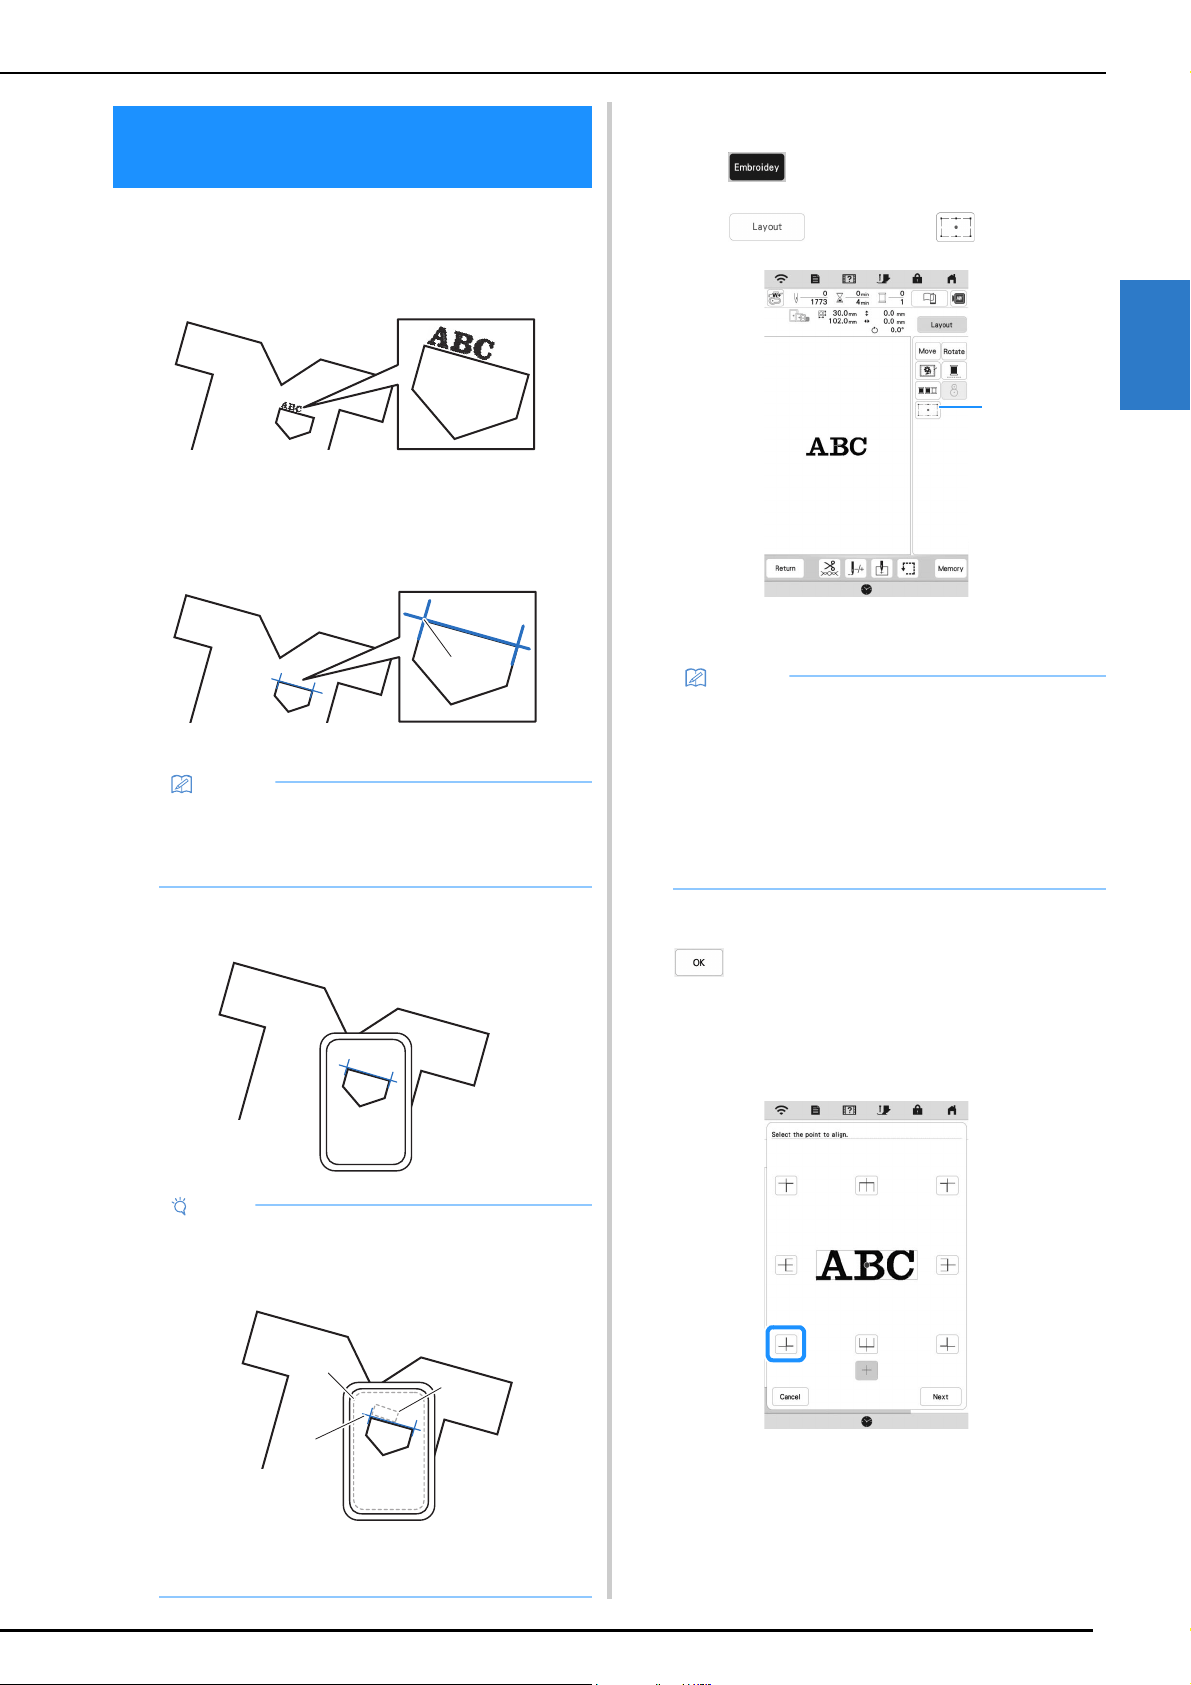
By using the 2-point embroidery positioning function with a
LED pointer, the embroidering position can easily be aligned.
This is useful when embroidering in an area where it is
necessary to align the pattern, as shown below.
a
Use a chalk pencil to mark the desired embroidering
position.
The line drawn for the reference direction should be
longer.
1 Chalk pencil mark
b
Hoop the fabric in the embroidery frame.
c
Select the pattern.
d
Touch to display the embroidery screen.
e
Touch and then touch .
1 Switch on/off the 2-point embroidery positioning
function with a LED pointer.
f
If a message appears, indicating that the move and
rotate settings will return to the original ones, touch
.
g
From the reference points shown in the screen, select
the point to be used for aligning the pattern.
For this example, select the point in the lower-left
corner of the pattern.
THE 2-POINT EMBROIDERY
POSITIONING FUNCTION
Memo
• If the desired position of the pattern can be clearly
established, such as when embroidering along a
pocket, it is not necessary to mark the position with
a chalk pencil.
Note
• When hooping the fabric in the embroidery frame,
make sure that the embroidery pattern will fit within
the embroidering area of the frame being used.
1 Embroidering area
2 Embroidery pattern size
3 Chalk pencil mark
a
a
b
c
Memo
• The LED pointer lights up to indicate the needle
drop point.
• When the LED pointer is turned on, the embroidery
foot height is automatically adjusted according to
the fabric thickness.
• If the surface of the fabric is too uneven or rough,
check and adjust the alignment of the light of the
LED pointer and the needle drop point before
starting to embroider.
1
Loading ...
Loading ...
Loading ...