Loading ...
Loading ...
Loading ...
Installation and connection en
9
2.
Find out which gas type and which gas pressure
your local gas supply network uses before installing
the appliance, and ensure that the gas setting for
the appliance complies with this information. If the
appliance settings have to be changed, follow the
instructions in the section "Gas connection and con-
version to a different gas type".
3.
This appliance is not connected to a waste gas
main. It must be positioned and connected in ac-
cordance with the applicable installation conditions.
Do not connect the appliance to a waste gas main.
Ensure that suitable ventilation measures are carried
out.
4.
Establish the gas supply using a permanent, non-
elastic connection, such as a gas pipe or a safety
hose.
5.
If you use a safety hose, ensure that the hose is not
trapped or compressed. The hose must not come
into contact with hot surfaces.
6.
The connection must have an easily accessible
locking device.
Flexible hoses
1.
Do not pinch or squeeze hoses.
2.
Do not subject the hoses to twisting or pulling
forces.
3.
Keep the hoses away from sharp edges.
4.
Do not let the hoses come into contact with parts
that may reach a temperature higher than 70 °C
above room temperature.
5.
Ensure that the full length of the hoses can be ac-
cessed for testing.
Checking for leaks
▶
After connecting the gas pipe, use soapy water to
check the connections for leaks.
Starting up
1.
Start up the appliance in accordance with the in-
struction manual.
2.
Ignite all of the burners.
‒ Check the stability of the flames at a high and
low setting.
Moving or transporting the appliance by the gas
pipe (collector) or by the door handle
1.
Do not move the appliance by pulling on the gas
pipe (collector).
a The gas pipe may be damaged and a gas leak may
occur.
2.
Do not move the appliance by holding it by the door
handle.
a This may damage the door hinges and door handle.
4.3 Electrical connection
Only allow a licensed professional to connect the appli-
ance. You must comply with the requirements of your
electricity supplier.
¡ The appliance is designed for operation at 220-240
V. 16 A fuse
¡ Any damage arising from the appliance being con-
nected incorrectly will invalidate the warranty.
CAUTION‒!
The power cable may be damaged. The damage to the
power cable may lead to a dangerous situation.
▶ The power cable must be replaced by the manufac-
turer, their after-sales service or a similarly qualified
person.
¡ The appliance must always be disconnected from
the power supply when installation work is being
carried out.
¡ The appliance fulfils the requirements of protection
class I and must only be connected to an earthed
mains socket.
¡ The mains power cable must be at least type H05 V
V-F 3G 1mm².
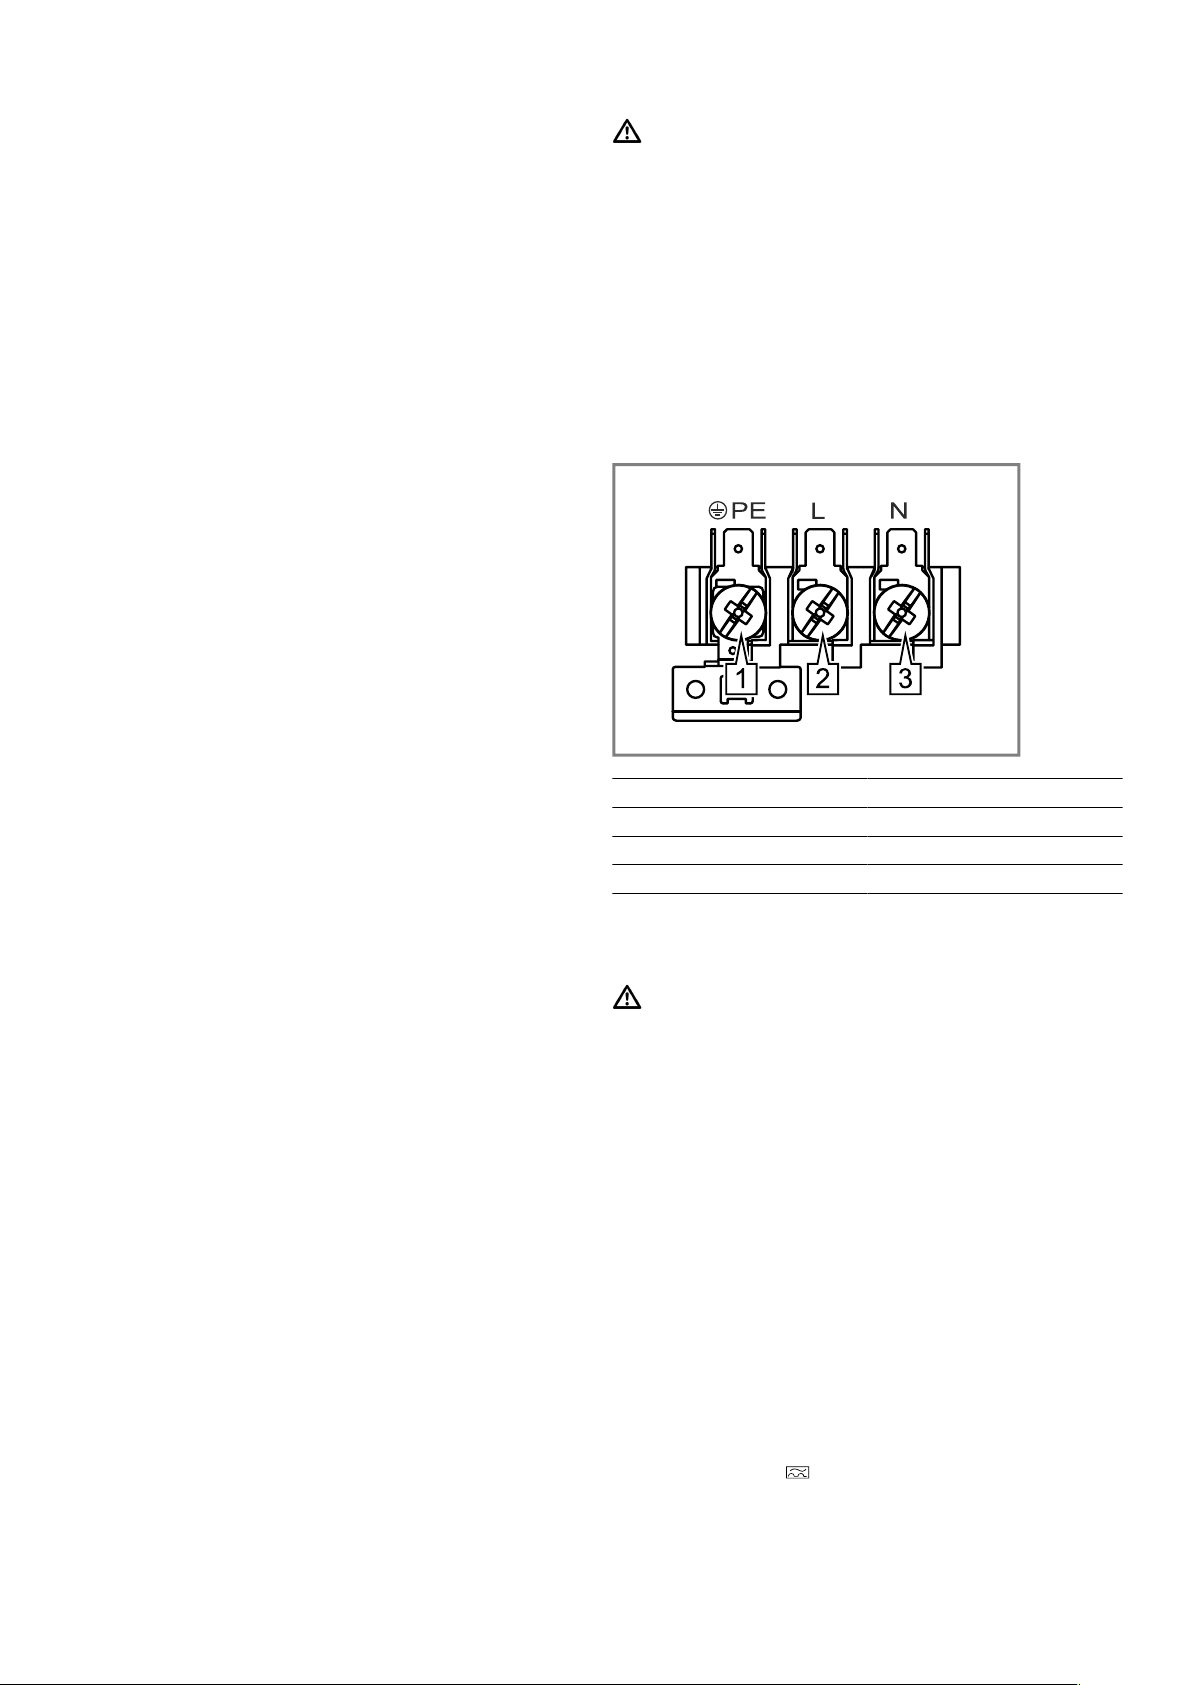
Information
1 Yellow + green
2 Brown
3 Blue
Important information about the electrical
connection
Note the following information and ensure that:
WARNING‒Risk of electric shock!
There is a risk of electric shock if you touch live com-
ponents.
▶ Hold the mains plug with dry hands only.
▶ Never pull out the mains plug from the socket while
the appliance is in operation.
▶ Pull out the power cable directly at the plug and
never by pulling the power cable as this may be-
come damaged.
¡ Fit the mains plug and socket together.
¡ The mains plug can be accessed at all times.
¡ The cross section of the cable is sufficient.
¡ The mains cable is not kinked, crushed, modified or
severed.
¡ If required, the mains cable must only be replaced
by a qualified electrician. A replacement mains
cable is available from the after-sales service.
¡ Do not use any multiple plugs or multi-connectors
and extension cords.
¡ The earthing system is correctly installed.
¡ If using a residual current device, only use one that
bears the mark
. The presence of this mark is the
only way to be sure that it fulfils all the applicable
regulations.
¡ The mains cable does not come into contact with
heat sources.
Loading ...
Loading ...
Loading ...