Loading ...
Loading ...
Loading ...
en Installation instructions
42
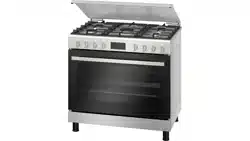
Setting the bypass nozzles
1.
Use a flat-head screwdriver (no. 2) to set the bypass
nozzles in accordance with the gas type that is to
be set. To do this, follow the instructions in the sec-
tion entitled
→"Converting the appliance from liquid gas to nat-
ural gas", Page40 or in the section entitled
→"For ovens – converting the appliance from nat-
ural gas to liquid gas", Page40.
2.
At this stage, it is important to test for leaks. You
can find additional information about this in the sec-
tion entitled
→"Leak test and function test", Page42.
Fitting the control panel
To reassemble, proceed in the reverse order of disas-
sembly.
1.
Take hold of the front panel with both hands and
carefully fit it into place. Ensure that the cables are
not damaged and the connections do not come
loose.
2.
Insert the screws that were removed from the front
panel.
‒ Insert the screws into the corners of the front
panel.
3.
Slide the hob panel backwards and slowly insert it.
4.
Insert the screws on the right- and left-hand hinge
brackets.
5.
Insert the burner connection screws
6.
Install the burner bases in their respective positions
according to their size. Insert the ignition plugs into
the corresponding openings next to the burner
bases. Place the enamelled burner lids onto the
centre of the corresponding burner bases and, in
doing so, note the sizes. Fit the pan support grids
and the pan support racks.
7.
If the appliance has a covering plate, hold it vertic-
ally by both sides and slowly reinsert it into the
holder.
8.
Carefully insert the knobs.
‒ At this stage, it is important to check that the gas
burners are burning correctly. You can find addi-
tional information about this in the section en-
titled
→"Checking the correct burner behaviour",
Page43.
a Check whether the appliance is working correctly.
Replacing the oven gas burner
Preparation
¡ Switch off all of the knobs on the control panel.
¡ Close the gas connection shut-off.
¡ Disconnect the appliance from the mains.
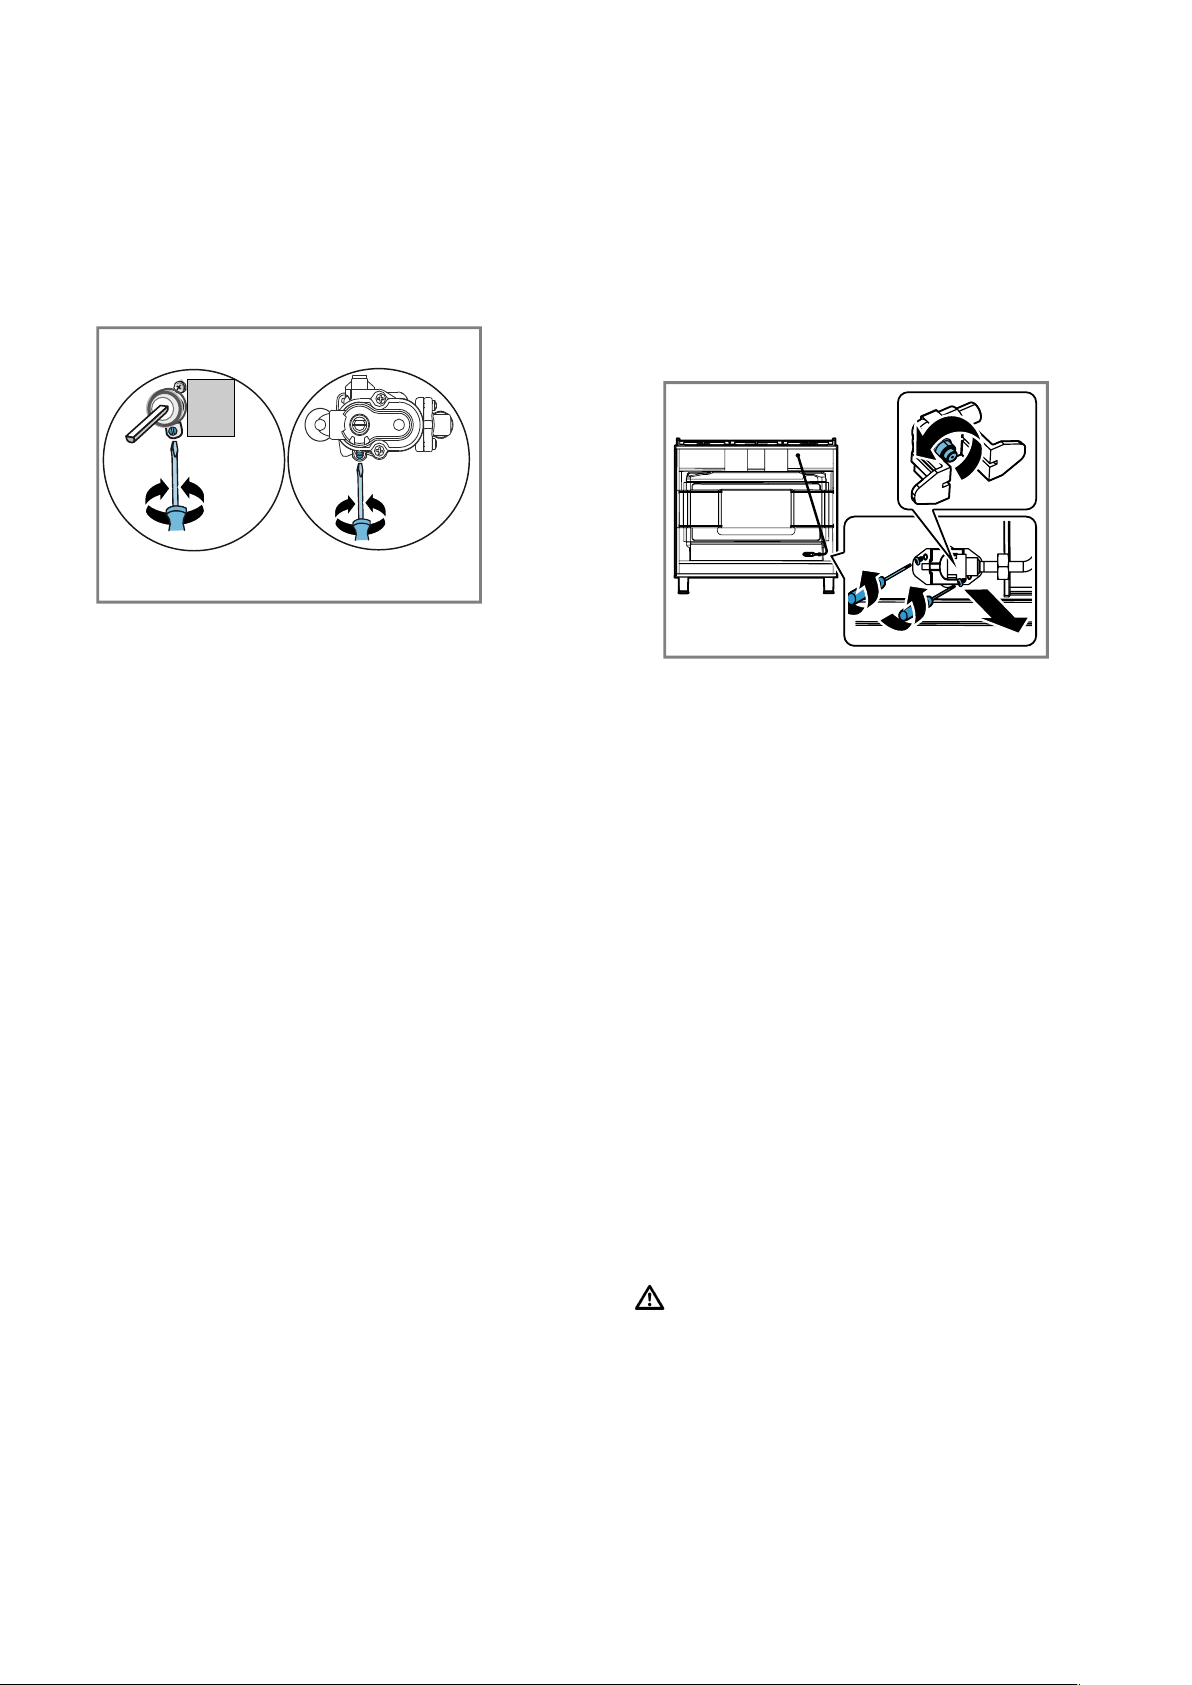
Replacing the oven's lower gas burner nozzle
1.
On the rear cover, loosen the plastic screw on the
power cable's mounting part.
‒ Remove the screws on the rear cover and take
the cover off.
2.
Remove the two screws on the nozzle holder for the
lower oven burner and carefully take the nozzle
holder out.
‒ Use a 7 mm socket wrench to remove the nozzle
from the nozzle holder.
3.
Select the appropriate nozzle from the table de-
pending on the gas type that you converted to. You
can find additional information about this in the sec-
tion entitled
→"Technical data – Gas", Page43.
4.
Insert and tighten the new nozzle. (Tightening torque
4 Nm)
‒ At this stage, it is important to test for leaks. You
can find additional information about this in the
section entitled
→"Leak test and function test", Page42.
5.
Carefully insert the nozzle holder. Insert the screws.
‒ At this stage, it is important to test for leaks. You
can find additional information about this in the
section entitled
→"Leak test and function test", Page42.
6.
Insert the rear cover of the oven and the screws.
‒ On the rear cover, tighten the plastic screw on
the power cable's mounting part.
7.
At this stage, it is important to check that the gas
burners are burning correctly. You can find addi-
tional information about this in the section entitled
→"Checking the correct burner behaviour",
Page43.
22.6 Leak test and function test
The leak test must be carried out by two people.
WARNING‒Risk of explosion!
Sparks, flames or open flames may cause explosions
during the leak and function test.
▶ Ensure that no sparks are produced.
▶ Do not use any fire or naked flames.
▶ Only check the leak tightness using a suitable foam.
Gas leak
¡ Close the gas connection locking device.
¡ Ventilate the relevant location sufficiently.
¡ Check the gas and nozzle connections once more.
¡ Repeat the leak test →Page42.
Loading ...
Loading ...
Loading ...