Loading ...
Loading ...
Loading ...

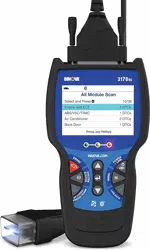
Honda OBD1 Systems
CODE RETRIEVAL PROCEDURE
51
Make sure the emergency brake is applied.
Place the transmission in neutral.
Turn all vehicle accessories "OFF."
Press ENTER
to continue.
3. Highlight Read DTCs and press ENTER
.
4. When the Scan Tool is in the process of retrieving codes, a "One
moment please..." message shows.
If the Scan Tool fails to link to the vehicle's computer, a "Vehicle
is not responding" message shows.
- Verify the ignition is ON.
- Check the cable connections at the Scan Tool and at the
vehicle’s DLC.
- Turn the ignition OFF, wait 10-
12 seconds, then turn back ON
to reset the computer.
- Press POWER/LINK
and
repeat step 3 as necessary.
5. If the Scan Tool was able to link to the
vehicle successfully, the Scan Tool
displays the retrieved DTCs.
The Scan Tool will display a code only of codes are present in
the vehicle's computer memory. If no codes are present, a "No
DTC's are presently stored in the vehicle's computer" message
is displayed.
6. If more than one code was retrieved, press DTC/FF, as necessary,
to display additional codes one at a time.
In the case of long code definitions, a small arrow is shown
in the upper/lower right-hand corner of the code display
area to indicate the presence of additional information.
7. Disconnect the Scan Tool from the vehicle and turn the ignition key
OFF.
8. To prolong battery life, the Scan Tool automatically shuts "Off" after
approximately three minutes with no button activity. The DTCs
retrieved will remain in the Scan Tool's memory, and may be viewed
at any time. If the Scan Tool’s batteries are removed, or if the Scan
Tool is re-linked to a vehicle to retrieve codes, any prior codes in its
memory are automatically cleared.
9. Follow the testing and repair procedures outlined in the vehicle's
service repair manual to correct DTCs. Codes should be addressed
and eliminated in the order they were received, erasing and
retesting after each repair is made to be sure the fault was
eliminated.
Loading ...
Loading ...
Loading ...