Loading ...
Loading ...
Loading ...
42
EAD10 Owner’s Manual
Recording Your Performance
Basic Guide
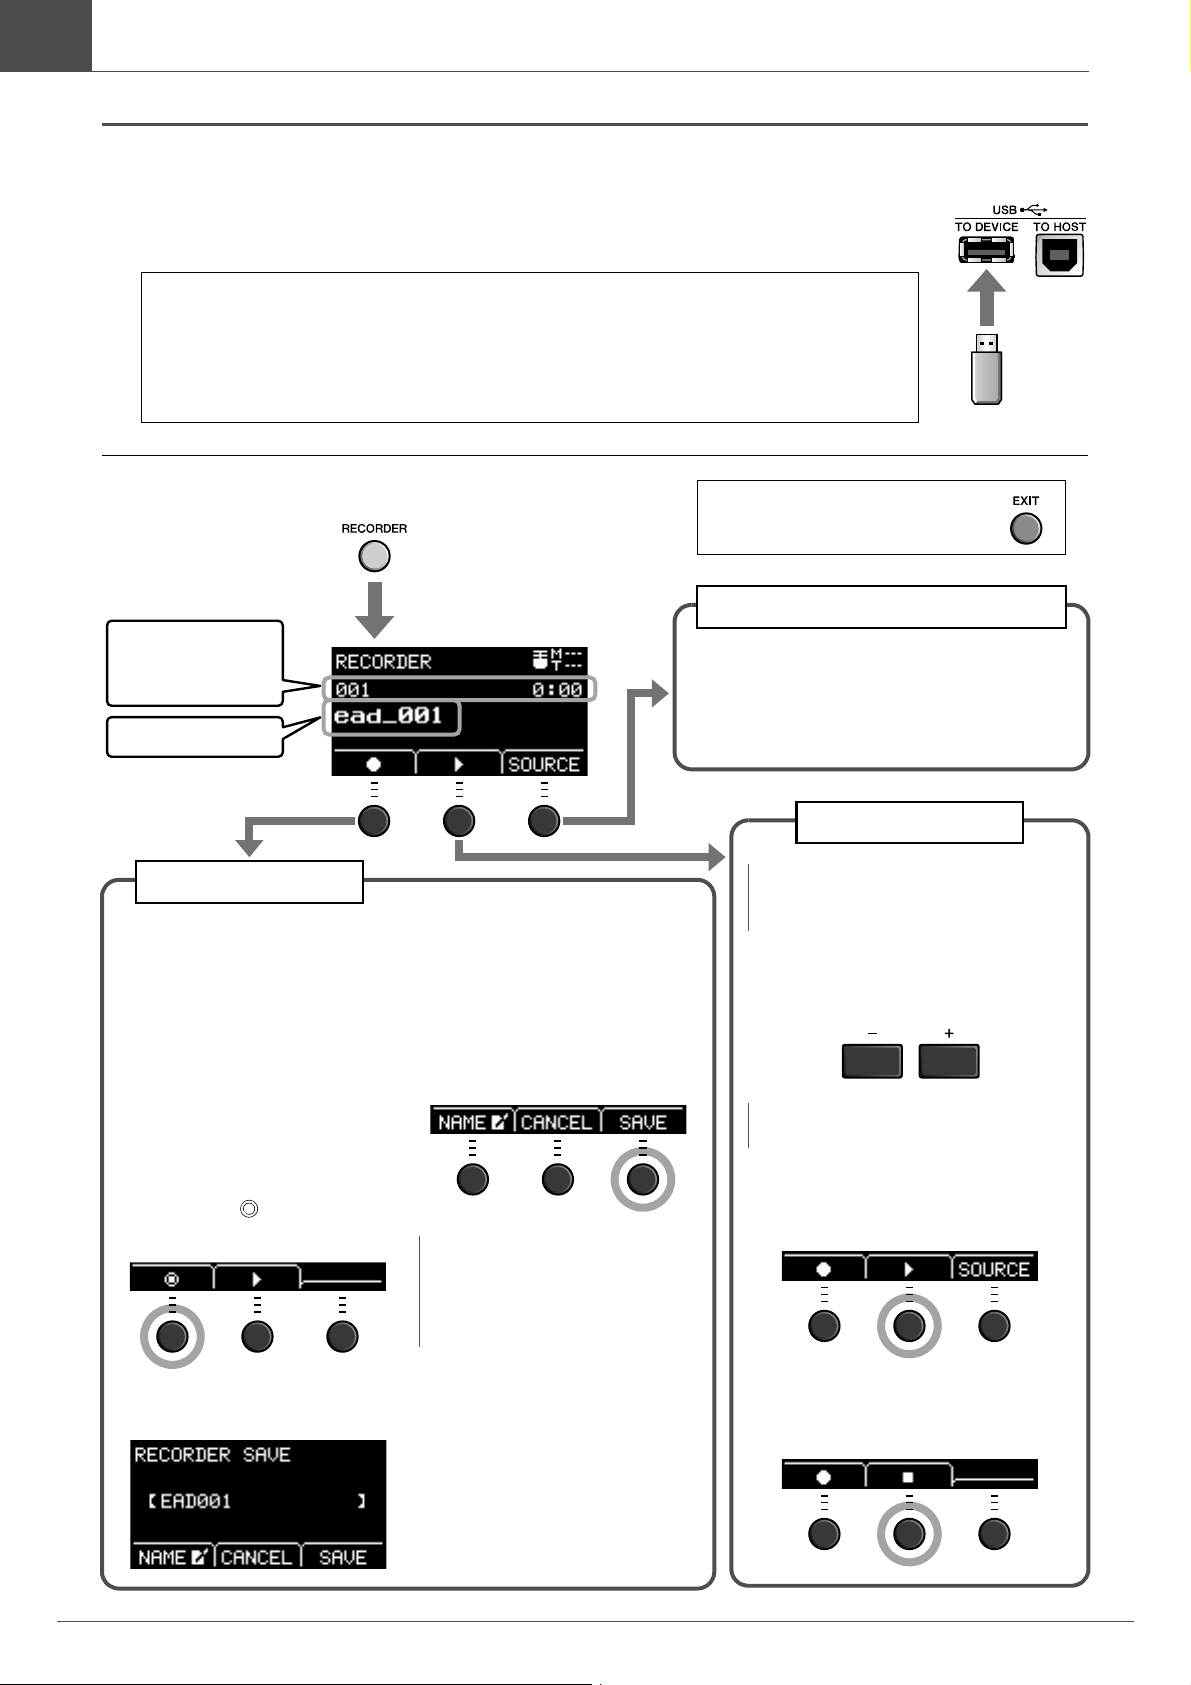
Recording to a USB Flash Drive
1.
Connect a USB flash drive to the [USB TO DEVICE] terminal on the rear panel.
When a USB flash drive is connected
• You can record up to 30 minutes at a time.
• A new file is created every time you record.
• Simultaneously press Playback and Record to overdub your performance onto the
currently playing song.
Press the [EXIT] button to return
to the Scene screen.
The RECORDER
(USB) screen opens.
Song number and
elapsed playback time
(min:sec)
3.
Press the button below
“
” ([F1]) to start
recording.
While recording “Now recording ..
(elapsed recording time
(min:sec))” appears.
4.
Play the drums.
5.
After you finish play-
ing, press the button
below “ ” ([F1]) to
stop recording.
The RECORDER SAVE screen
opens.
6.
Press the button below
“SAVE” ([F3]) and
save the file.
Press the button below “CAN-
CEL” ([F2]) if you do not want to
save the file.
NOTE
If you want to change the file name,
press the button below “NAME”
([F1]) and enter a new name. (page
37)
Recording
File name
Switching to AUX IN Recording
Change the setting when recording audio from
the [AUX IN] jack.
For more information, see “Switching to AUX
IN Recording” on page 43.
Playing Back
3.
Use the [–] or [+] buttons to
select a song for playback.
4.
Press the button below “>”
([F2]) to start playback.
5.
Press the button below
“
” ([F2]) to stop playback.
NOTE
This is not displayed when there is no
recorded song.
NOTE
Up to 100 songs are recognized.
2.
Press the [RECORDER] button.
Loading ...
Loading ...
Loading ...